| START HERE |
|
| Register | FAQ | PM | Events | Groups | Blogs | Calendar | Mark Forums Read |
|
|
|
Unregistered
|
||||||


| MA Glow Miniature Aircraft Glow Helicopter Support Forum |
|
|
 |
|
|
LinkBack | Thread Tools | Display Modes |
 01-15-2011, 06:01 AM
|
#41 (permalink) |
|
Registered Users
Join Date: Apr 2009
|
The mutts nuts
The dogs b******s All mean its very good, don't ask why cause I don't know, never thought about you in America not hearing it. Learn something new every day
__________________
I'm not controlling it, I'm just preventing it from crashing. |

|


|
| Sponsored Links | |||
|
Advertisement |
|
||
|
01-15-2011, 03:08 PM
|
#42 (permalink) |
|
Registered Users
Join Date: Jul 2010
|
No pictures are showing now
|
|
|
|
|
01-17-2011, 02:03 PM
|
#43 (permalink) |
|
Thread Starter

Join Date: Sep 2008
|
Heya,
Sorry for the late reply, I'm currently working on it as I type.. I'm looking to see the costs of upgrading to pro! with 27k images views and 10.1GB of Bandwidth use.. Was quite a shock to find out that my images had been viewed that amount of times But, Do not fear the build thread will still be completed one way or another. I've got alot more pictures to upload too! Regards Callum |
|
|

|
|
01-17-2011, 06:00 PM
|
#44 (permalink) |
|
Registered Users
Join Date: Apr 2009
|
It's one of the best I've seen.
Thanks Joe
__________________
I'm not controlling it, I'm just preventing it from crashing. |
|
|
|
|
01-17-2011, 07:32 PM
|
#45 (permalink) | |
|
Thread Starter
Join Date: Sep 2008
|
Quote:
Glad your enjoying this build thread. |
|
|
|
|

|
01-17-2011, 08:00 PM
|
#46 (permalink) |
|
Thread Starter
Join Date: Sep 2008
|
Okay, Pictures are back online
Time to continue with the build |
|
|
|
|
01-17-2011, 08:53 PM
|
#47 (permalink) |
|
Thread Starter
Join Date: Sep 2008
|
Sorry for the delay! But, I'm back in action, Now that I have upgraded to PhotoBucket Pro, and that the event I attended this weekend is over, I can now put my full attention on getting the build thread updated and of course progress with the build itself. So, We are now onto Bag 5, Only one more stage to go before the helicopter is fully built! Bag 5 comprises of assembley of the Swashplate and Washout arms, Aswell as Servo installtion, and preparing the canopy. So.. Let's get underway, Here we have the hardware bag's for Bag 5, There's Bag 5 and Bag 5-A 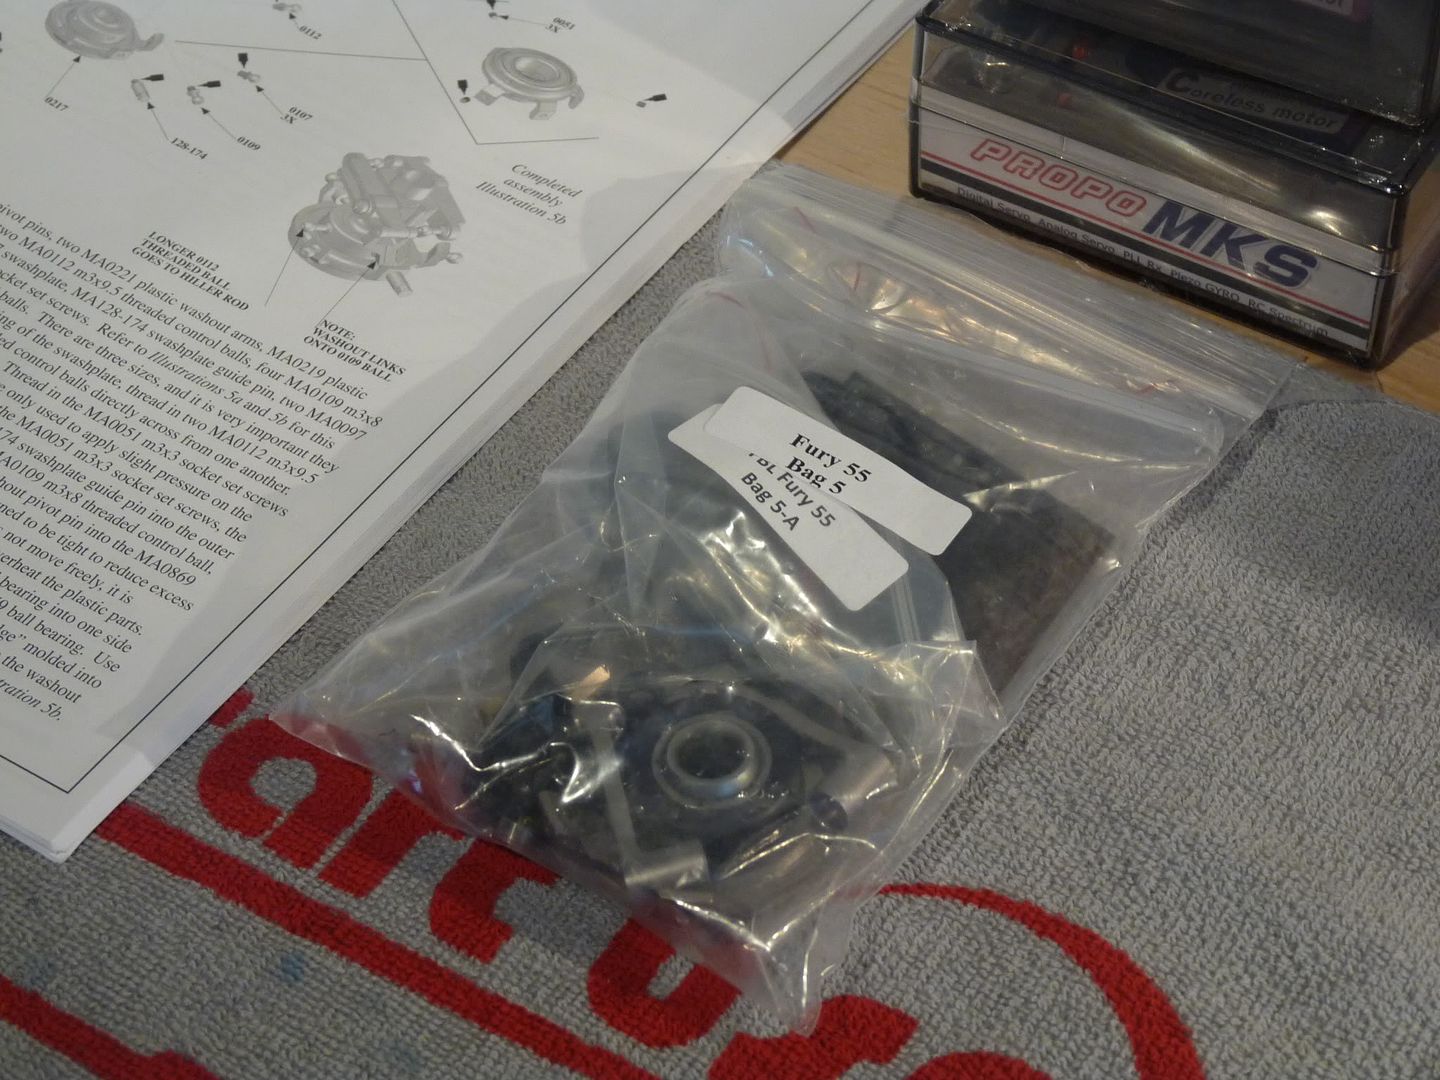 Splitting the bags we can reveal that one contains the most of the hardware for the swashplate and the other for the servo installtion, 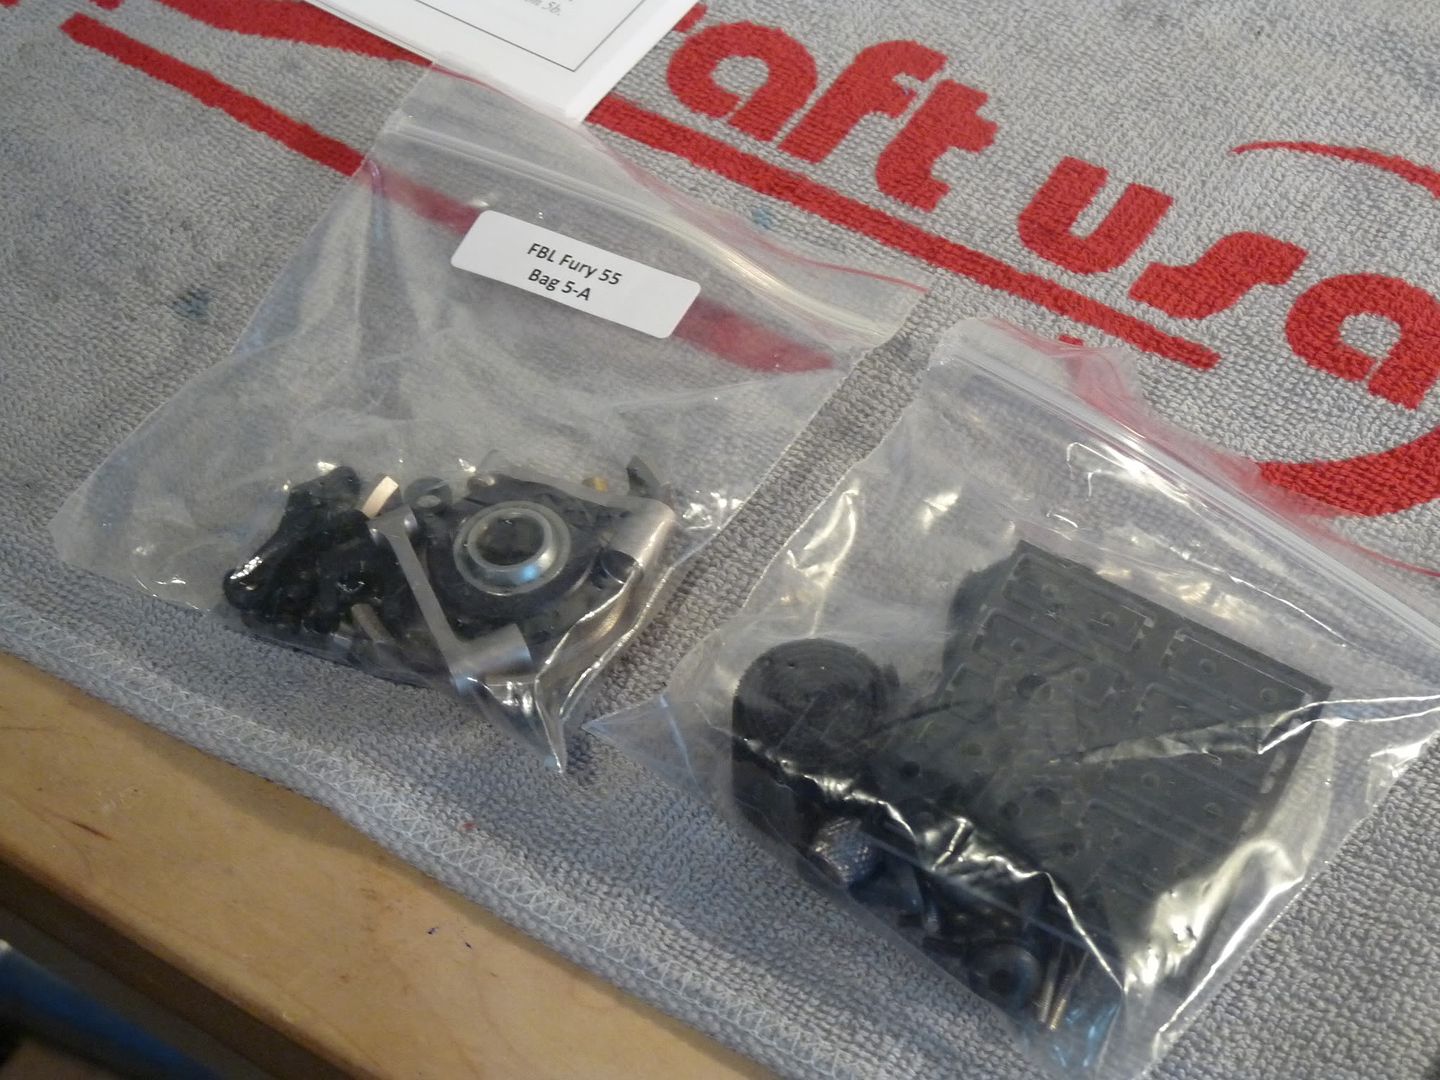 Time to get the swashplate bag open, and take a look of what's included, We can see the bag houses a mostly assembled swashplate, the washout arms and the washout S linkages, the bearings and linkage ball's for the swashplate. 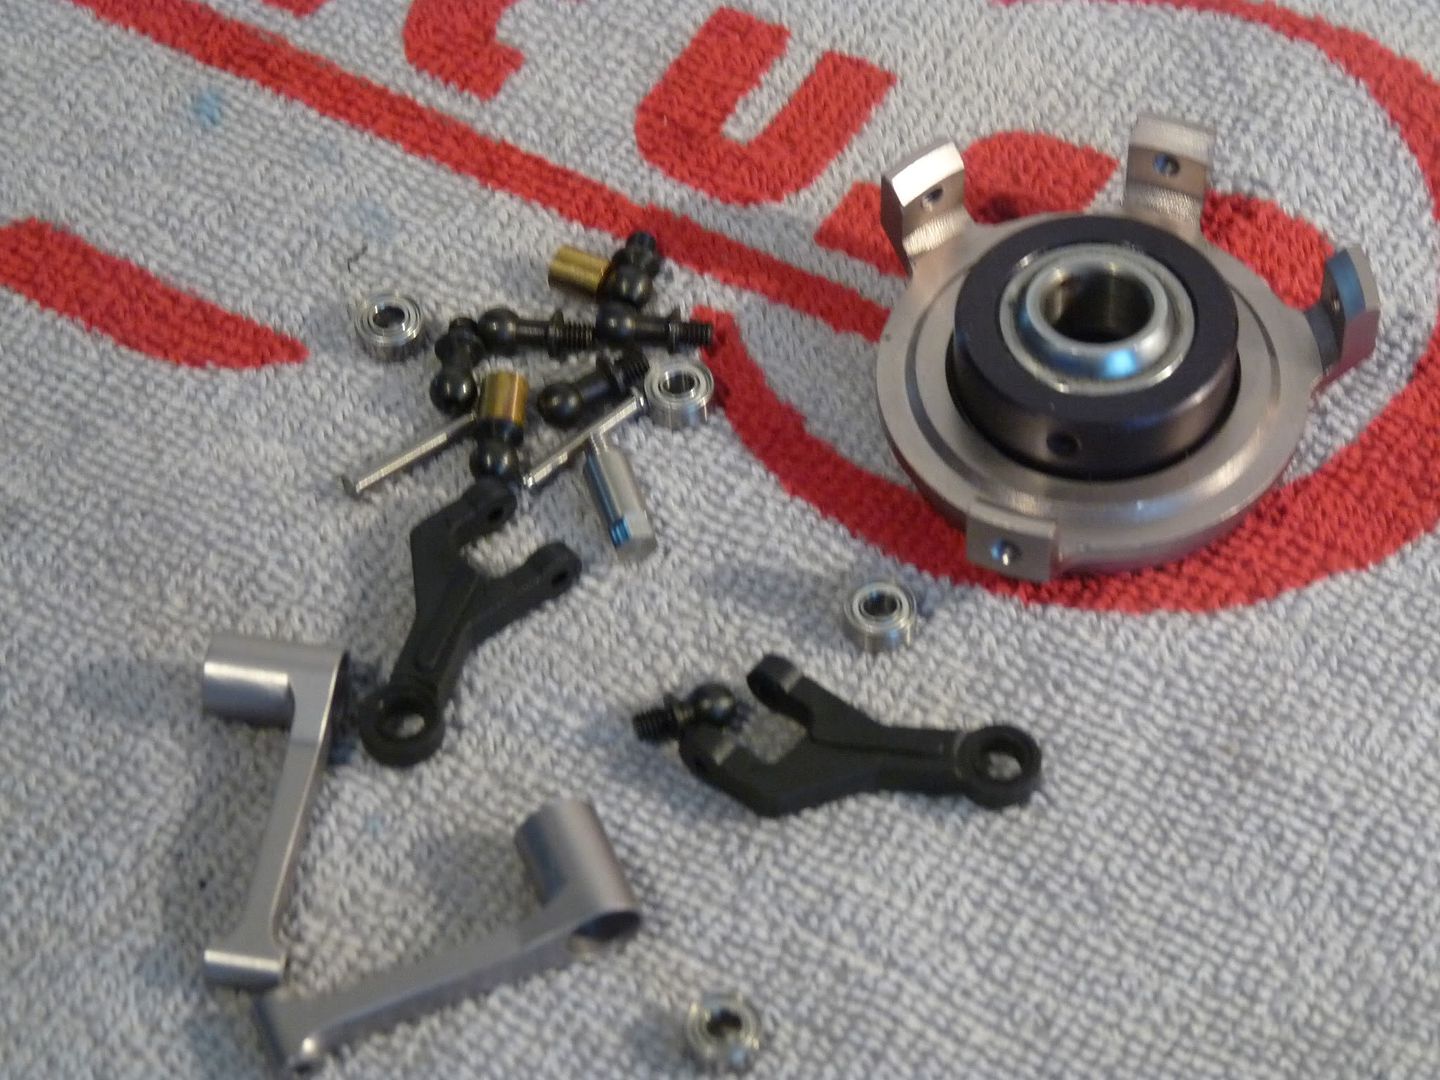 The quality of this swashplate is fantastic! There's no slop whatsoever! 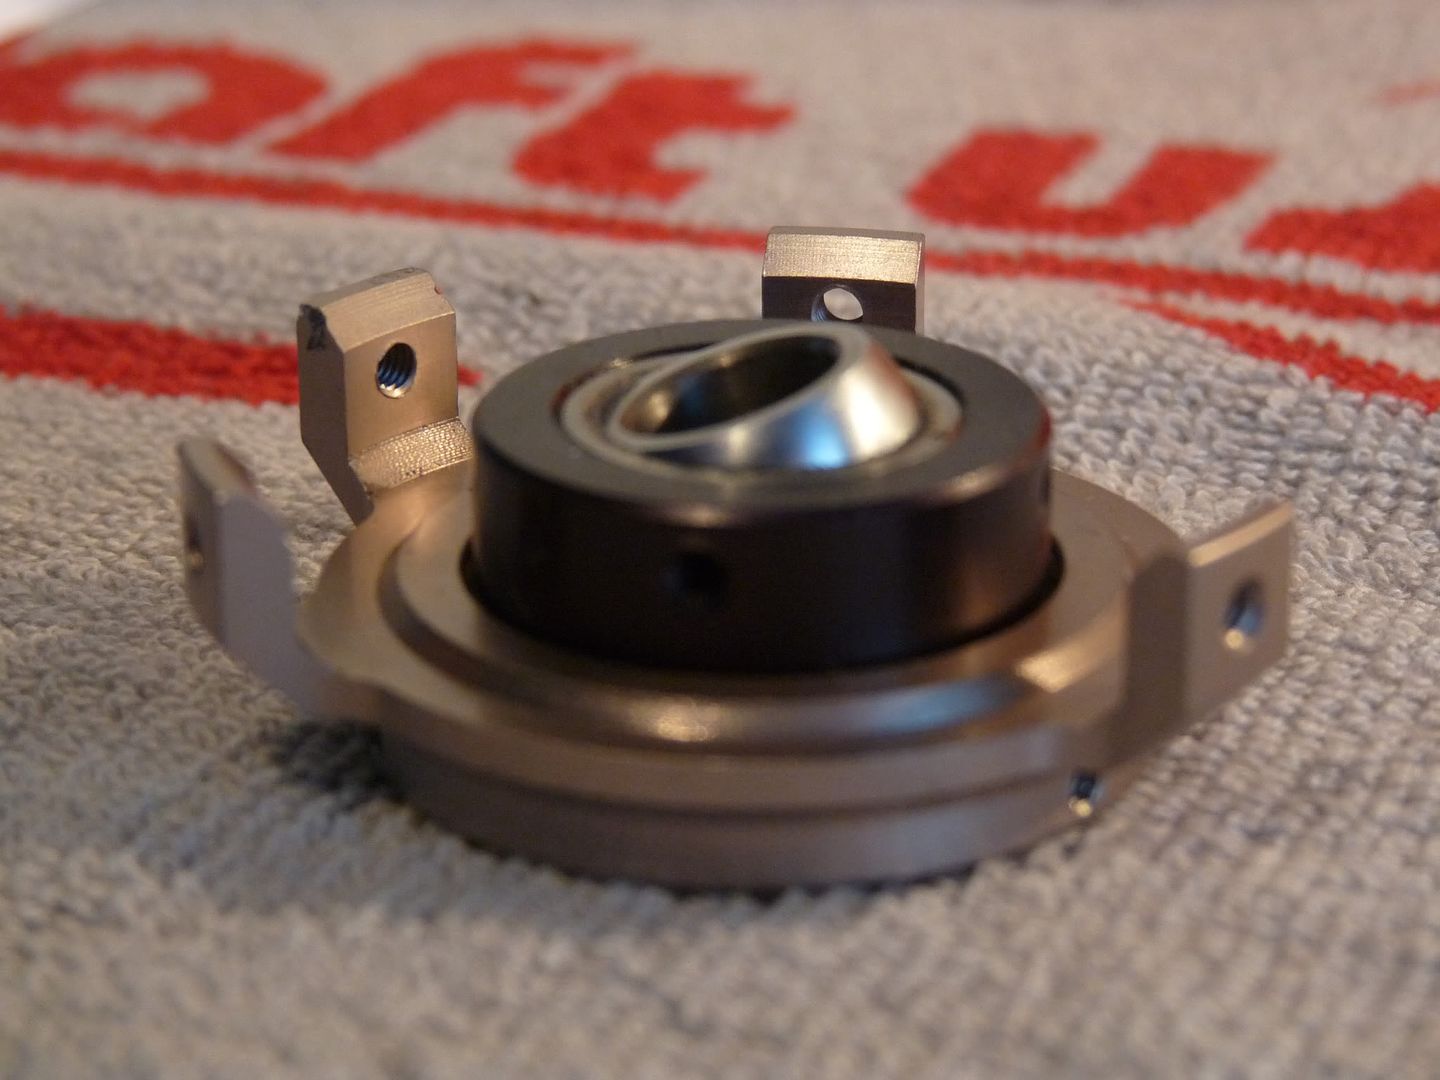 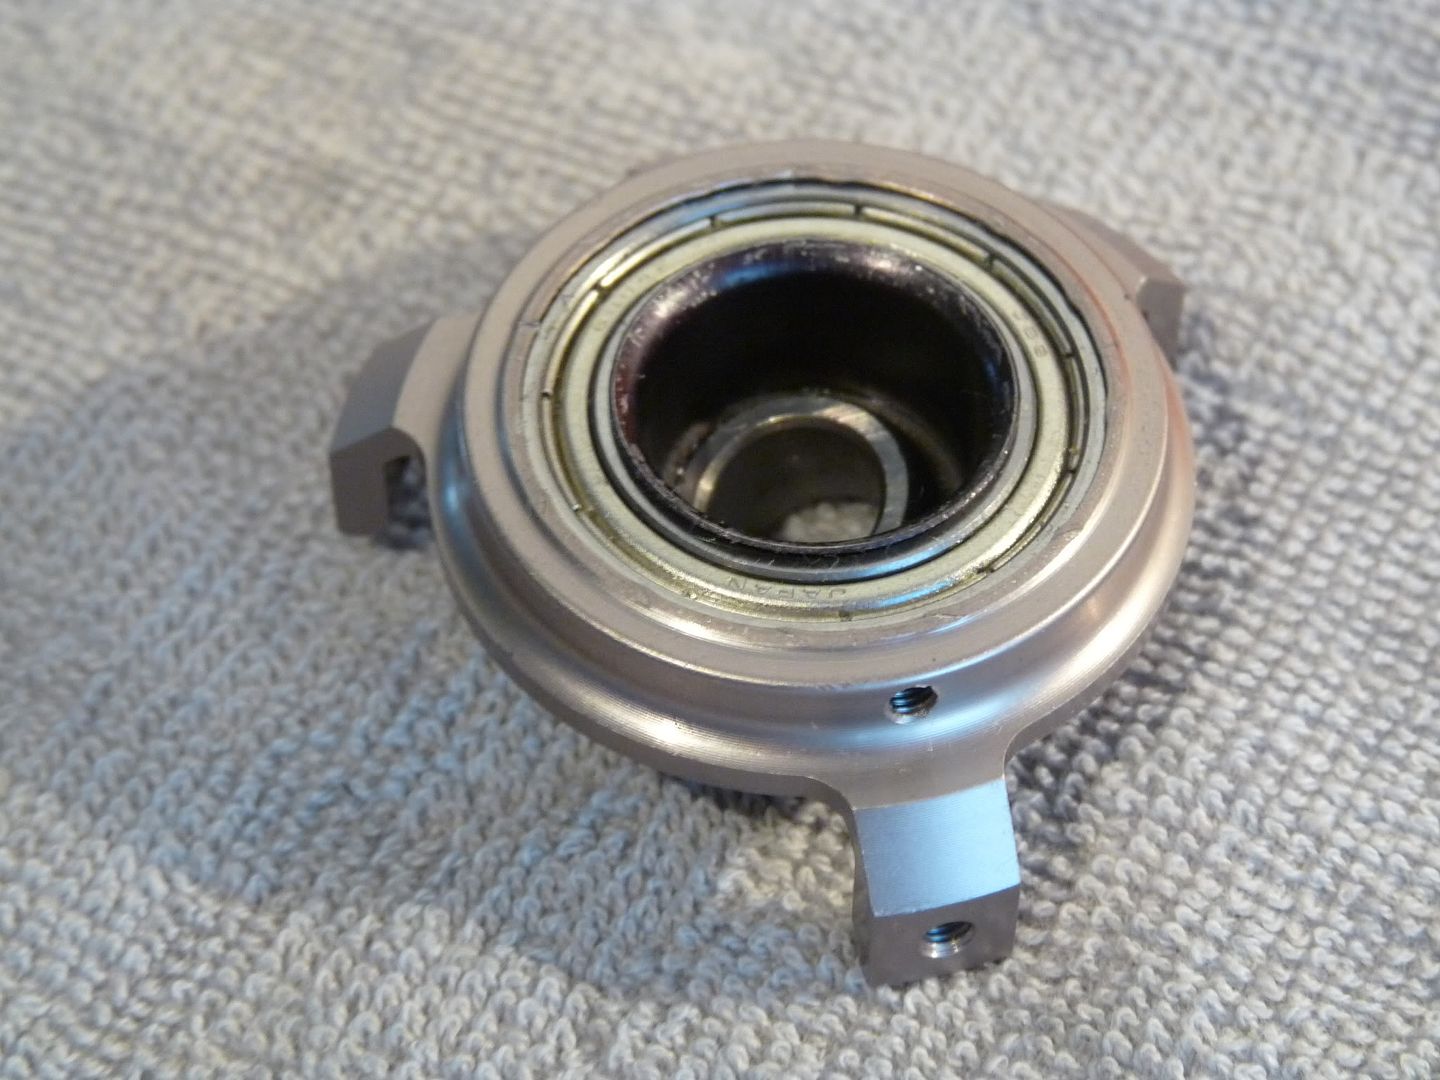 Next we have the washout arms, Again. This a good quality!  Now it's time to install the linkage balls onto the swashplate, Since I'm using the FBL spec machine, The control balls on the inner swash are different to the ones found on the normal flybar kit. This is so that the performance and resolution are at best for flybarless performance and the flybarless system. Here, you can see that i've installed them, As with anything going into metal, you should use thread lock. 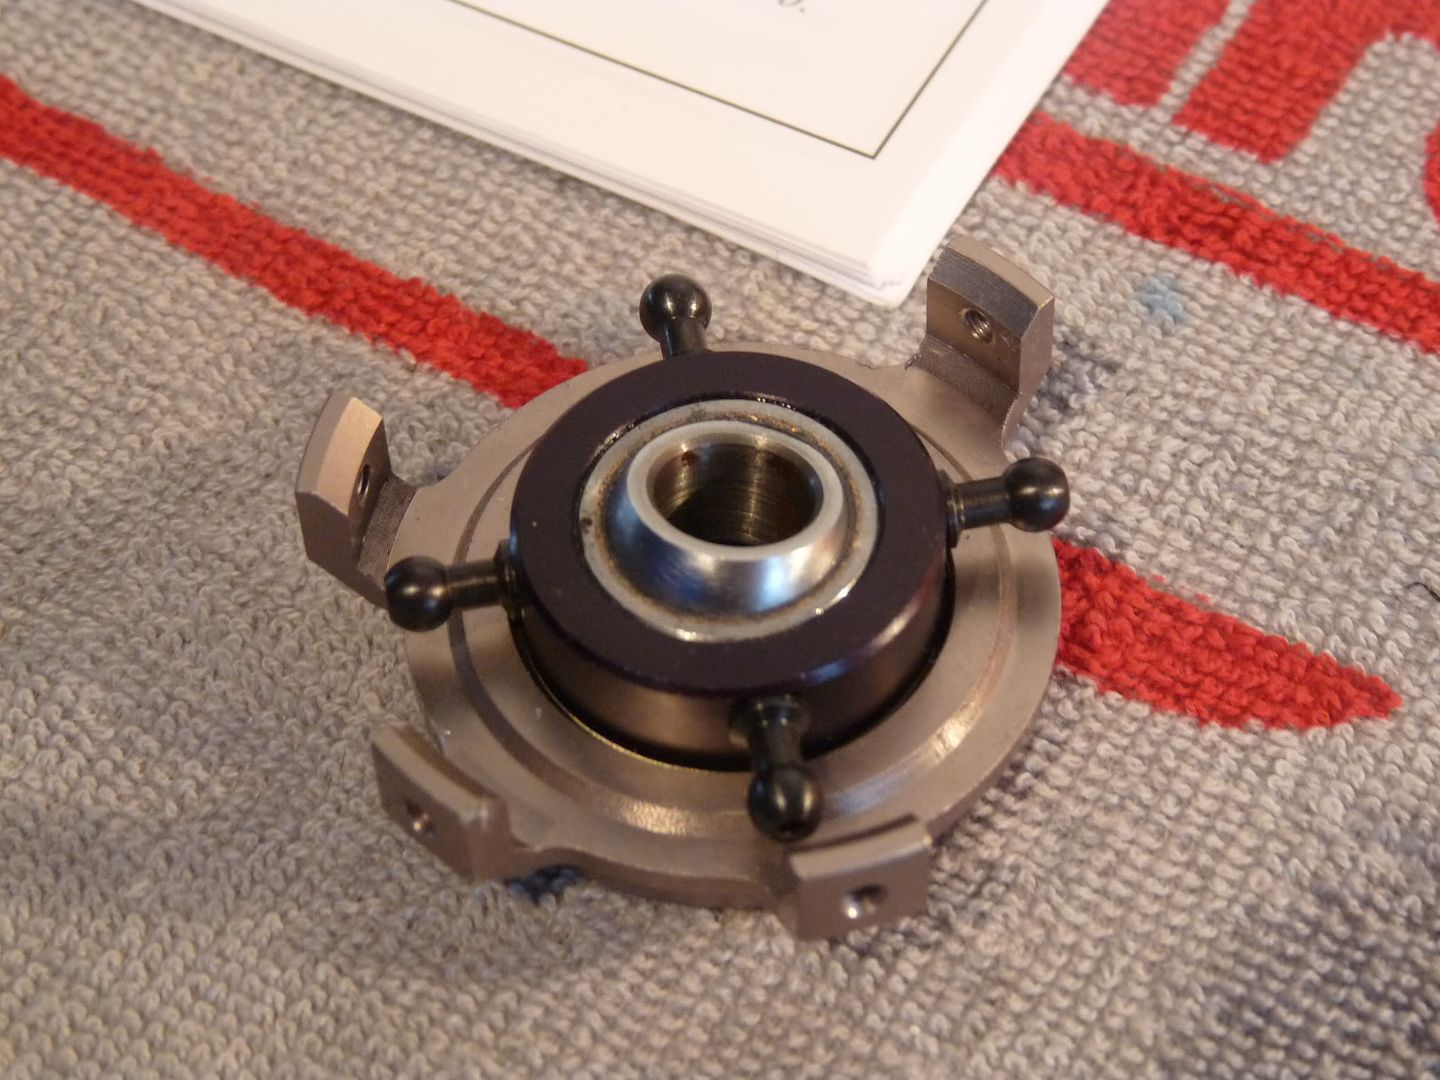 Now it's time to move onto the outer swash control balls. These connect to the servo linkages. Here I have started by installing the anti-rotation pin, One thing I like about this is that the end has flat spots to be able to use an adjustable wrench or pliers to tighten it up. 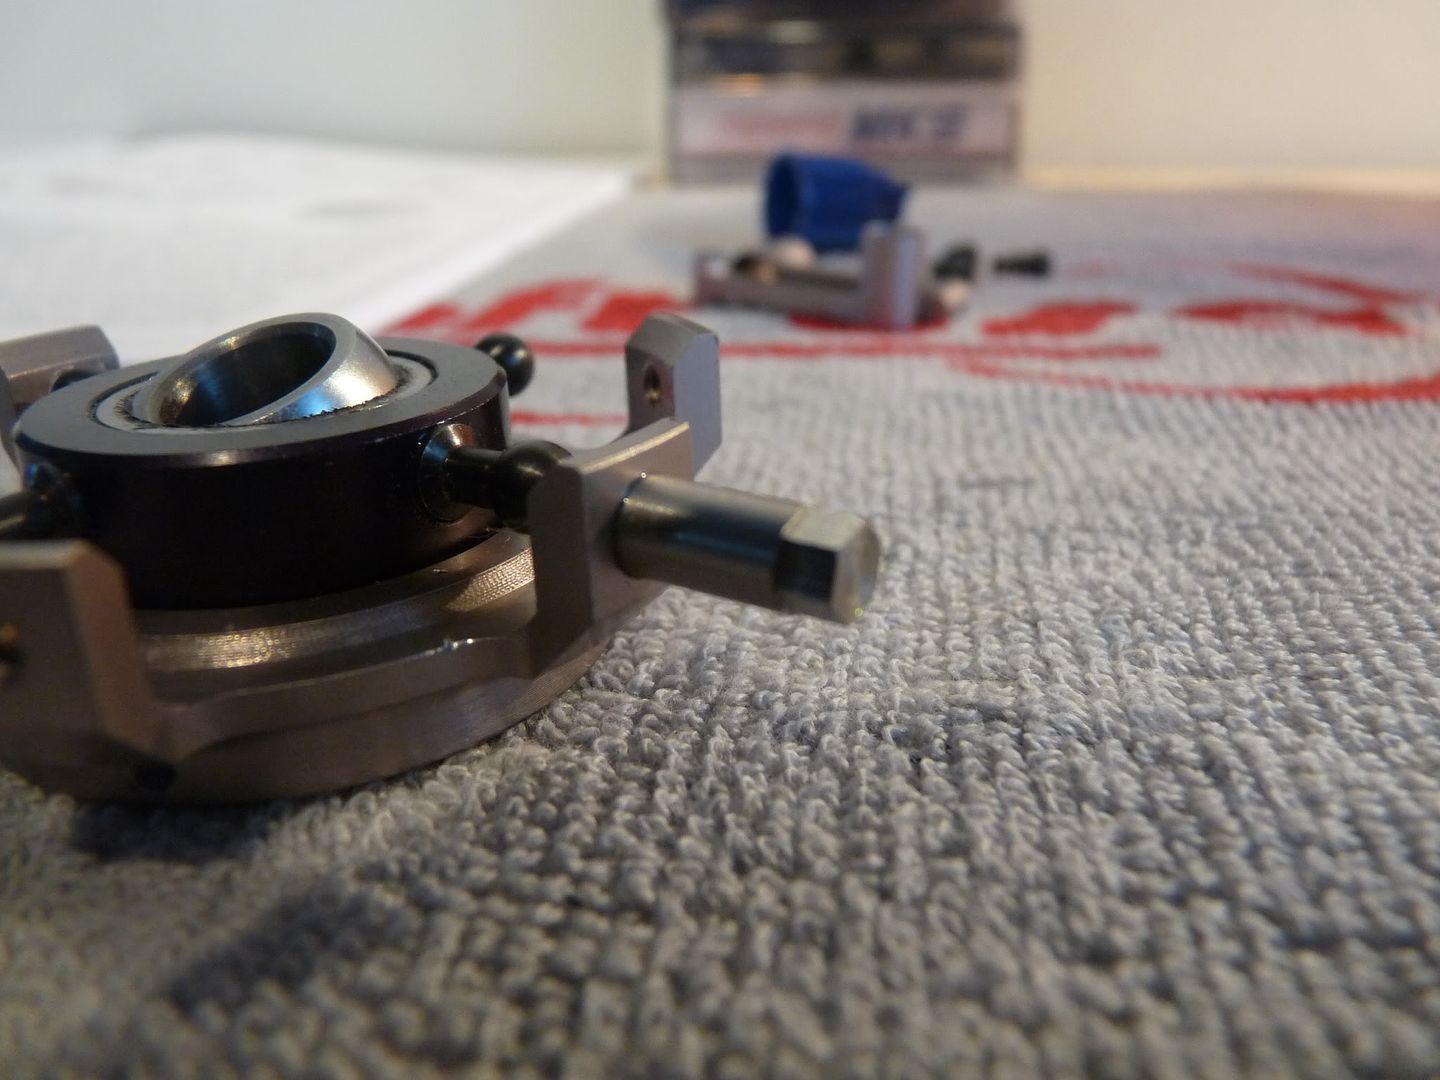 Here, I have finished install all the linkage balls onto the swashplate, Now it's time to install the 3x grub screws into the swashplate.. Grub screws you ask? One thing I really like about this swashplate is that it contains grub screws that very slightly put pressure onto the bearing to prevent slop in the swashplate. If over time you see a bit of slop, you can just slightly apply more pressure to the bearing to get rid of the slop and it will be like new again! However, I must warn.. Do not crank down the grub screws at all else you will distort the bearing and make it really notchy and unusable. 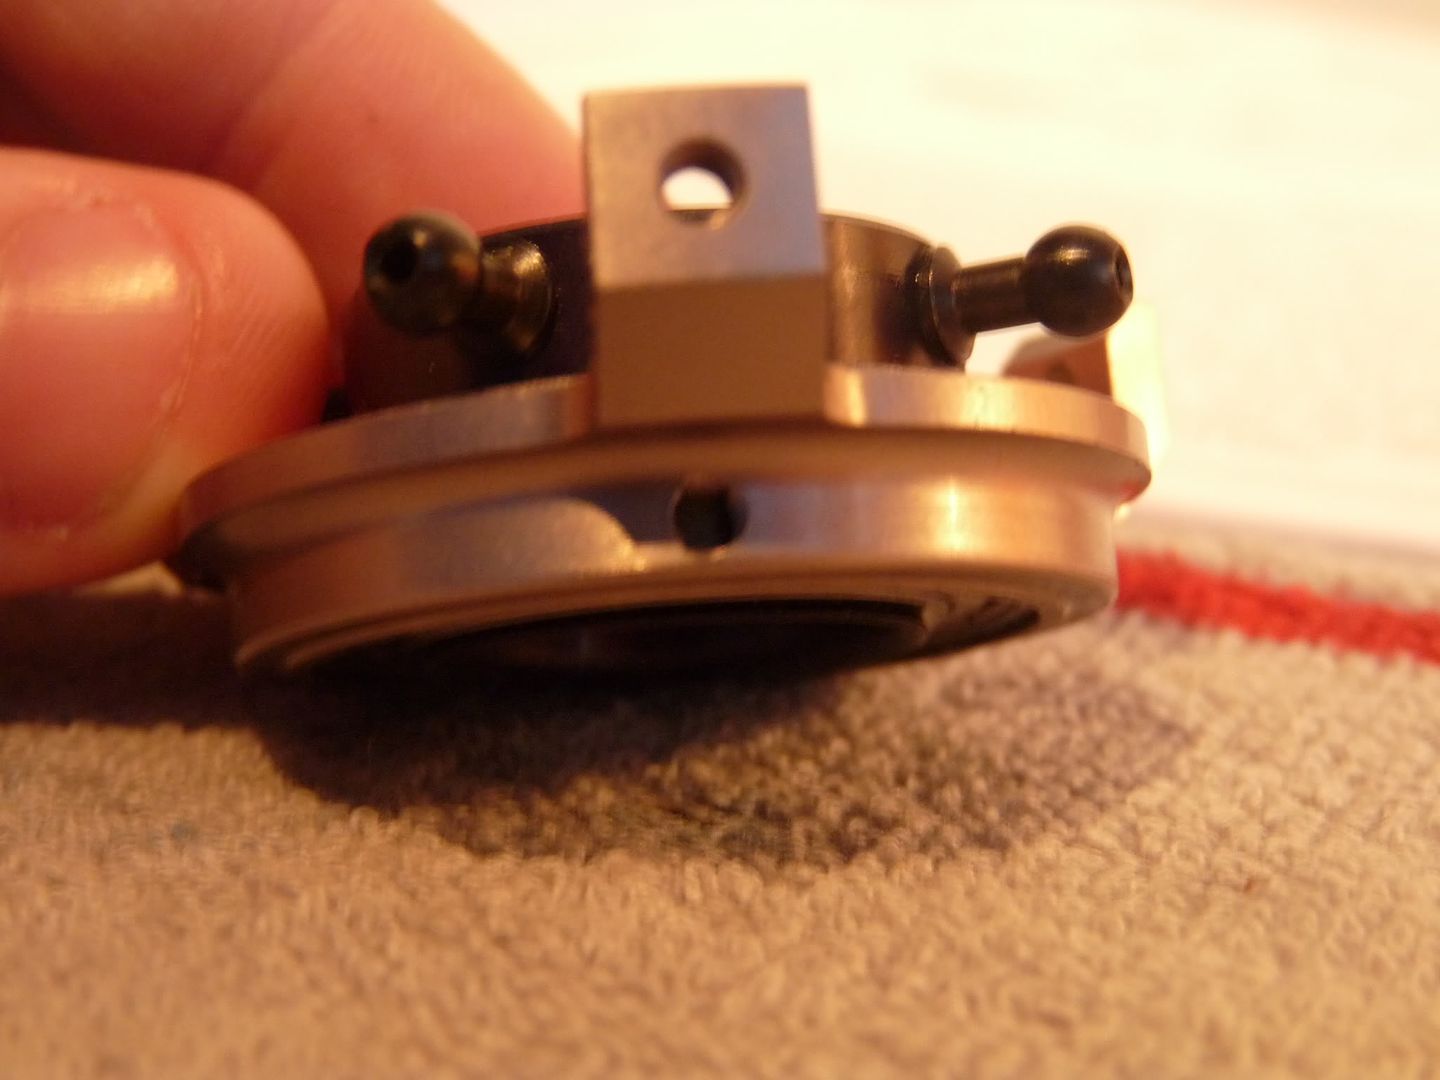 Next up, the washout arms! |
|
|
|
|
01-17-2011, 09:05 PM
|
#48 (permalink) |
|
Thread Starter
Join Date: Sep 2008
|
Moving onto the washout arms! time to get the washout arm, two bearings and a brass insert, 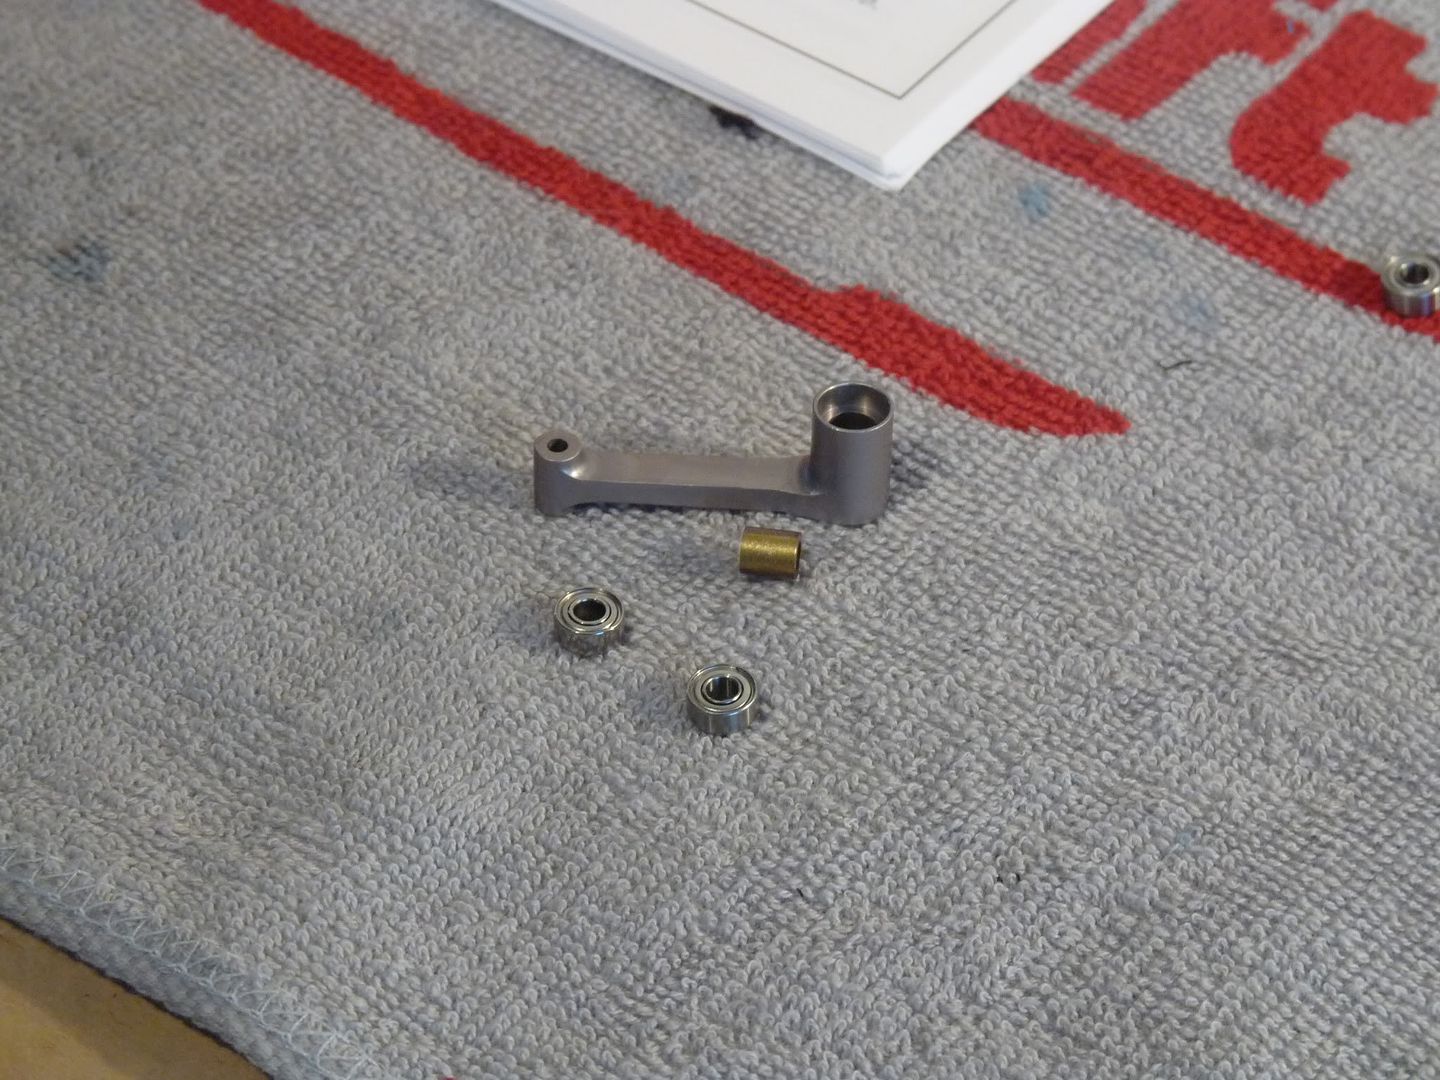 This step is pretty easy, Slot in a one bearing either side, then slot in the brass insert then install the remaining bearing on top, 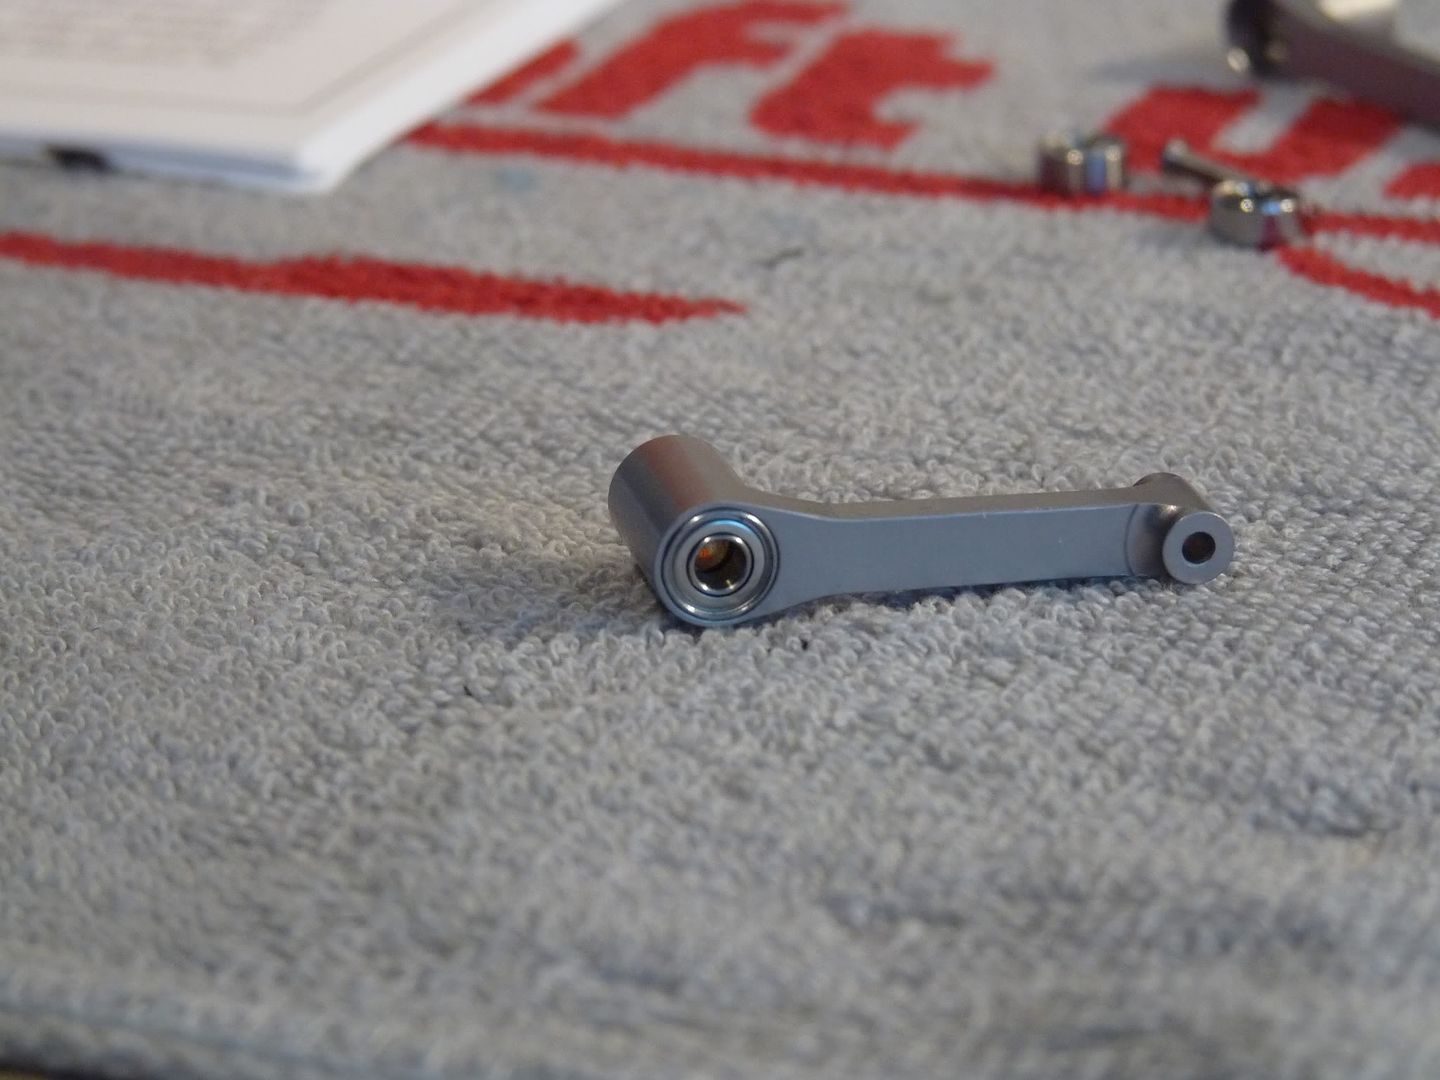 Now it's time to install the S arm linkage! These uses a pin rod and e-clip to secure it in place, 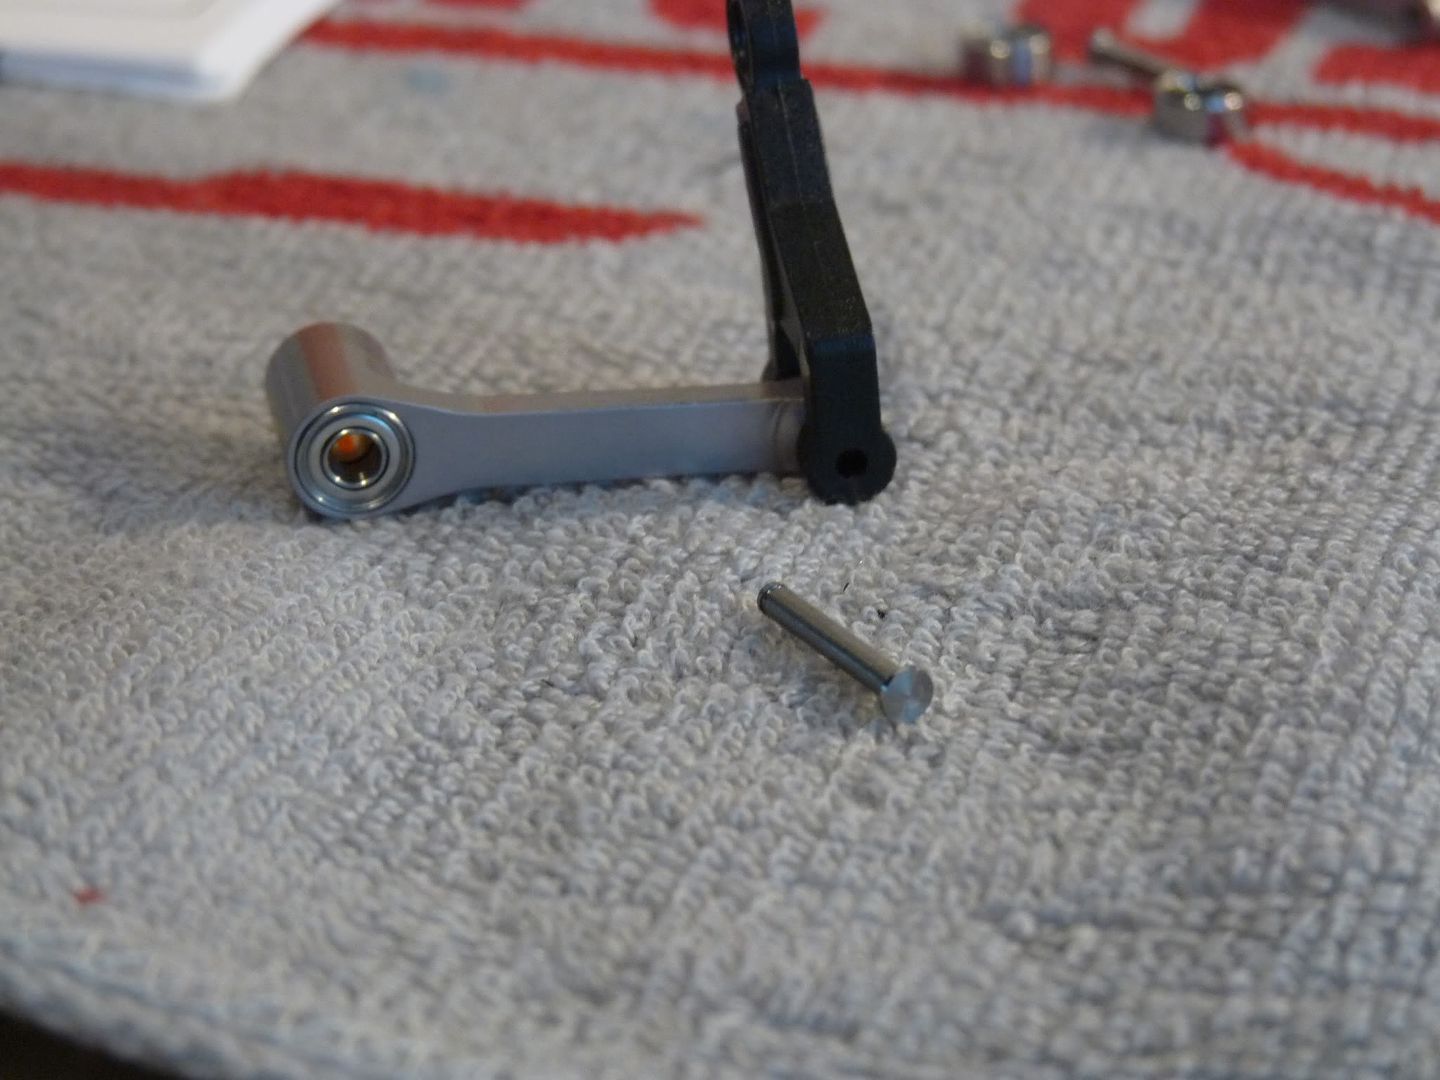 Here you can see them both the arms ready to install on the head block at a later stage! (please note eclips are missing on this picture) 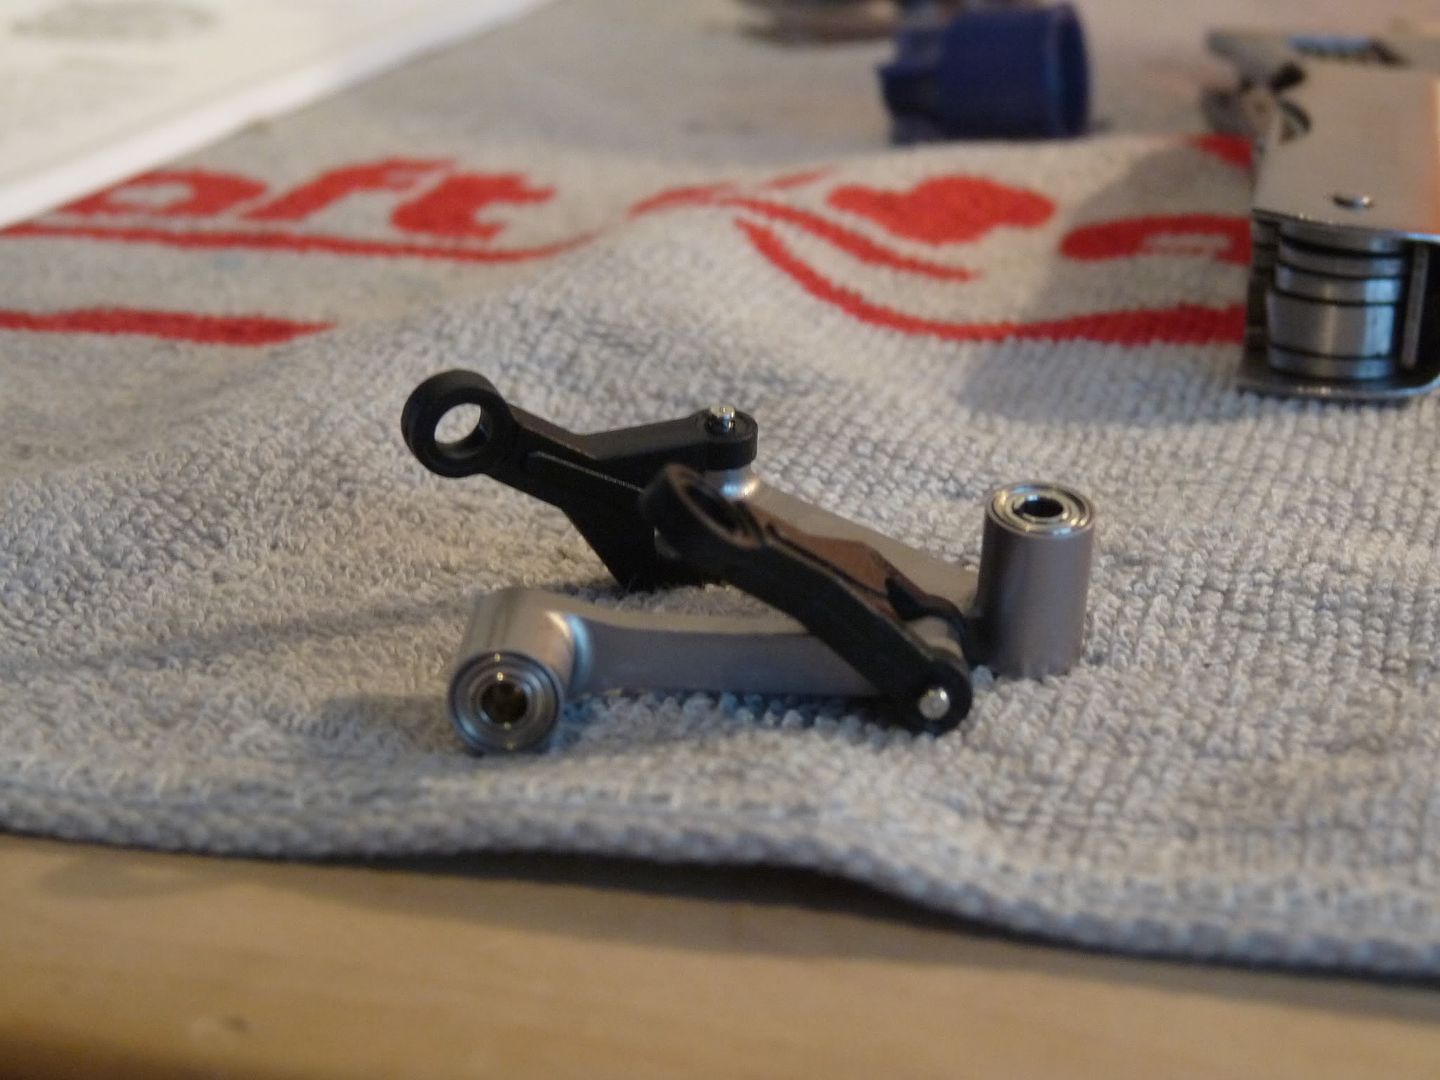 Next up.. Servo Installtion! |
|
|
|
|
01-17-2011, 09:40 PM
|
#49 (permalink) |
|
Thread Starter
Join Date: Sep 2008
|
Now, It's time for the all important Servo Installtion! Here we can see the contents of the other Bag 5 hardware. These include the various servo spacers, linkages, linkage rods, velctro tape and canopy thumb screws. But now the focus is on the servo spacers. 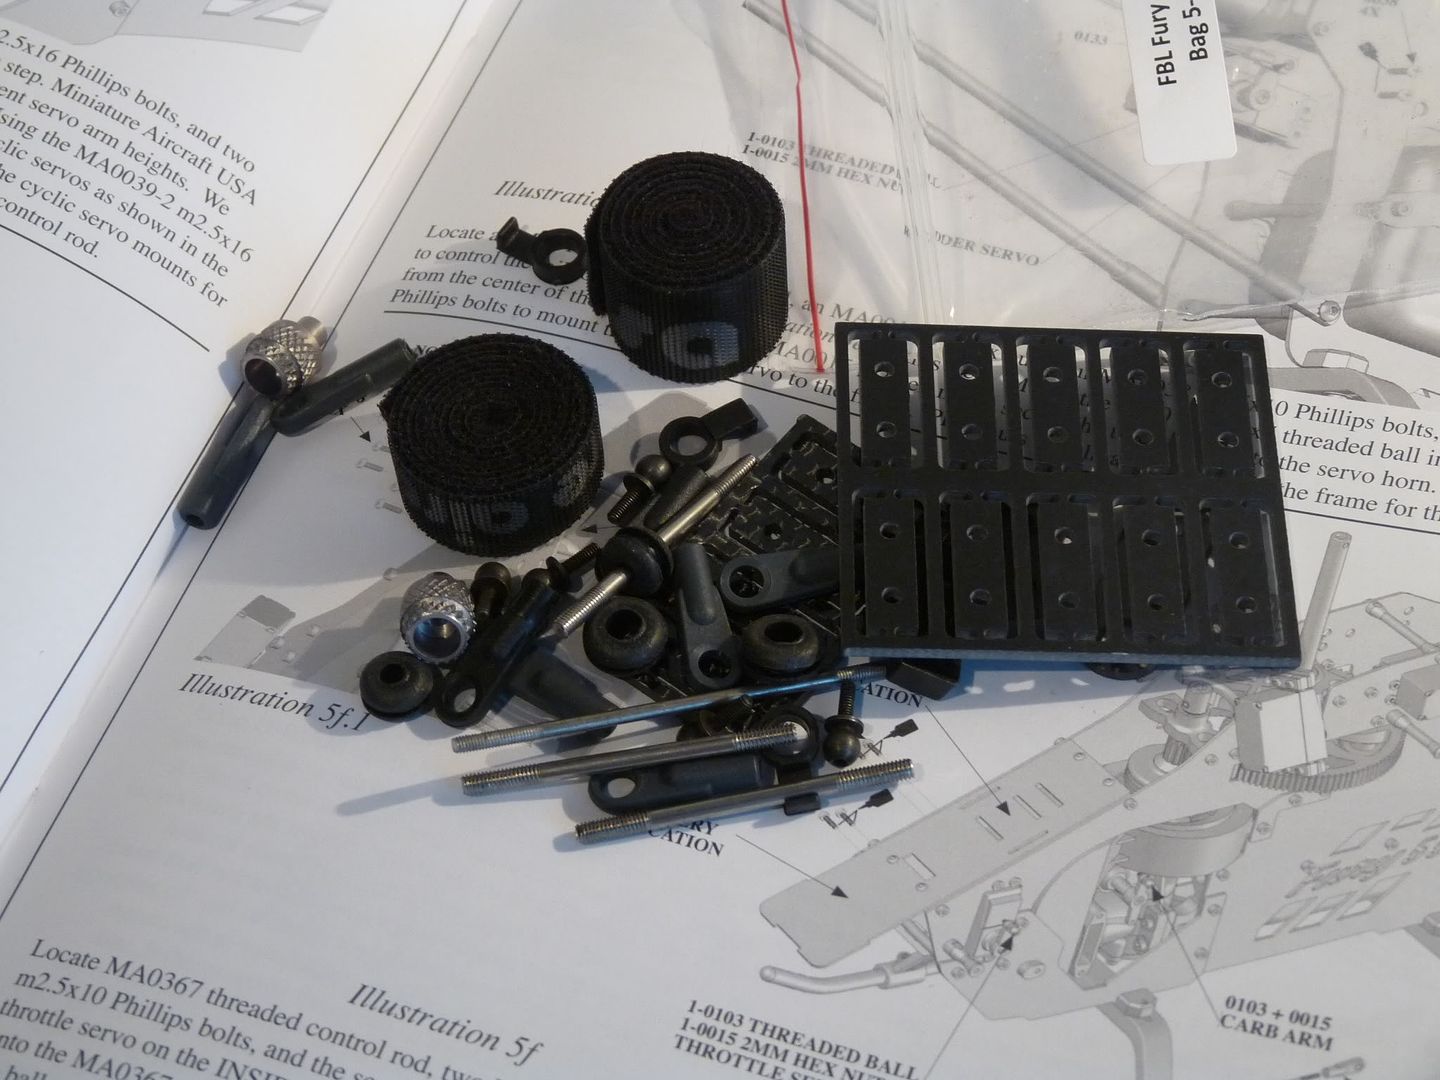 Here, I will be using brand new MKS DS670's for Cyclic Use, There are reccomended by MKS for Flybarless use, However please note, not all MKS servos are compatible with flybarless use. 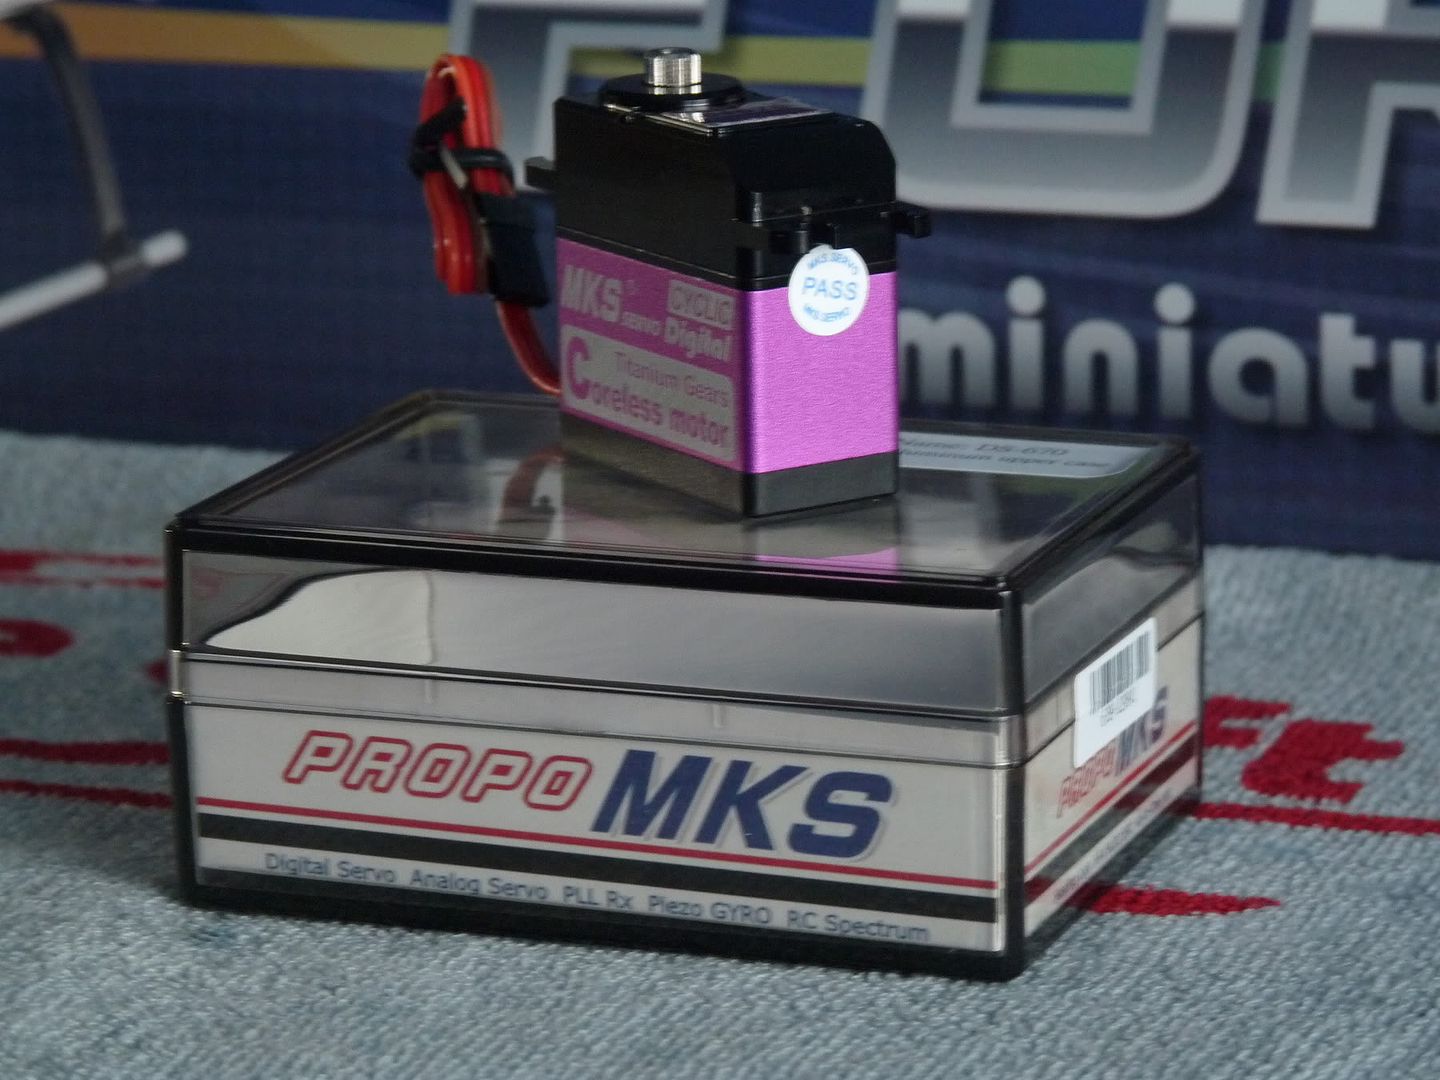 Time to prepare the servos for installtion, The Fury 55 comes with various servo spacers to be able to mount nearly all servos universally available, With doing a bit of guessing work, I was able to predict that the servos only needed one carbon servo spacer, However, Time will tell when it's time to install the servo horn and ball links. Hence I have not threadlocked the servo screws. 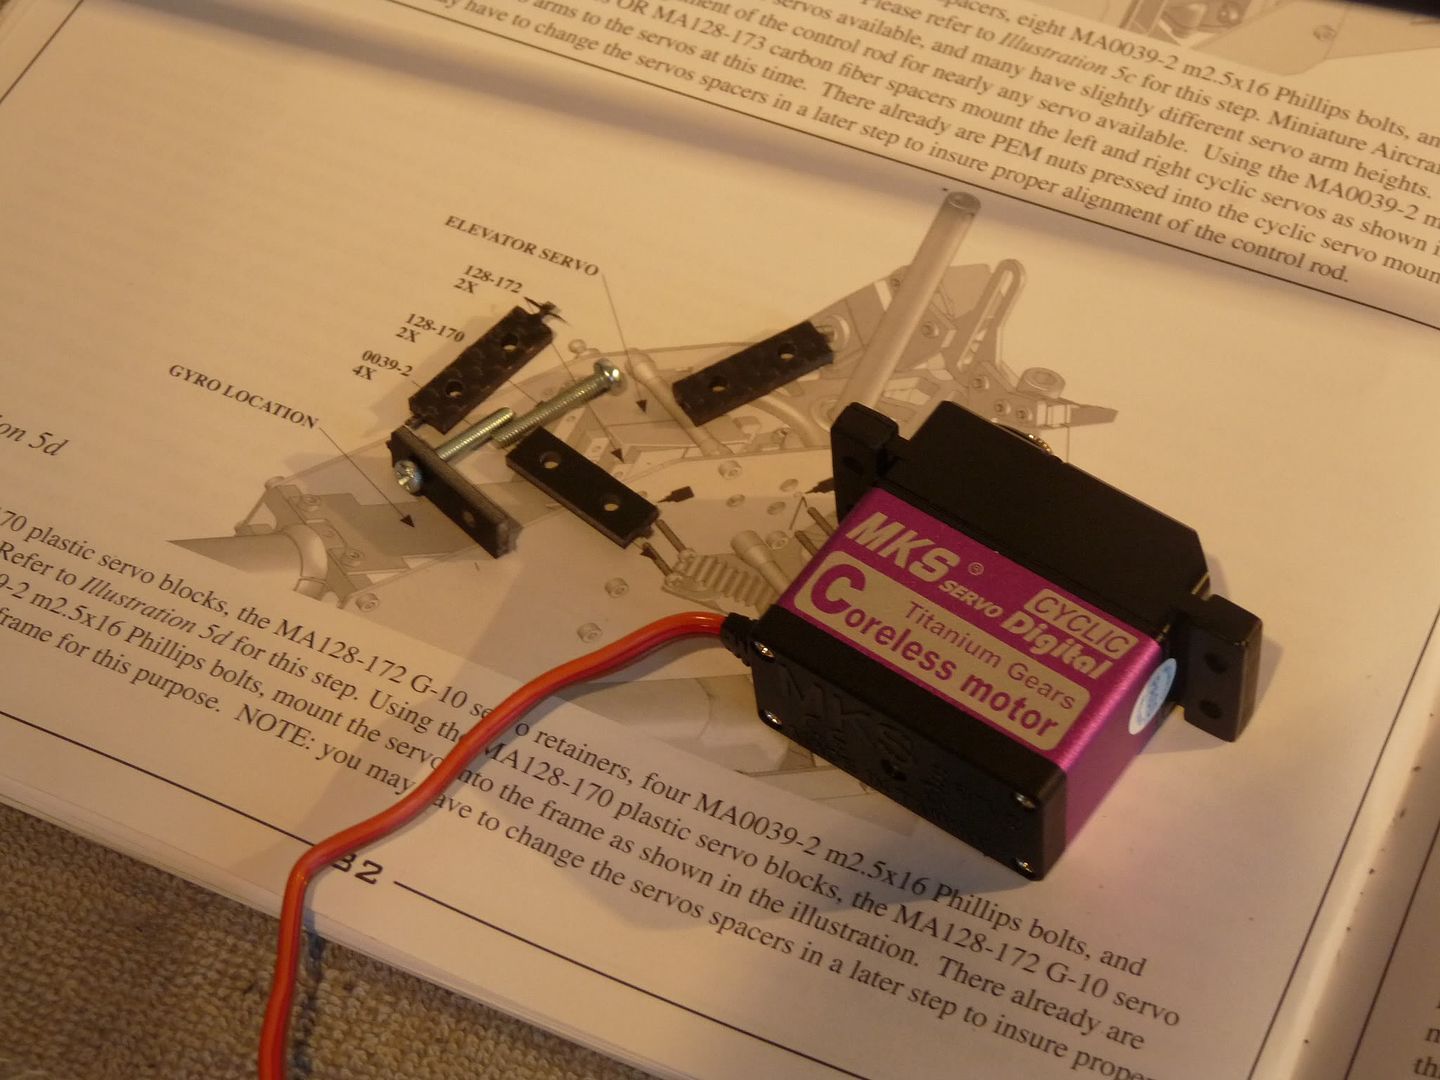 Servos Installed: 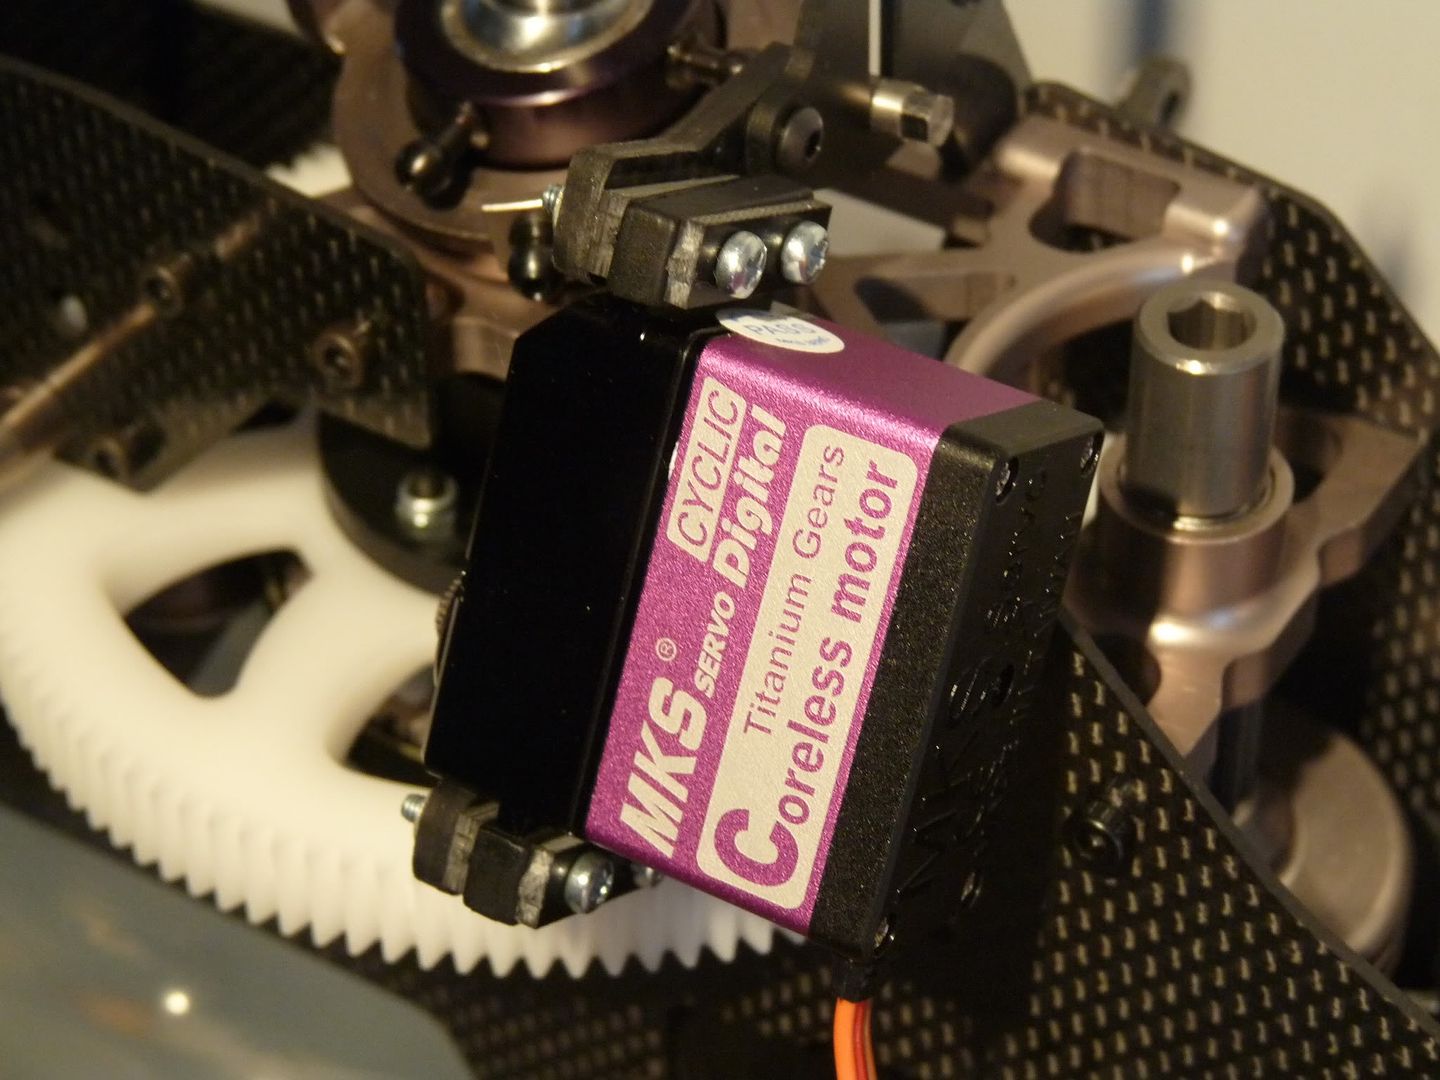  One thing I like about this machine is the ease of installtion, It is very easy to install the elevator servo and aswell as the tail servo, as shown below: 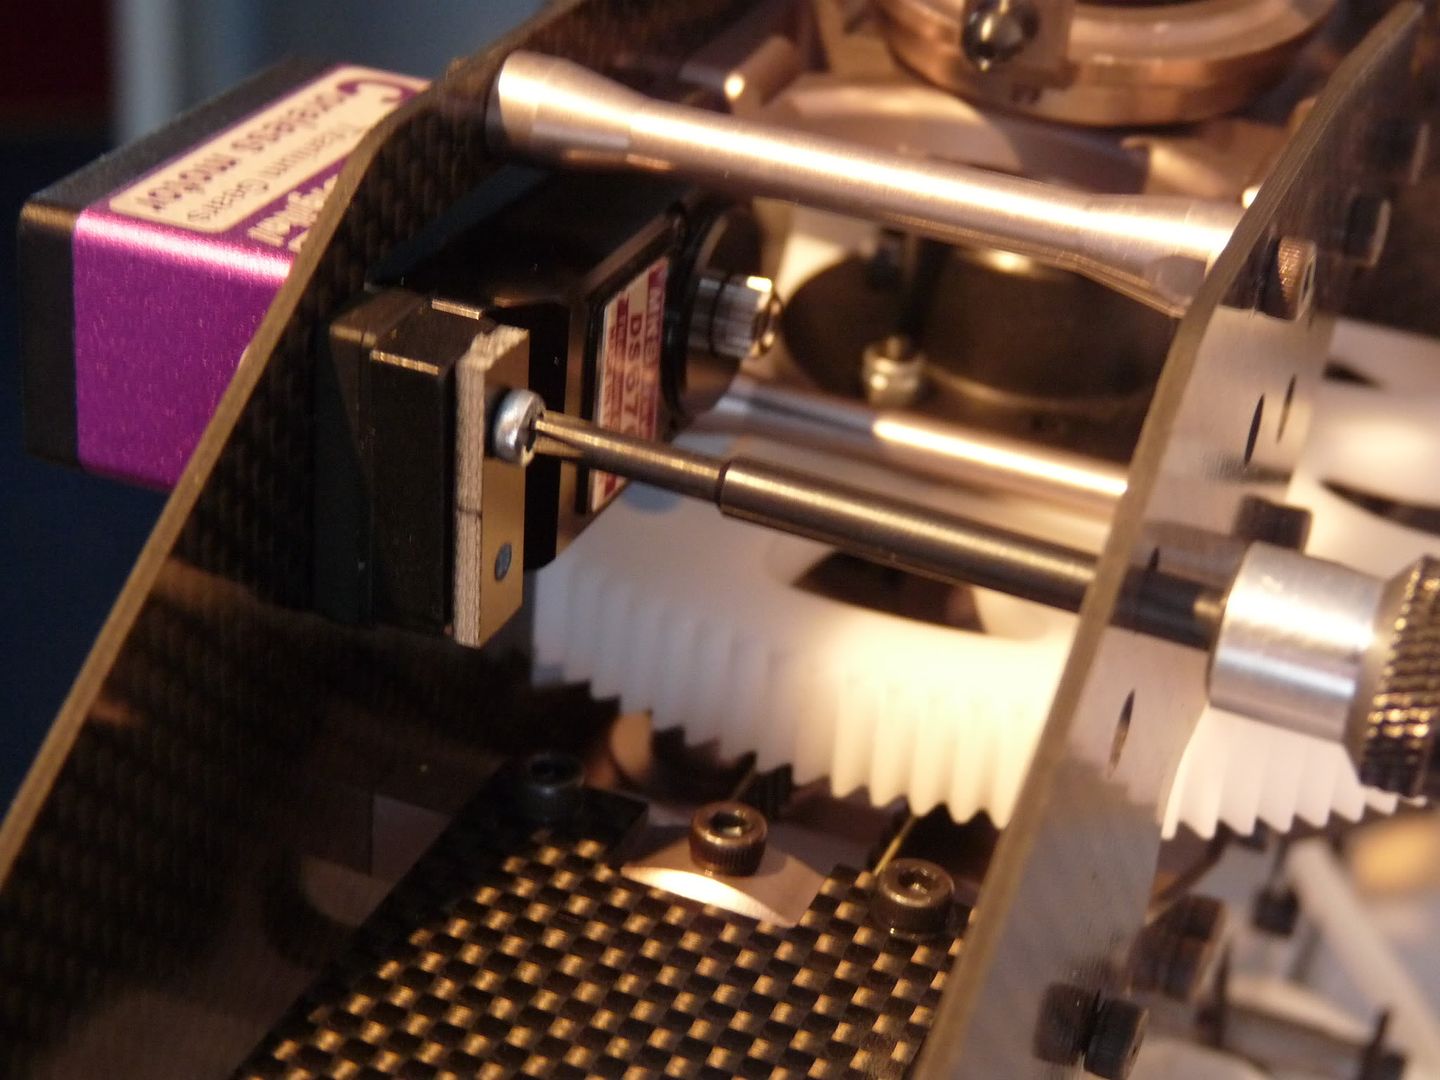 With the elevator servo, I had to deviate from the instructions, Since these servo's are quite tall, I had to the servo spacer block in front of the servo tabs (To keep screw legnth correct), Instead of behind, I guess with normal sized servos this would give the correct depth to keep the linkage rod 90 degrees. 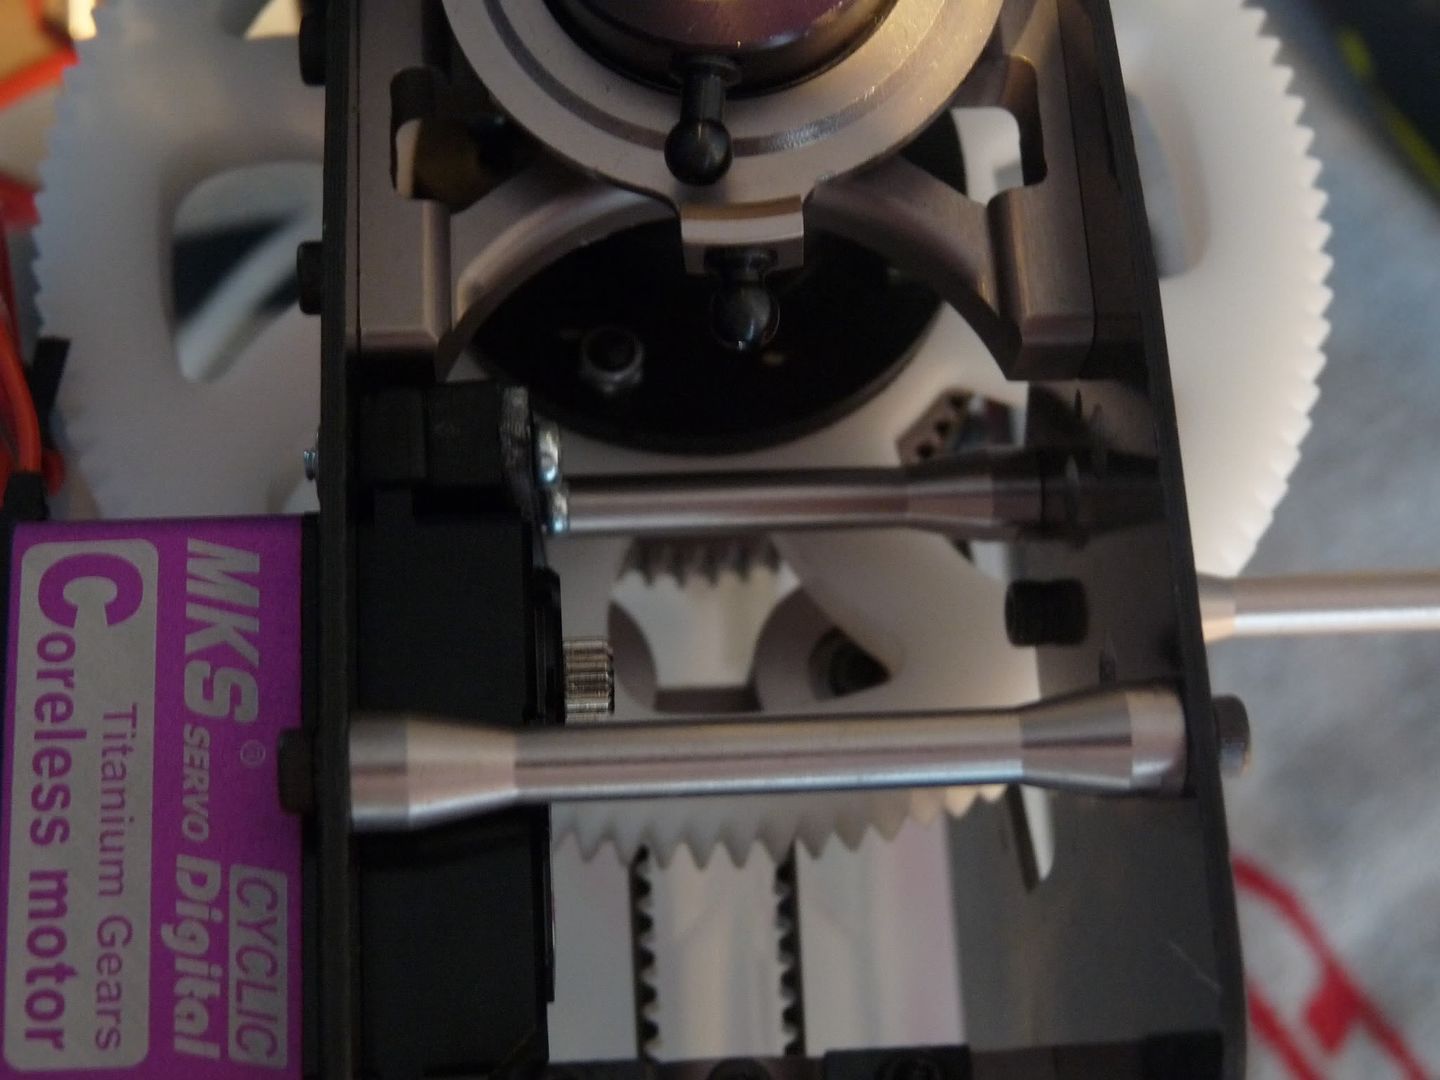 Cyclic servo install complete: 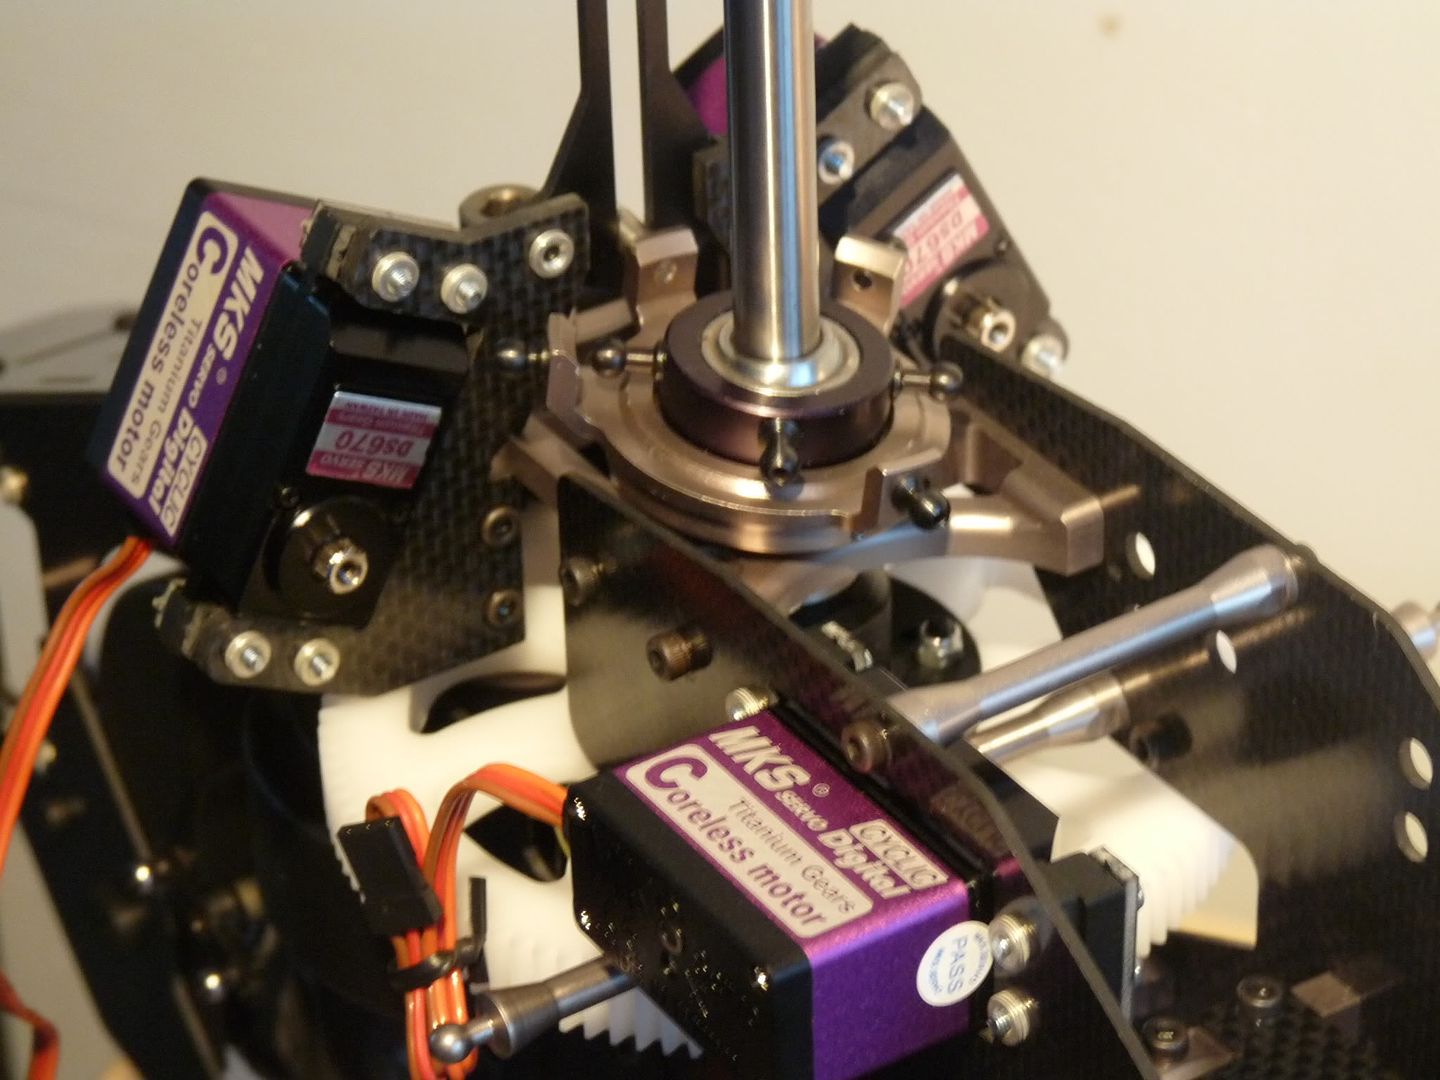 Next up is the tail and throttle servo! Miniature Aircraft has made the servo install a doddle, with screw driver holes in the frame make the task easy.  Again, I slightly deviated from the instructions, Since I had spare servo spacers I put them to good use and used them as servo plates, As the servo screws are a bit small for my liking just to install straight into the servo tabs, 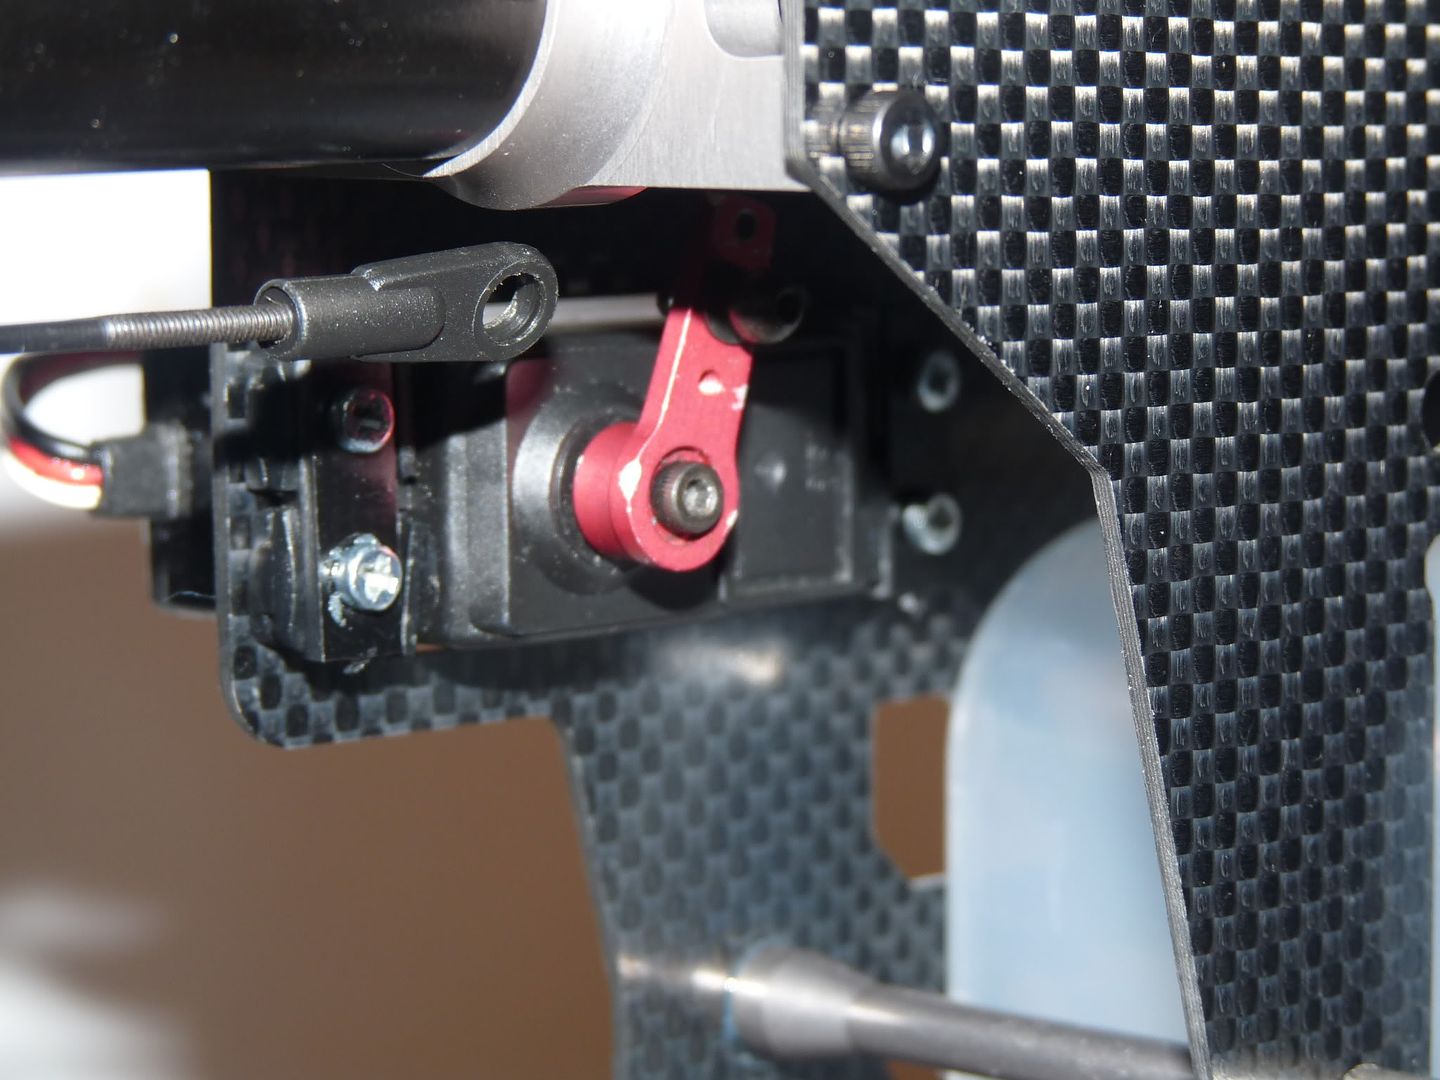 Bit of a problem as arised, I accidently rounded off my screw driver, So, I'm unable to fully install the throttle servo! I will be buying a new one later today  So this concludes the servo installtion! Another deviation here, The manual states to prepare the canopy and install the grommets, But I always leave that last.. So that is what I shall do Nex is Last but not least is Bag 6 - The head assembley! |
|
|
|
|
01-18-2011, 06:46 PM
|
#50 (permalink) |
|
Registered Users
Join Date: Jul 2010
|
Once again thanks for the pic's of your build
 , I am getting my servos soon, will you be using aluminum arms though out the build ?. , I am getting my servos soon, will you be using aluminum arms though out the build ?. |
|
|
|
|
01-18-2011, 08:38 PM
|
#51 (permalink) | |
|
Thread Starter
Join Date: Sep 2008
|
Quote:
I was going to use the stock arms, But rememberd I had some Dubro High Stregnth Plastic Servo Horns. These fit on the MKS output shaft. |
|
|
|
|
|
01-19-2011, 08:21 PM
|
#52 (permalink) |
|
Thread Starter
Join Date: Sep 2008
|
It's time for the last step in the build. Step 6. This step comprises of the head mechnics, and linkages. So far the build has been progressing really smooth, There will be a build report at the end though! Let's get onto Bag 6! Hardware Bag's for Step 6: 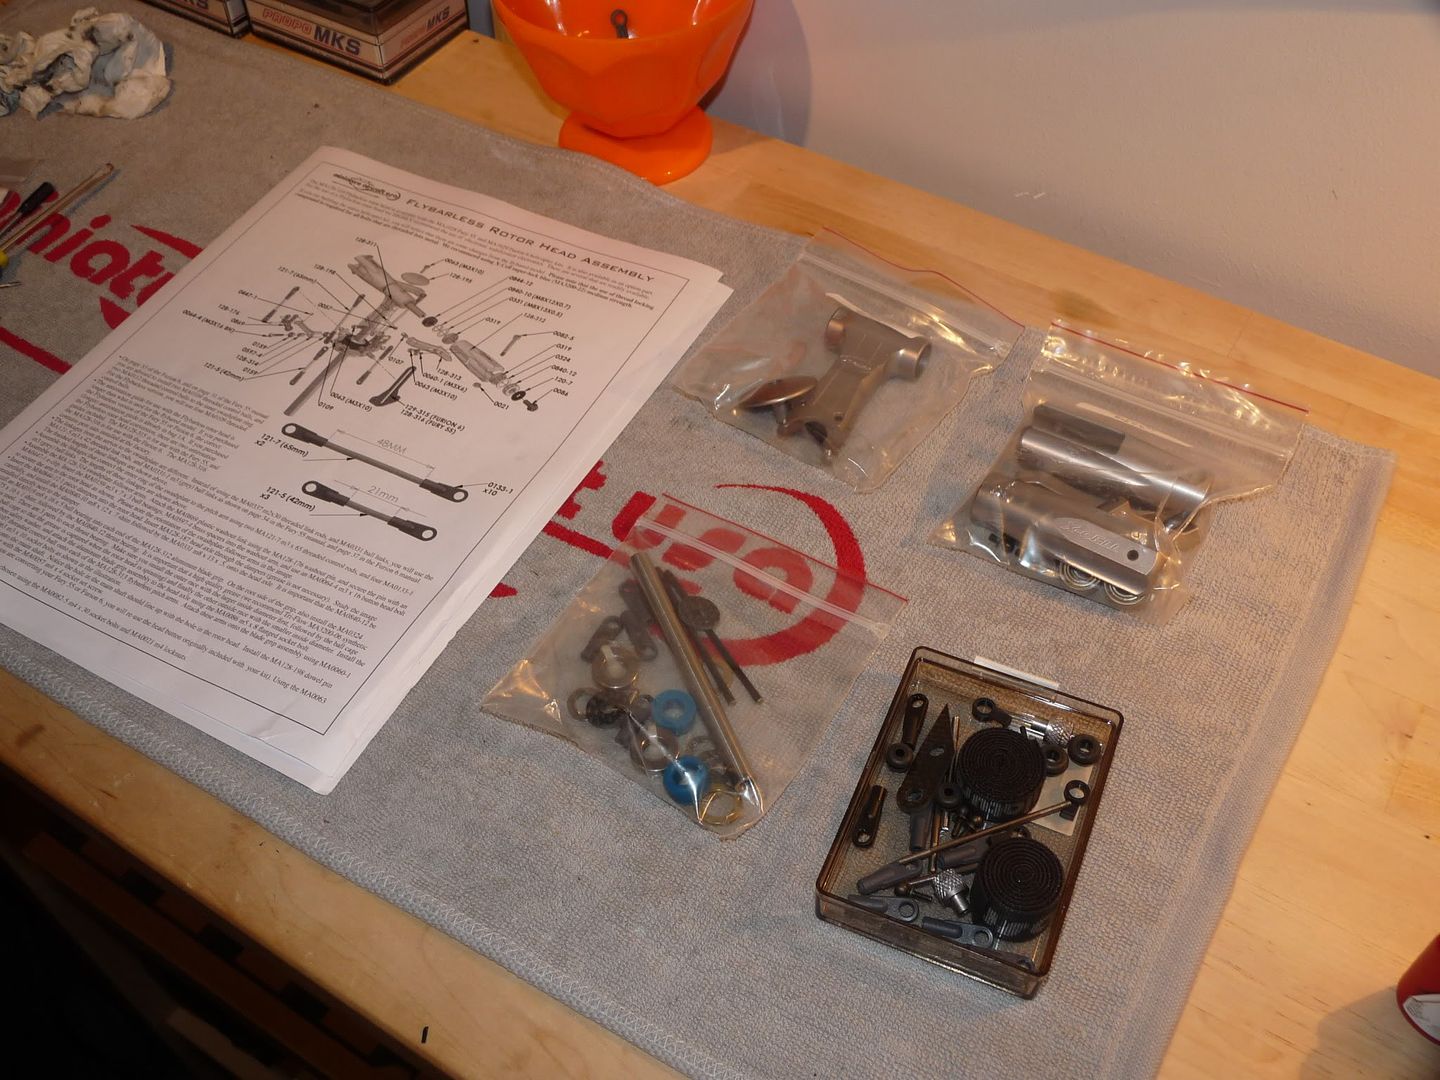 These two bag's comprises the Hub and Blade Grips 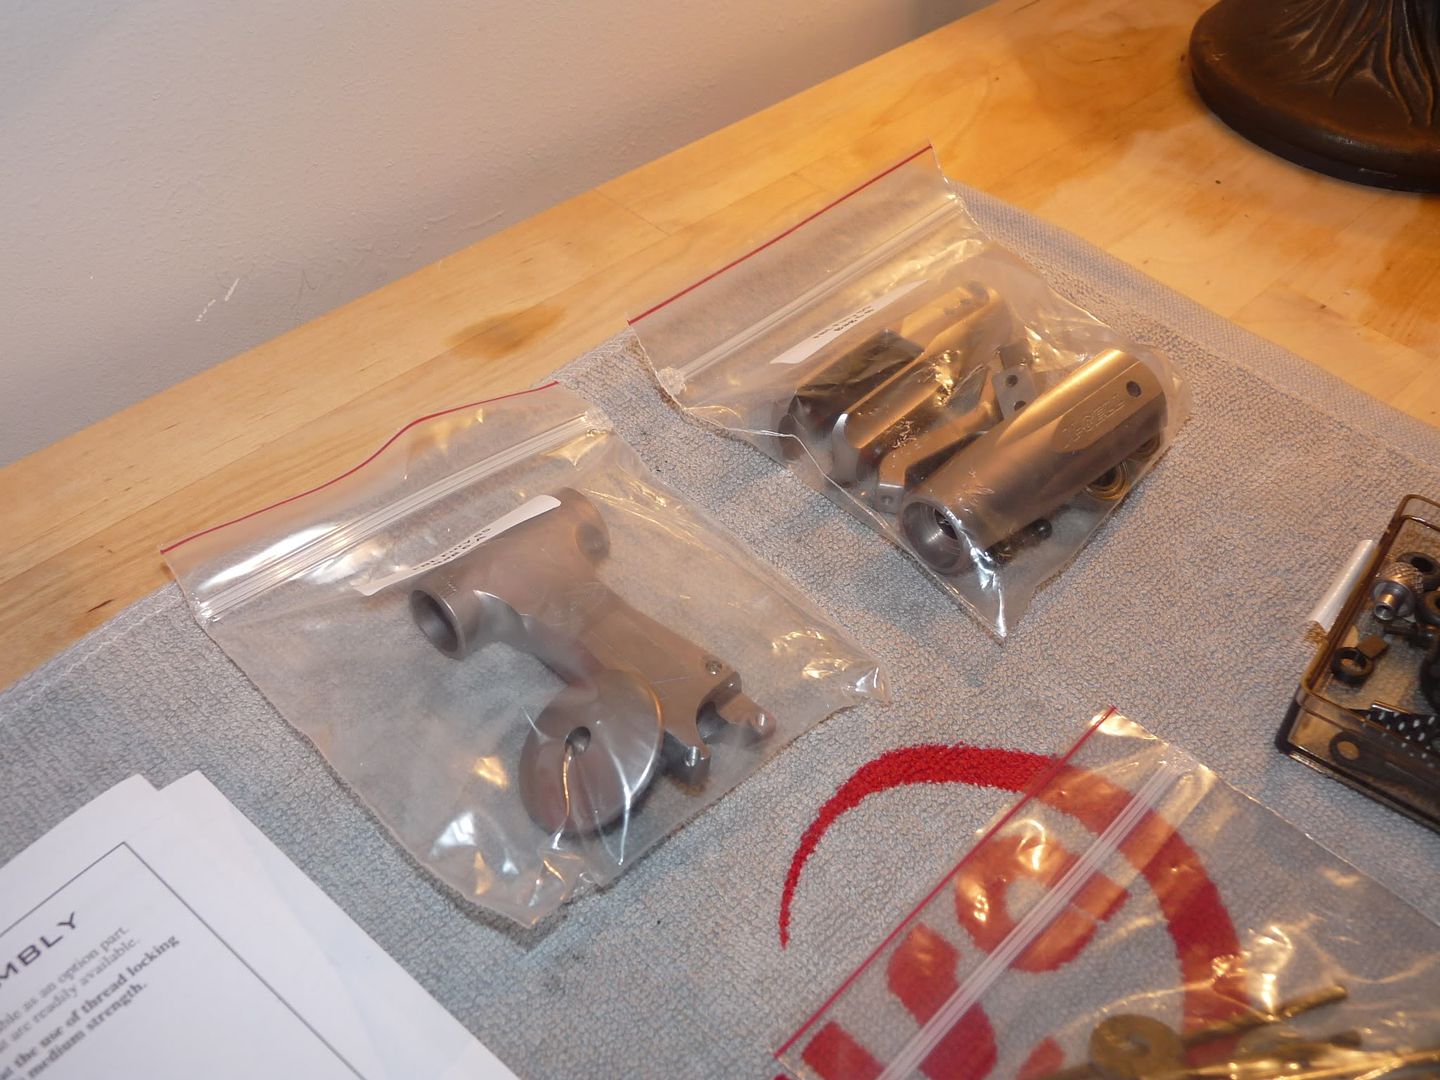 This bag comprises of the feather spindle, and bearings etc. 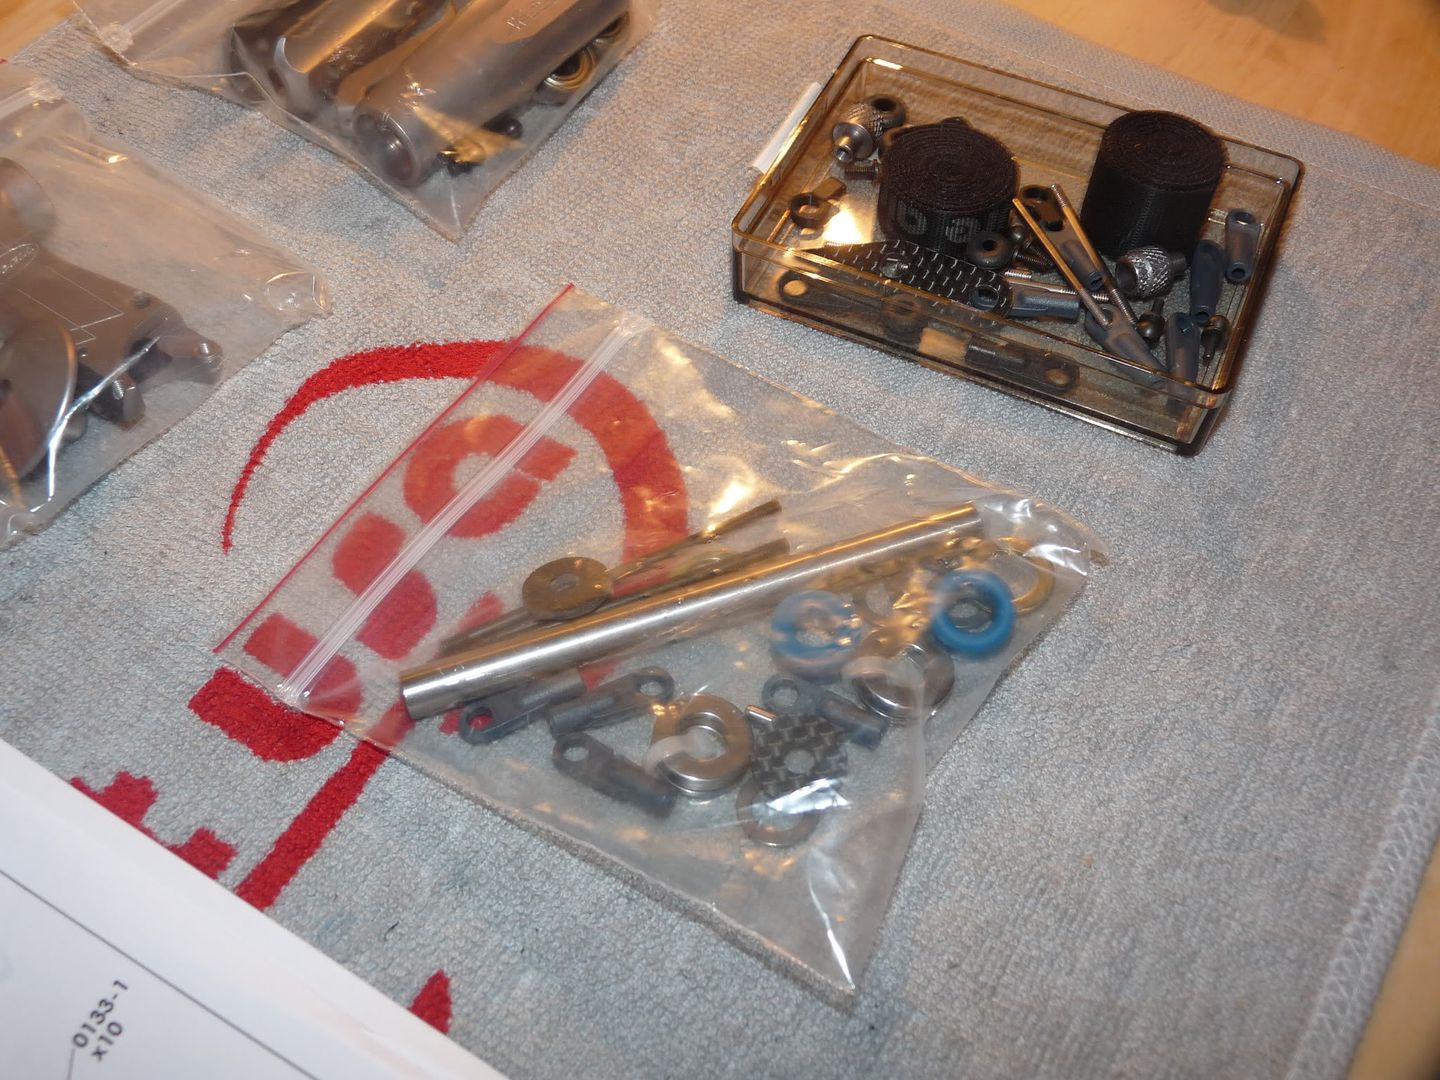 First off, I will start by getting the servo to swash linkages all to the manual spec's (21mm) 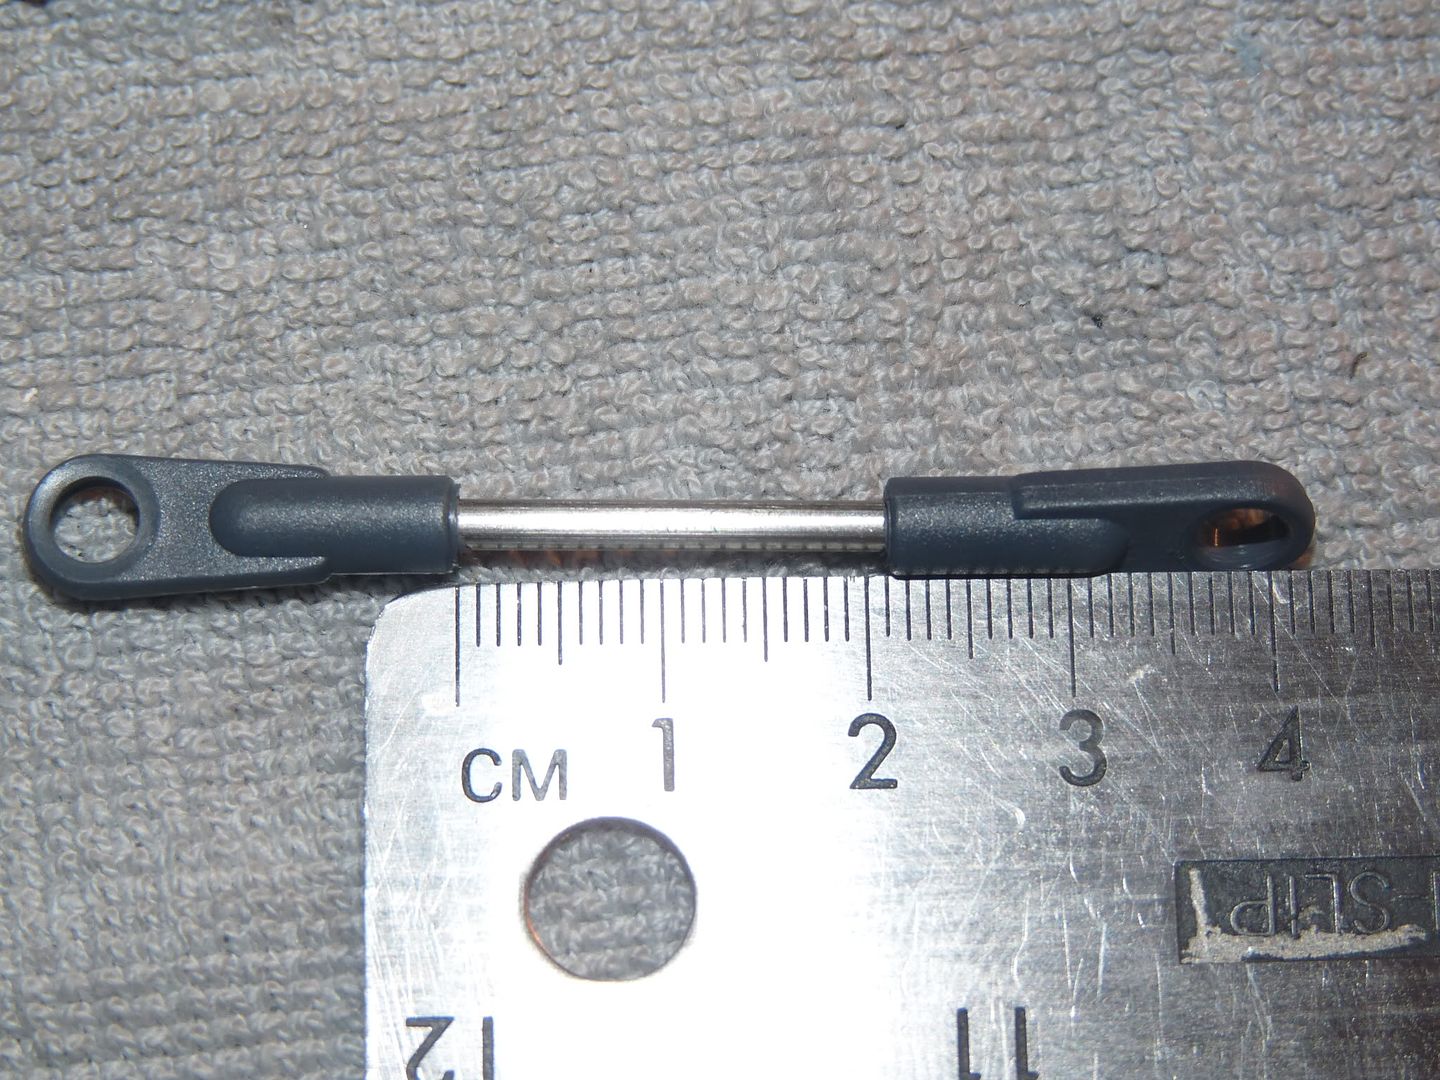 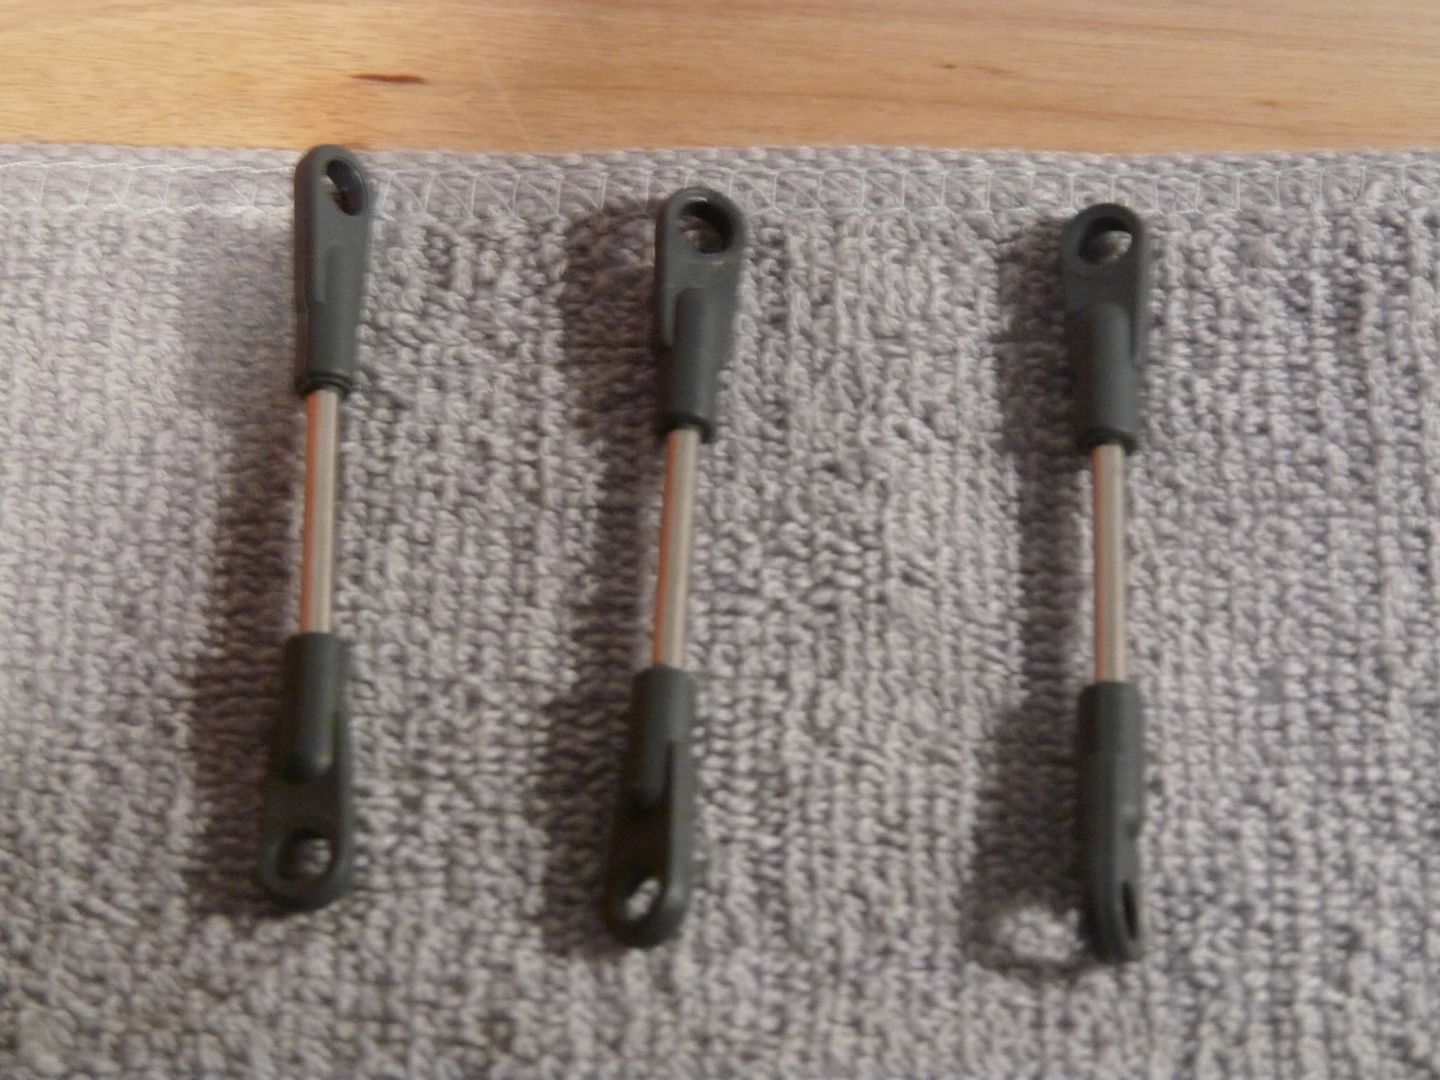 Installing the links onto the swash: 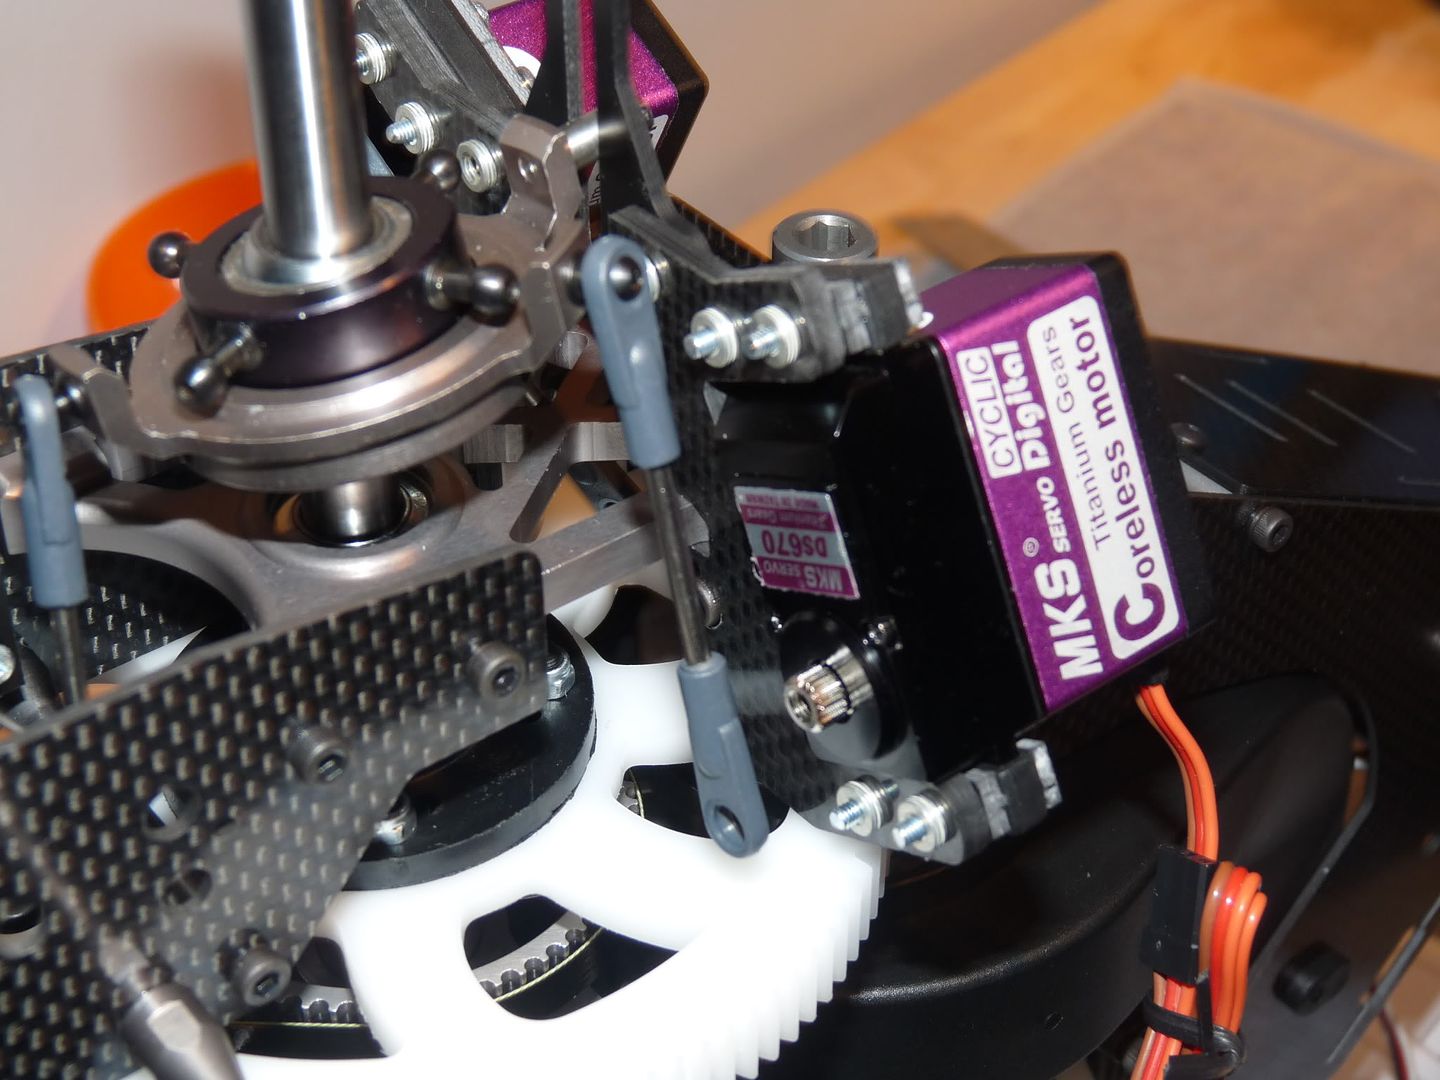 Next up is the actual head assembley! |
|
|
|
|
01-19-2011, 08:28 PM
|
#53 (permalink) |
|
Thread Starter
Join Date: Sep 2008
|
Time to get the head built I must say, It looks amazing, and the quality is again, superb! Hardware bag's going to be used: 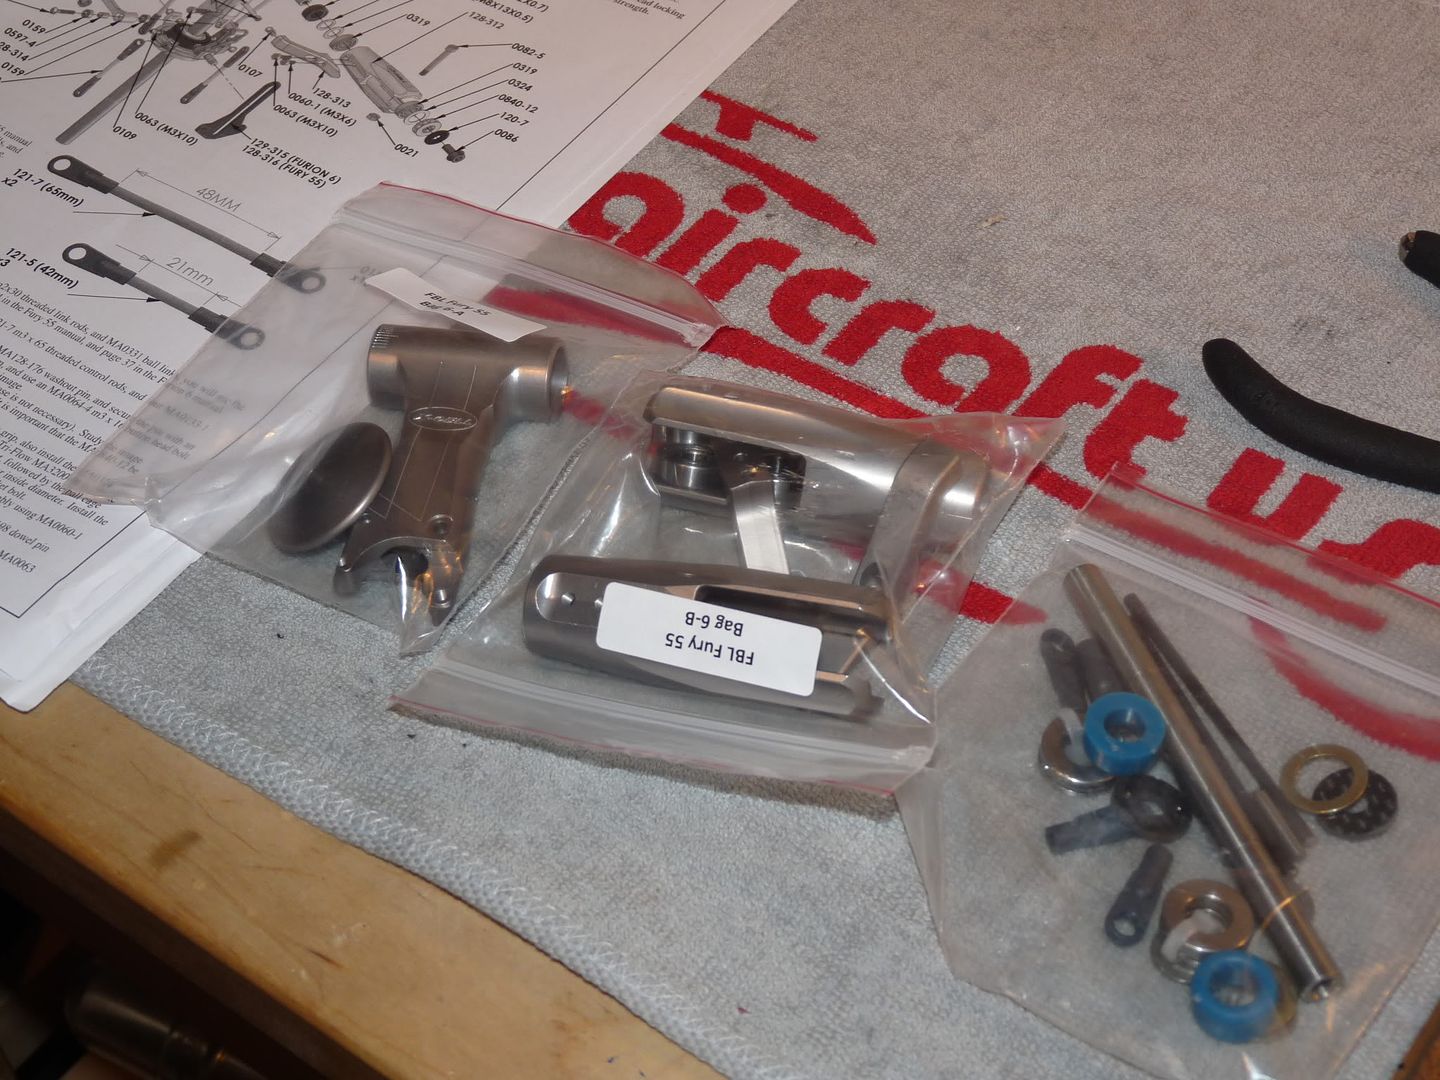 First up, let's take a look at the headblock and headbutton, the machine finishing is great! 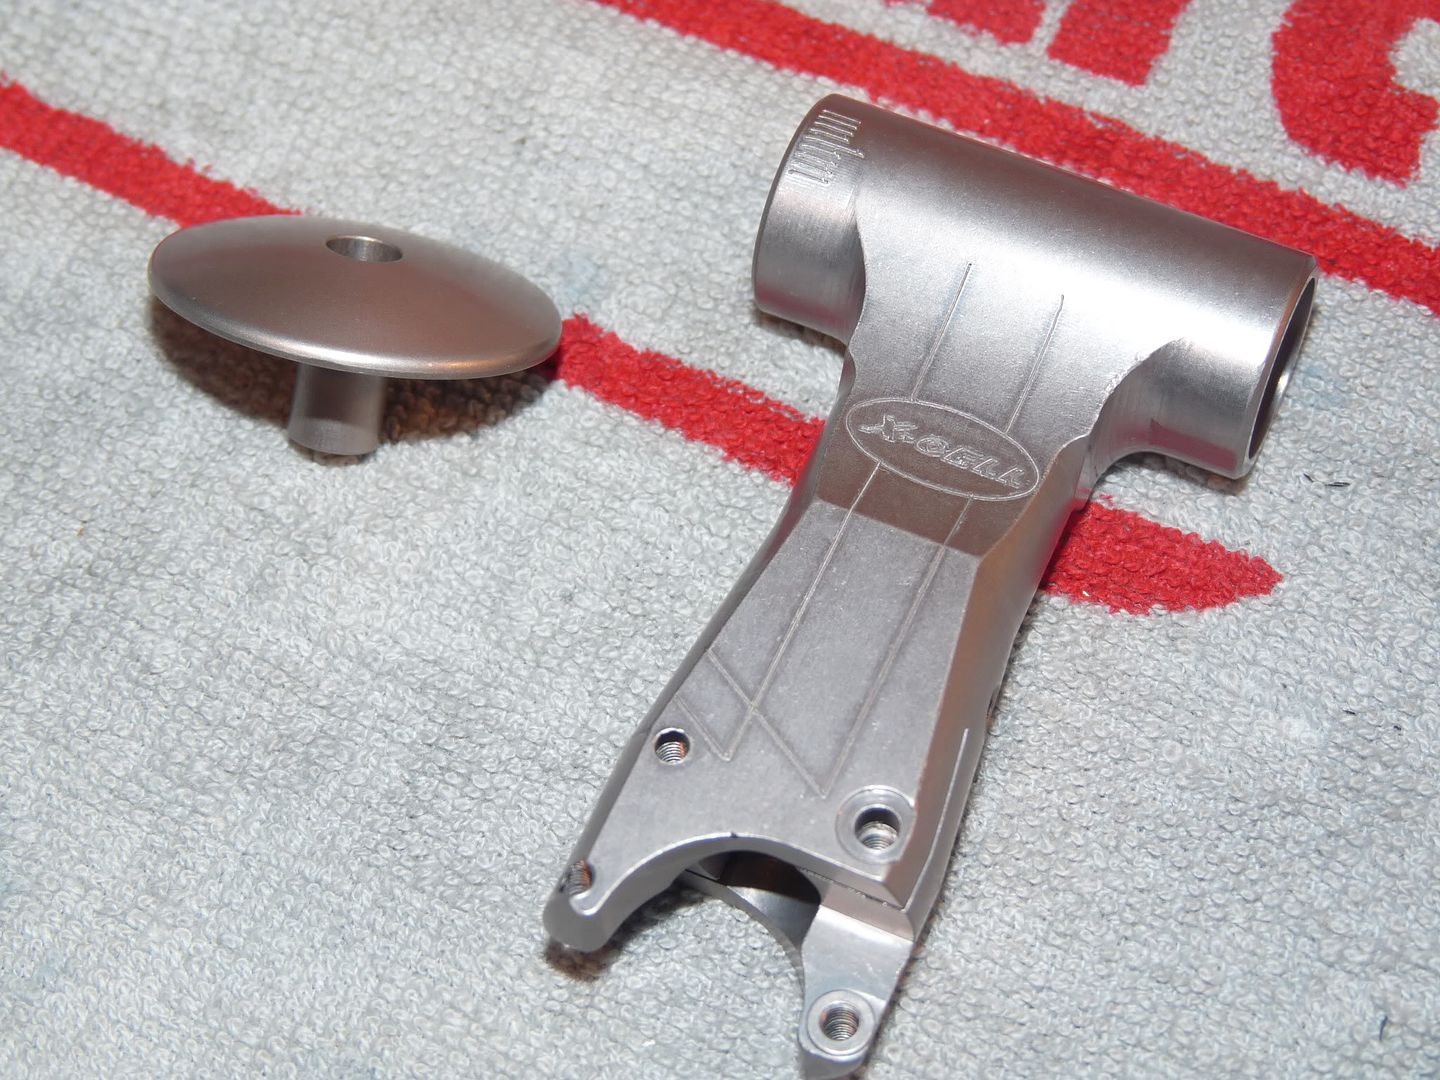 Next up is the blade grips and bearings, along with the linkage arms. Again Superb! 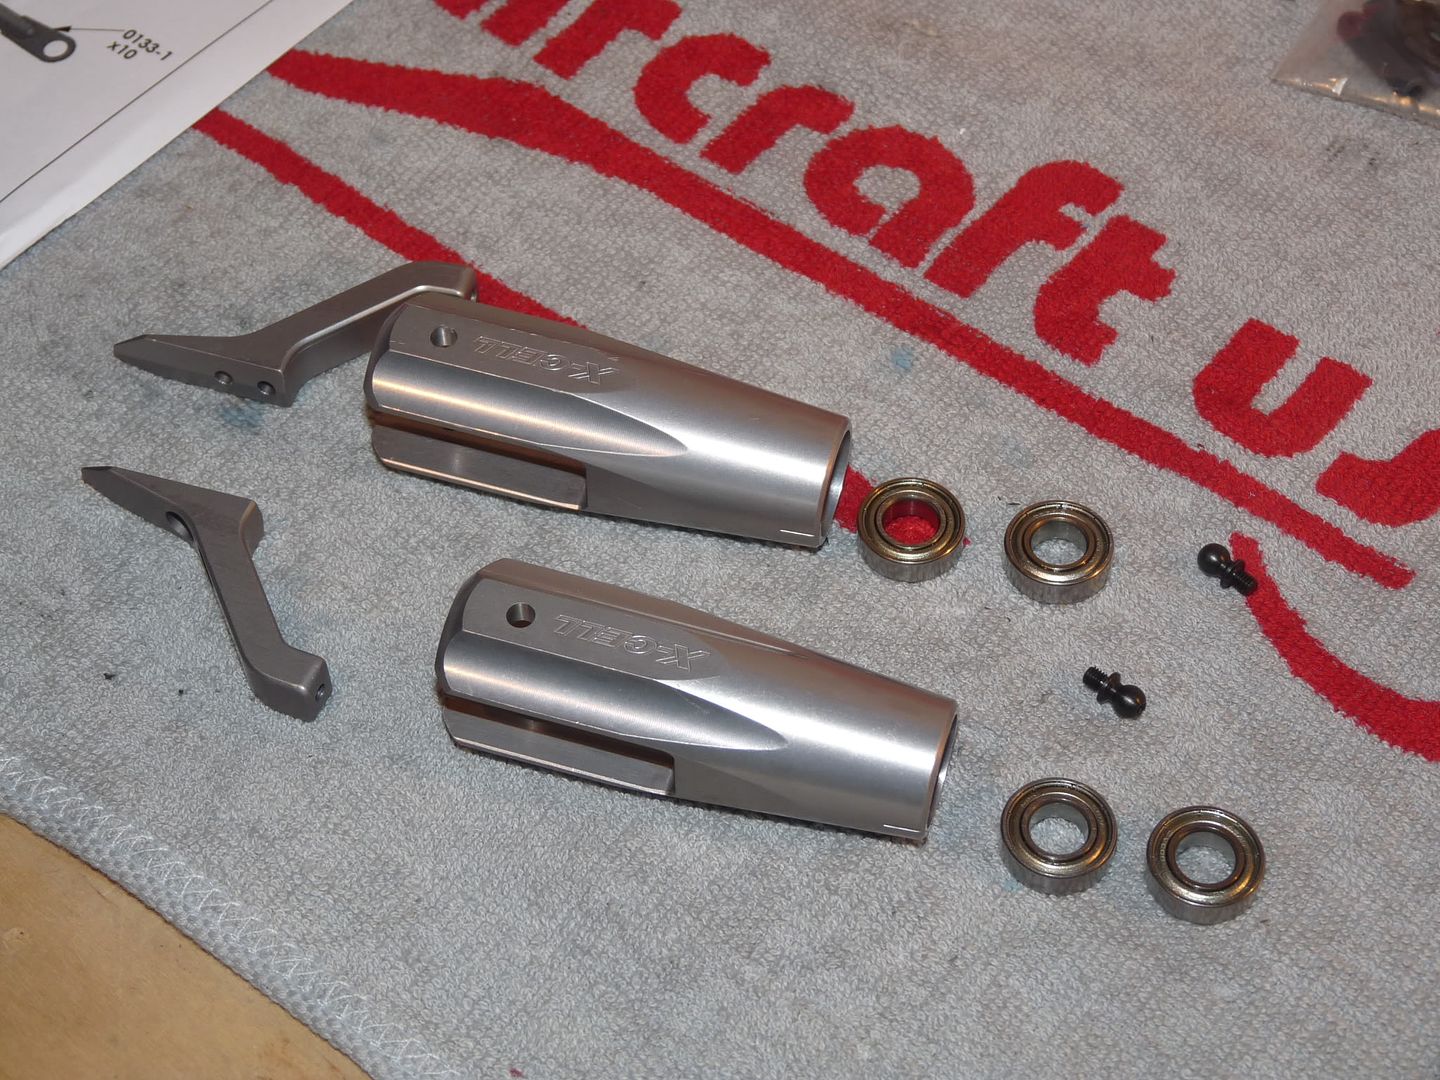 Let's start assembling! First off is the Hub and installing the dampers and feather spindle. 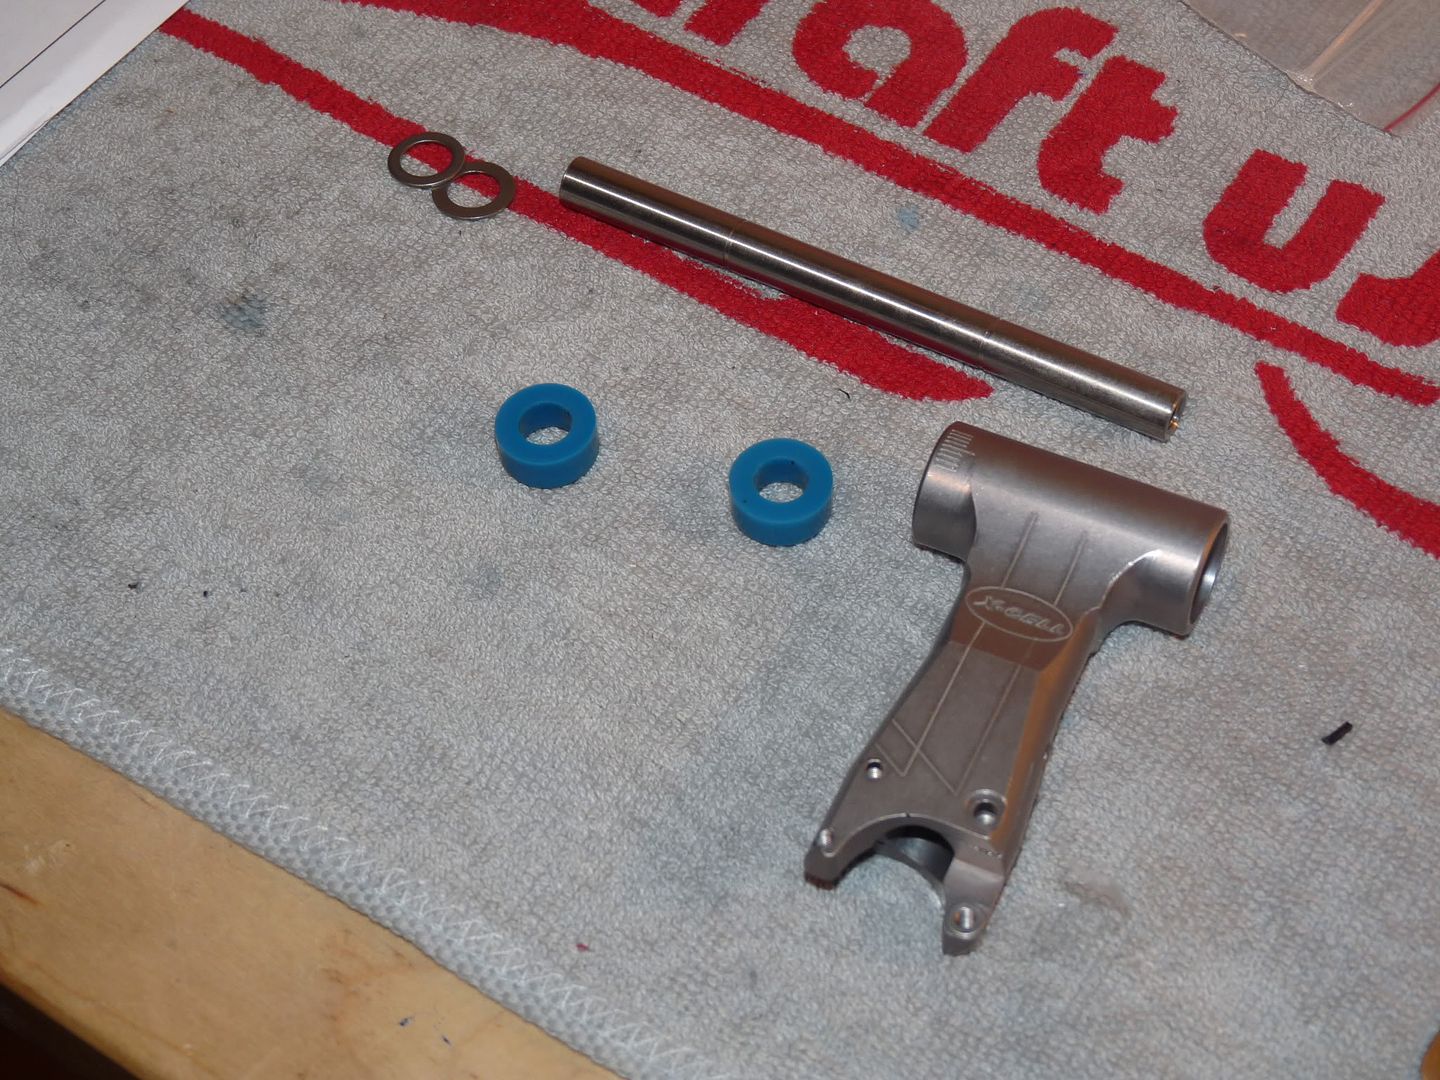 Installed the dampers.. Install went easy!  With a bit of work, I got the shaft installed and centered!, The centering is actually made easy because on the Flybar edition, you need to install e-clips. The shaft has grooves cut out that make the aligning the shaft a doddle. 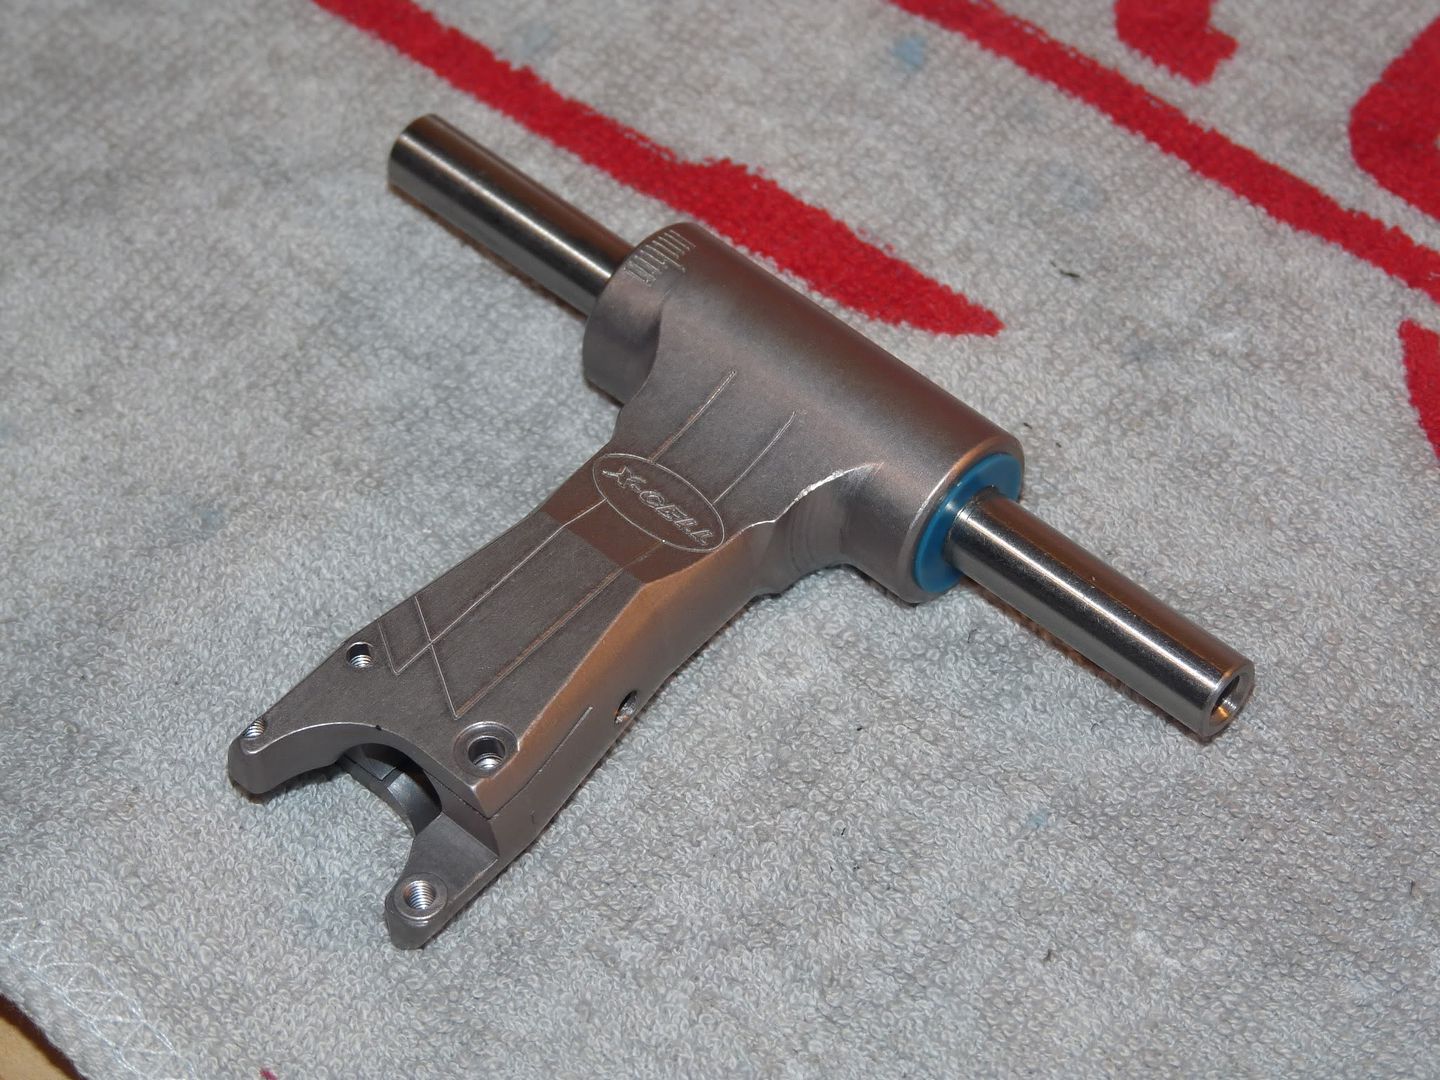 Sliding on the washers, Small ID first, Big ID Next! 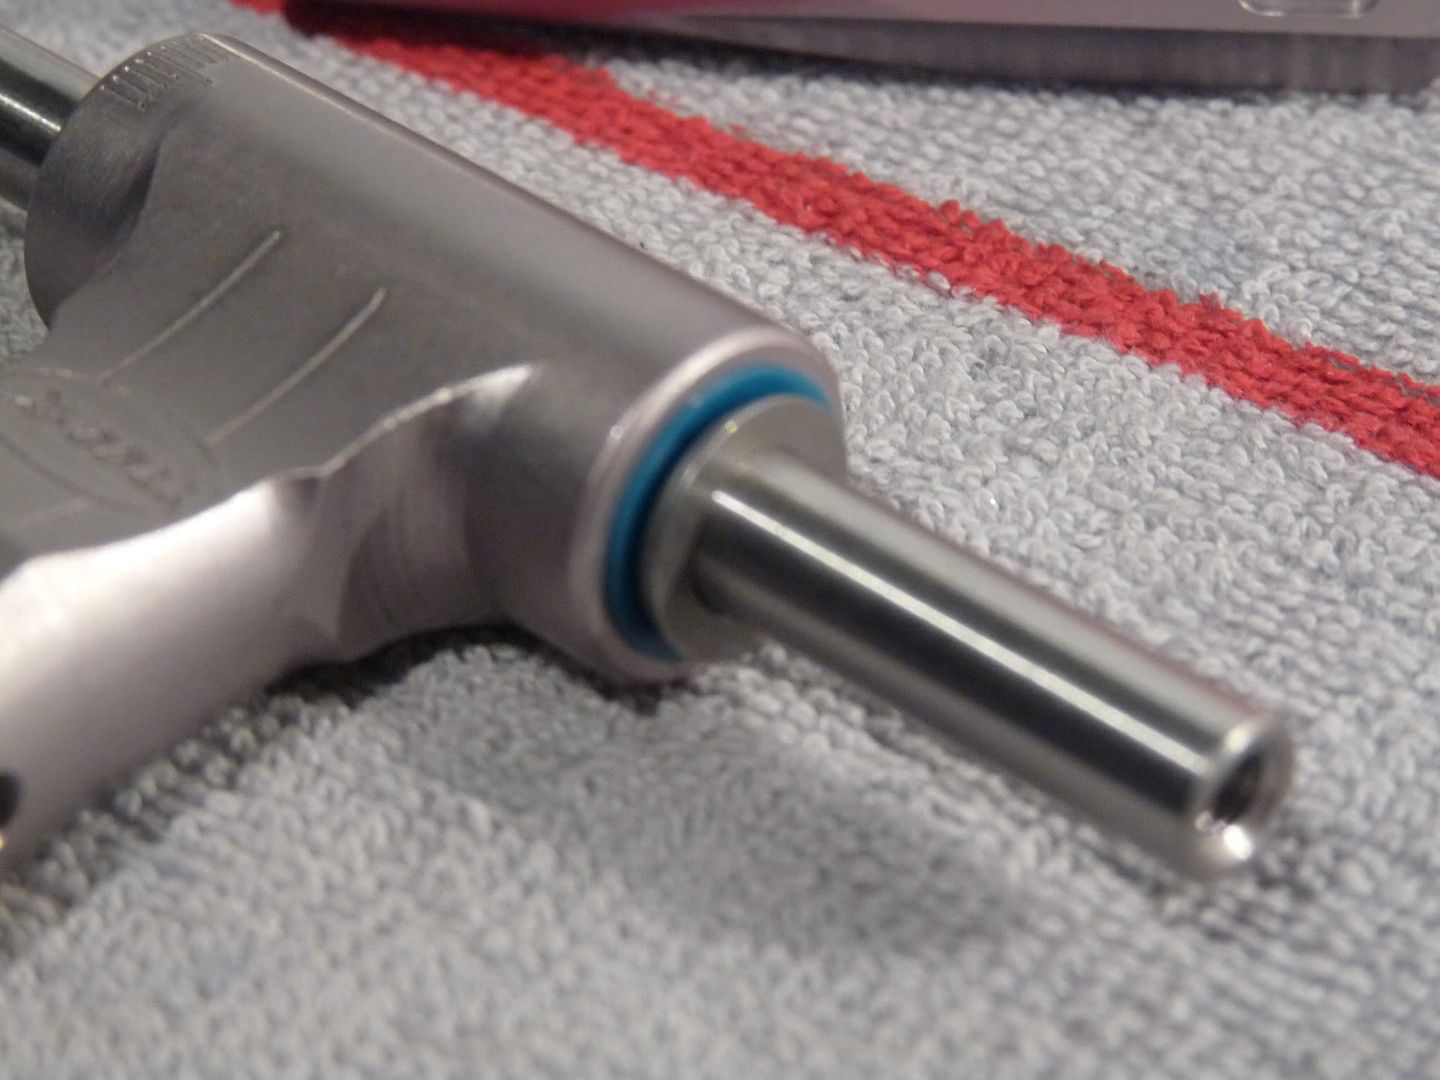 |
|
|
|
|
01-19-2011, 08:37 PM
|
#54 (permalink) |
|
Thread Starter
Join Date: Sep 2008
|
Time to get the blade grips installed! Order of hardware install (I know the blade grip is the wrong way round 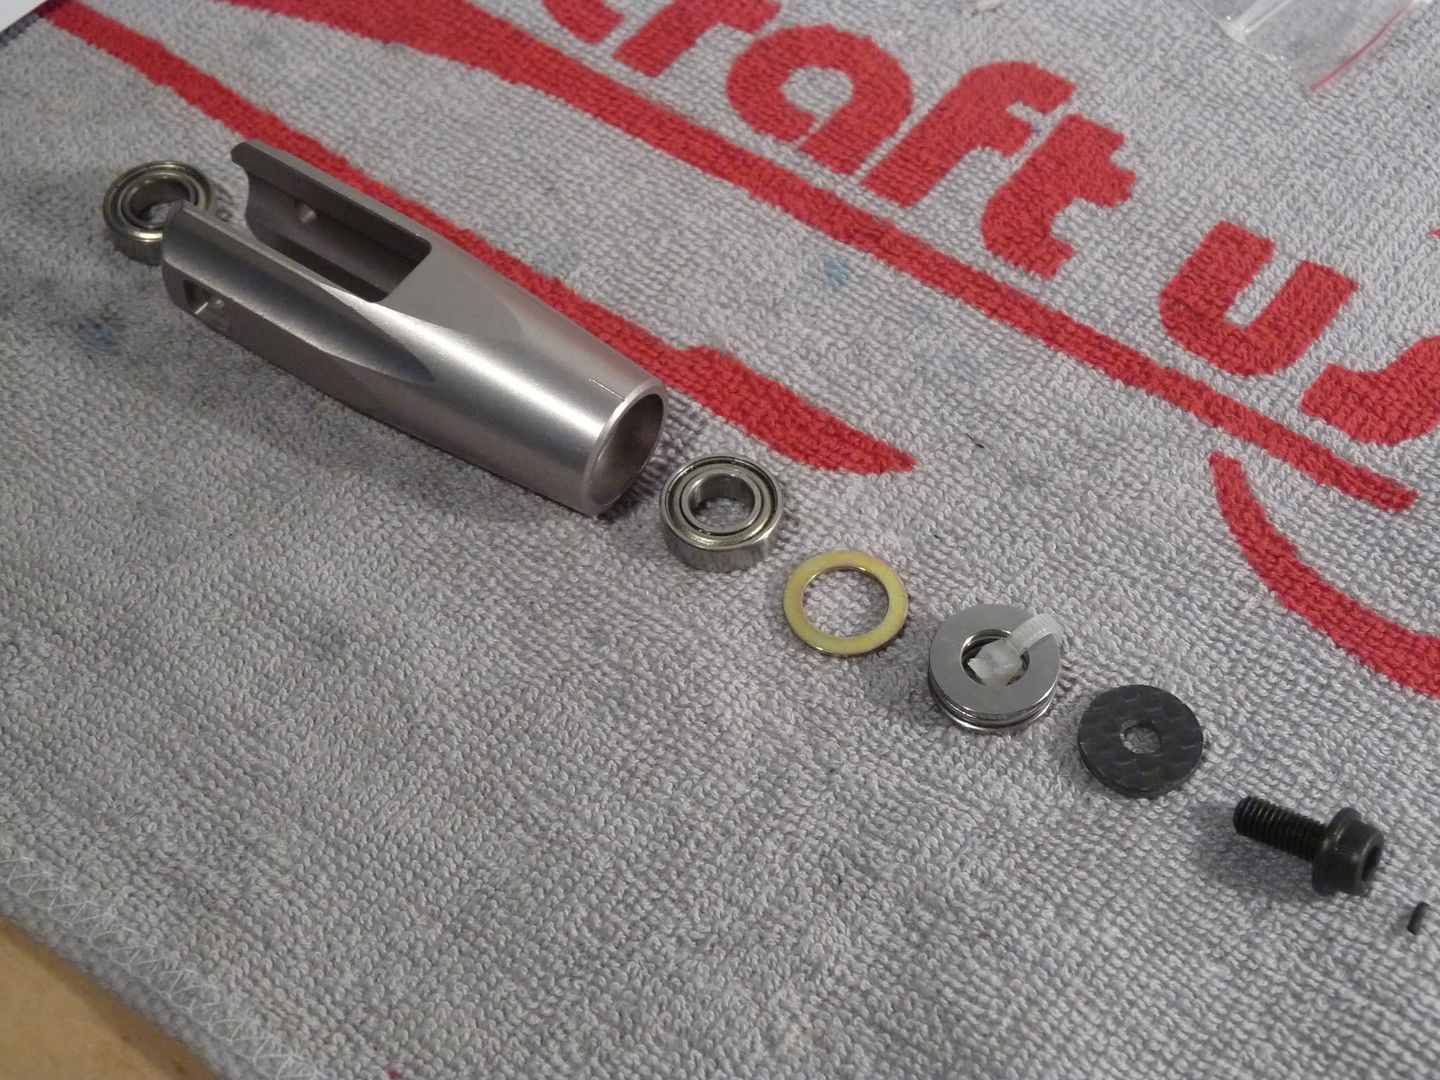 Bearing installed: 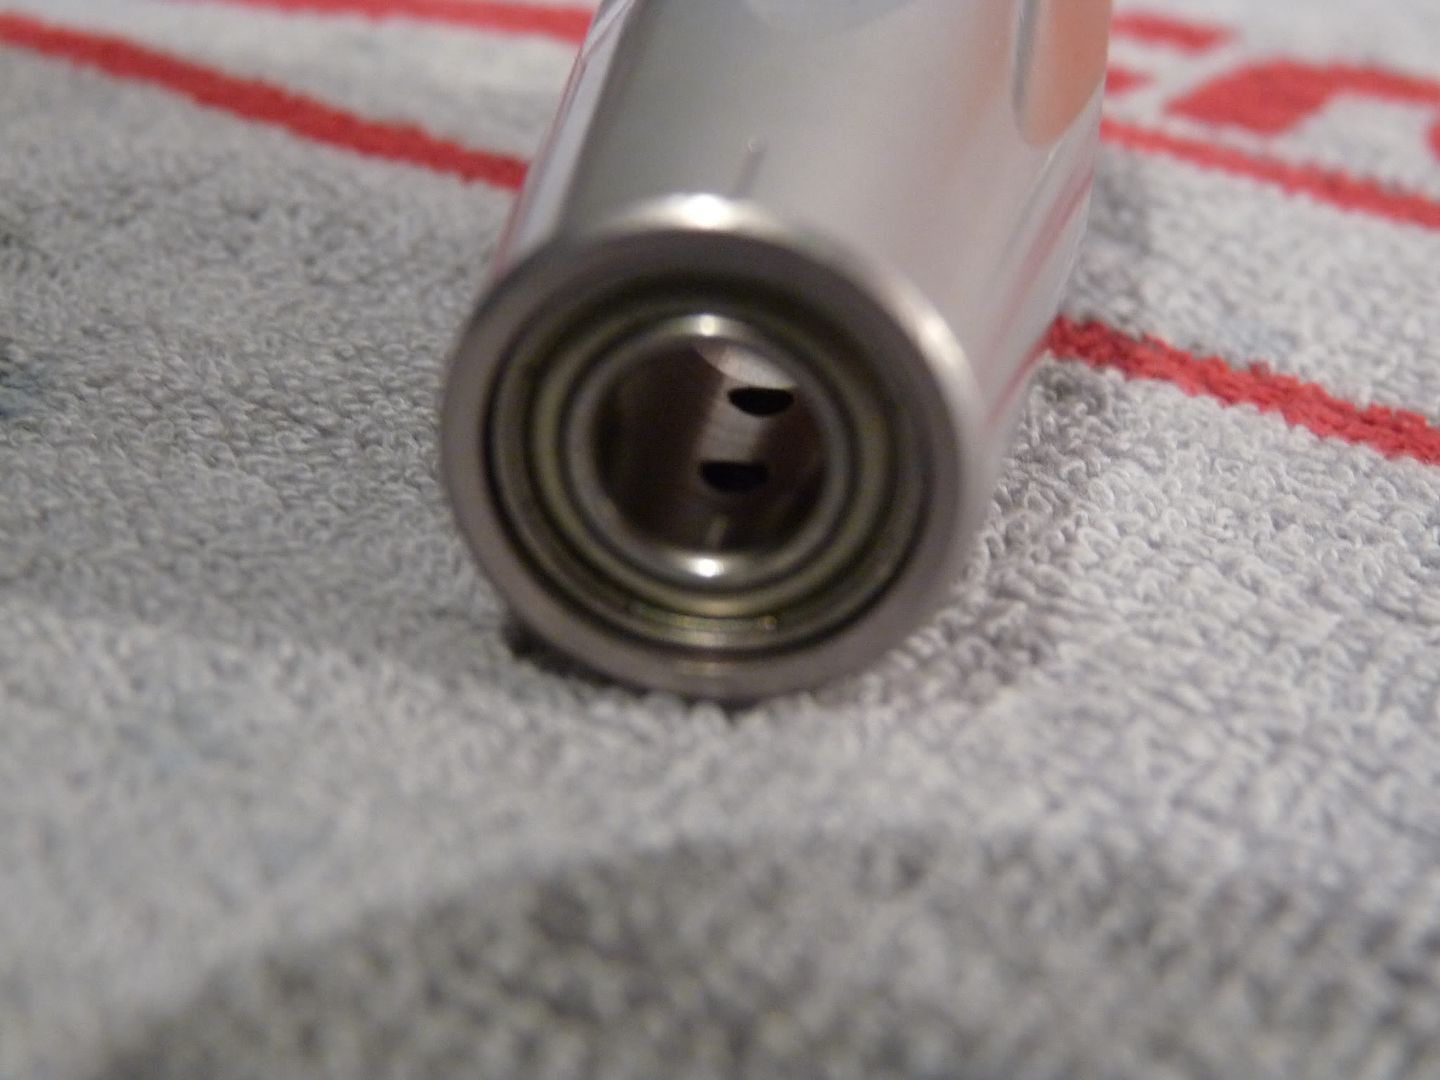 Time to prepare the thrust bearings: 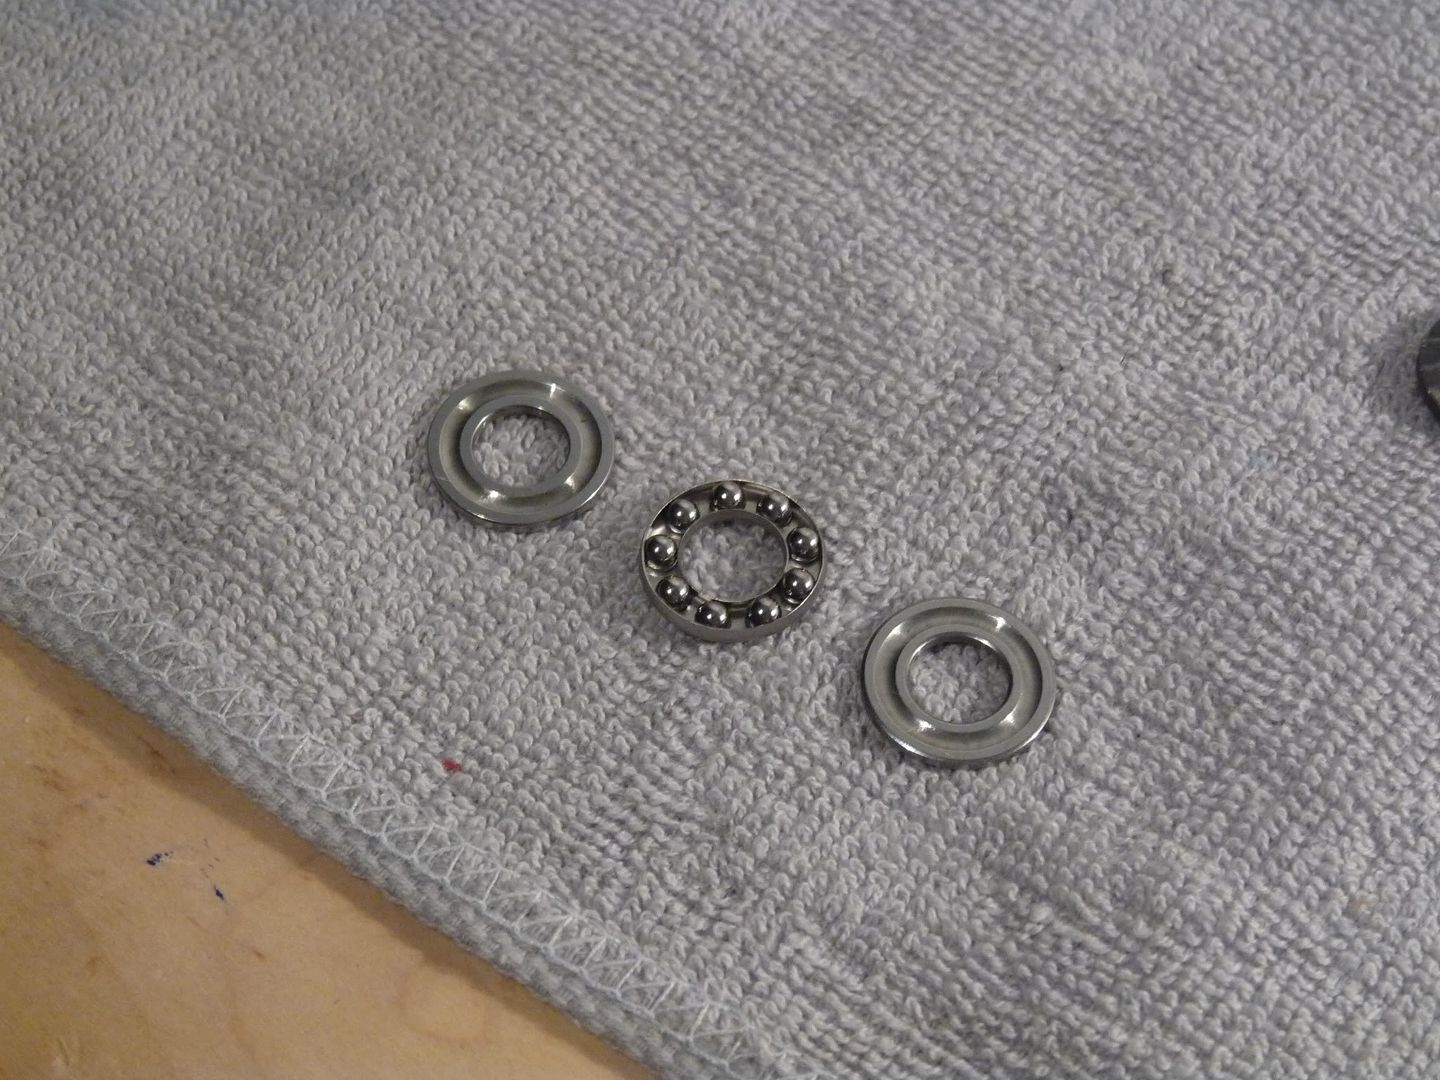 Greased up the thrust bearing 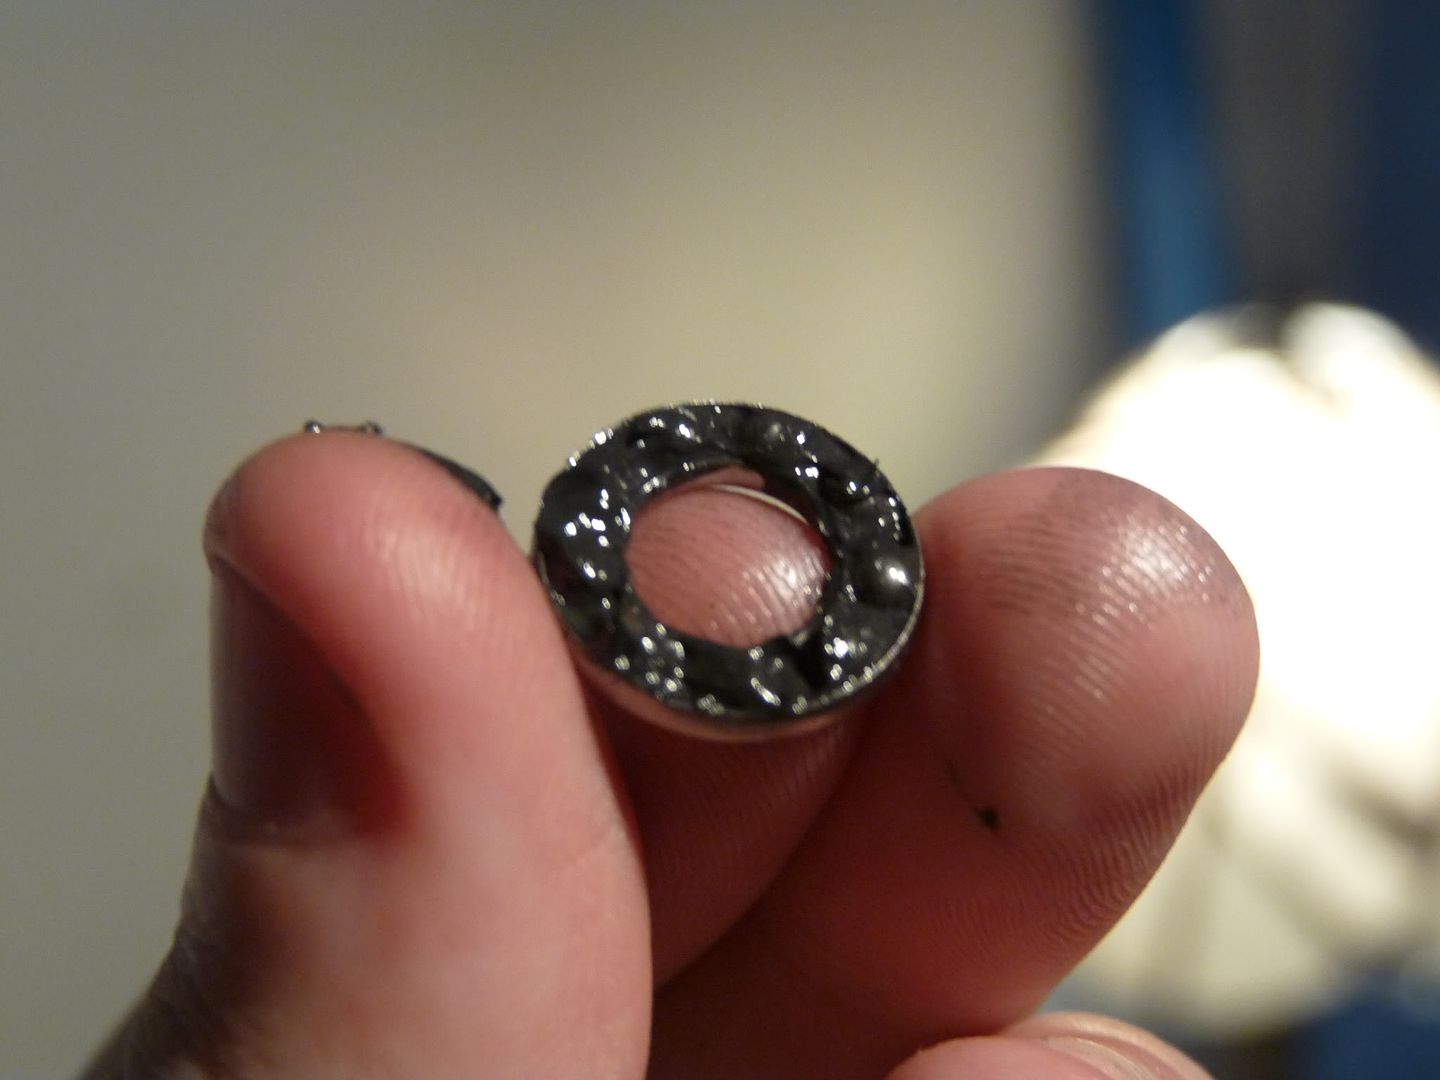 Installing the bold into the spindle: 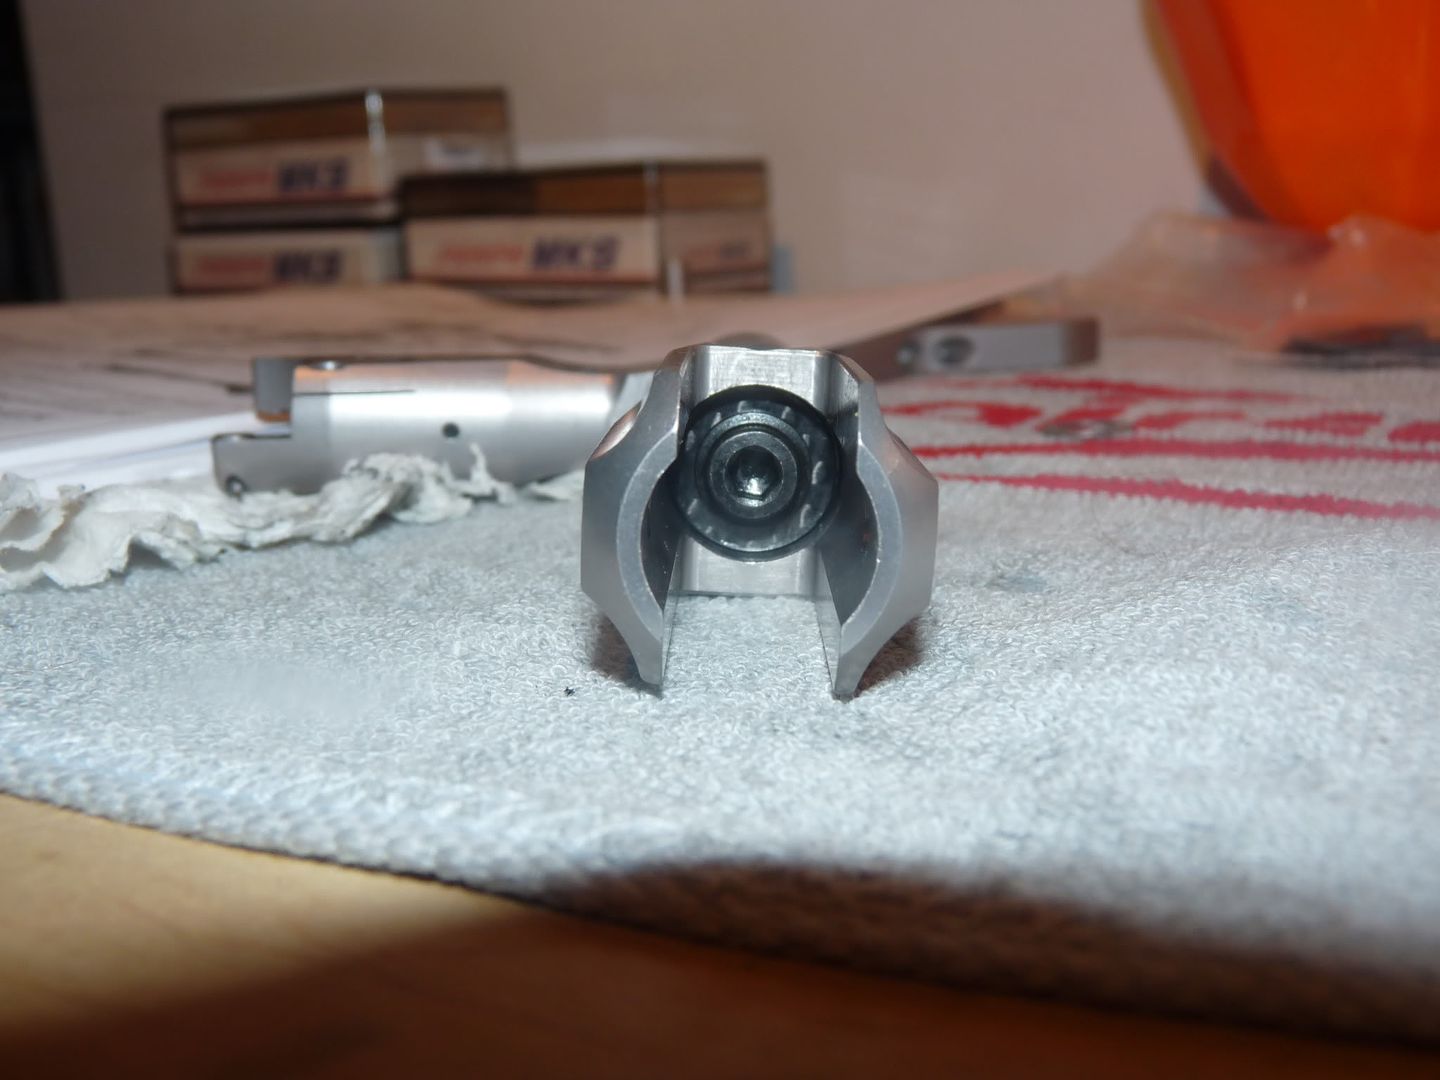 Both blade grips installed!, Note: Tighten up as tight as possible, until there's a slight notch then ease of a bit.. if there's still a bit of notch.. Pull on the grip and twist. If the notch goes and the grip smoothly rotates then this is fine. This is because you are loading the thrusts  Nex up is the blade link arm! Simple loctiting a linkage ball on, and then screwing into the blade grip. 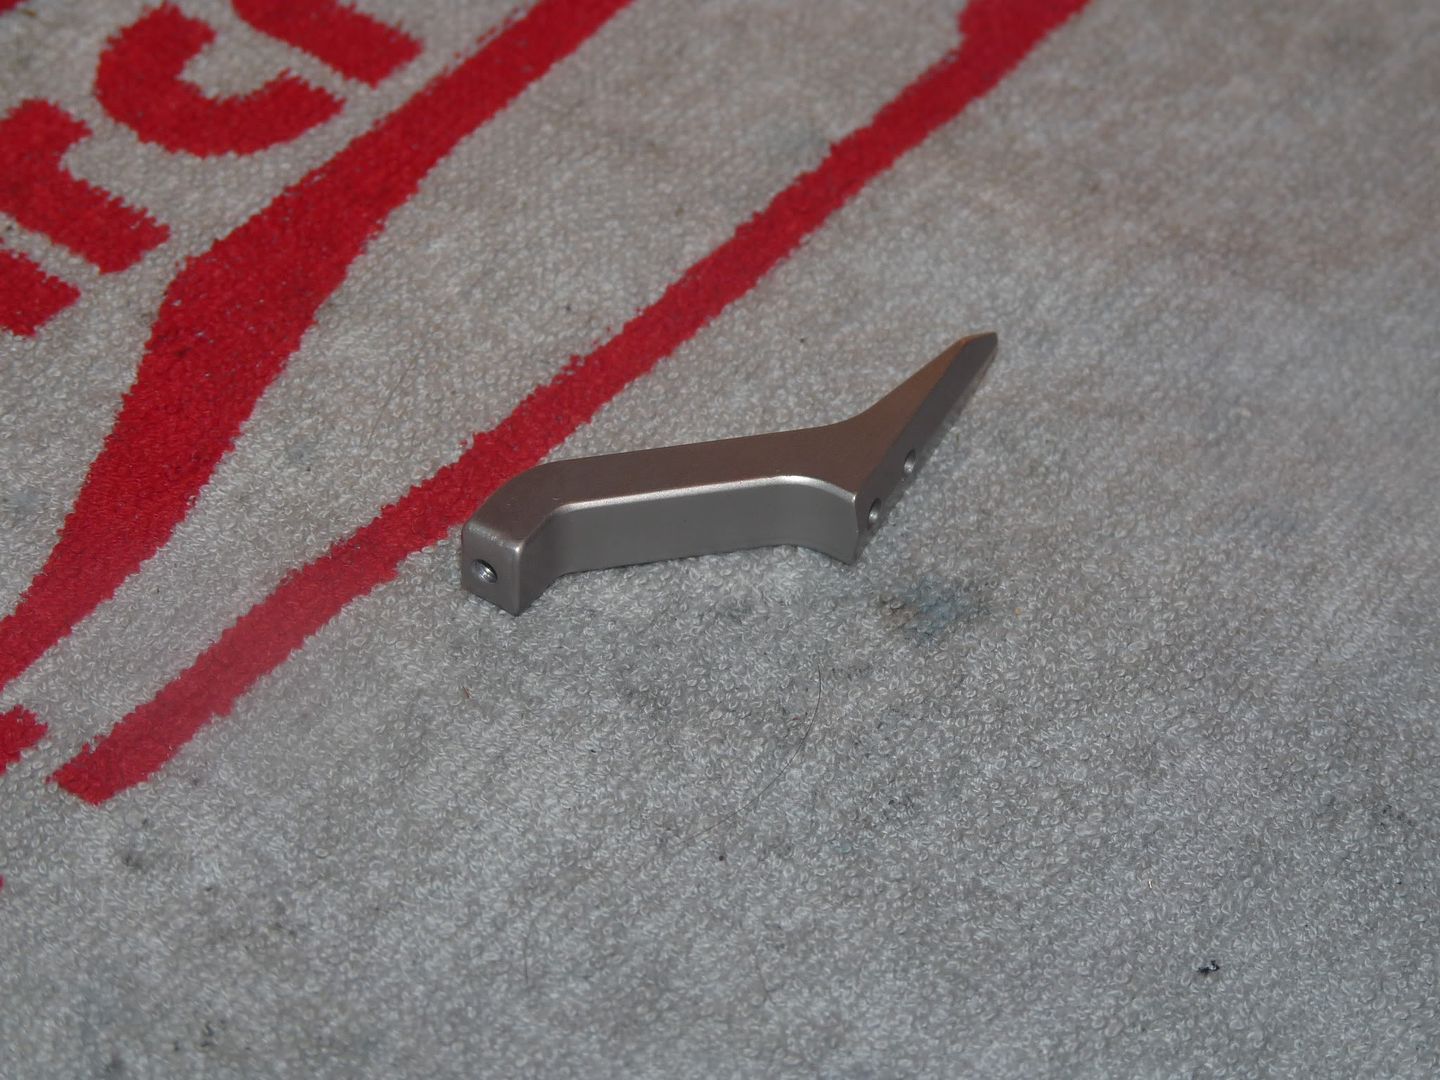 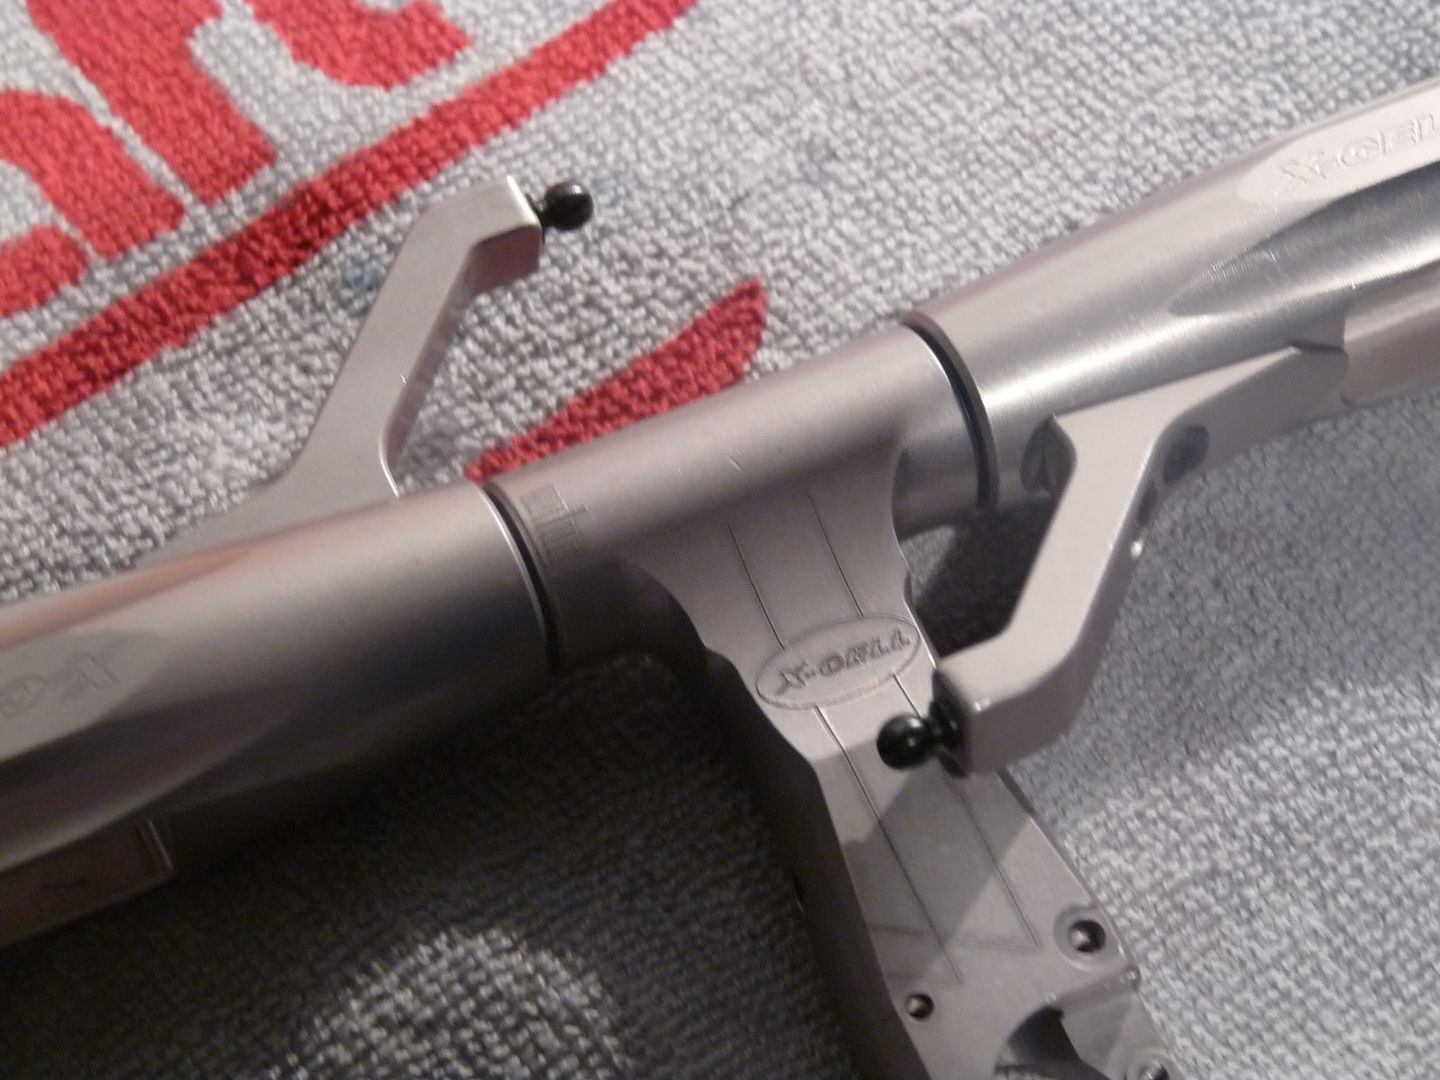 |
|
|
|
|
01-19-2011, 08:43 PM
|
#55 (permalink) |
|
Thread Starter
Join Date: Sep 2008
|
Next up is the washout arms! Pretty simple as to loctite a screw and bolt on, Note: Attain correct orientation of the arm 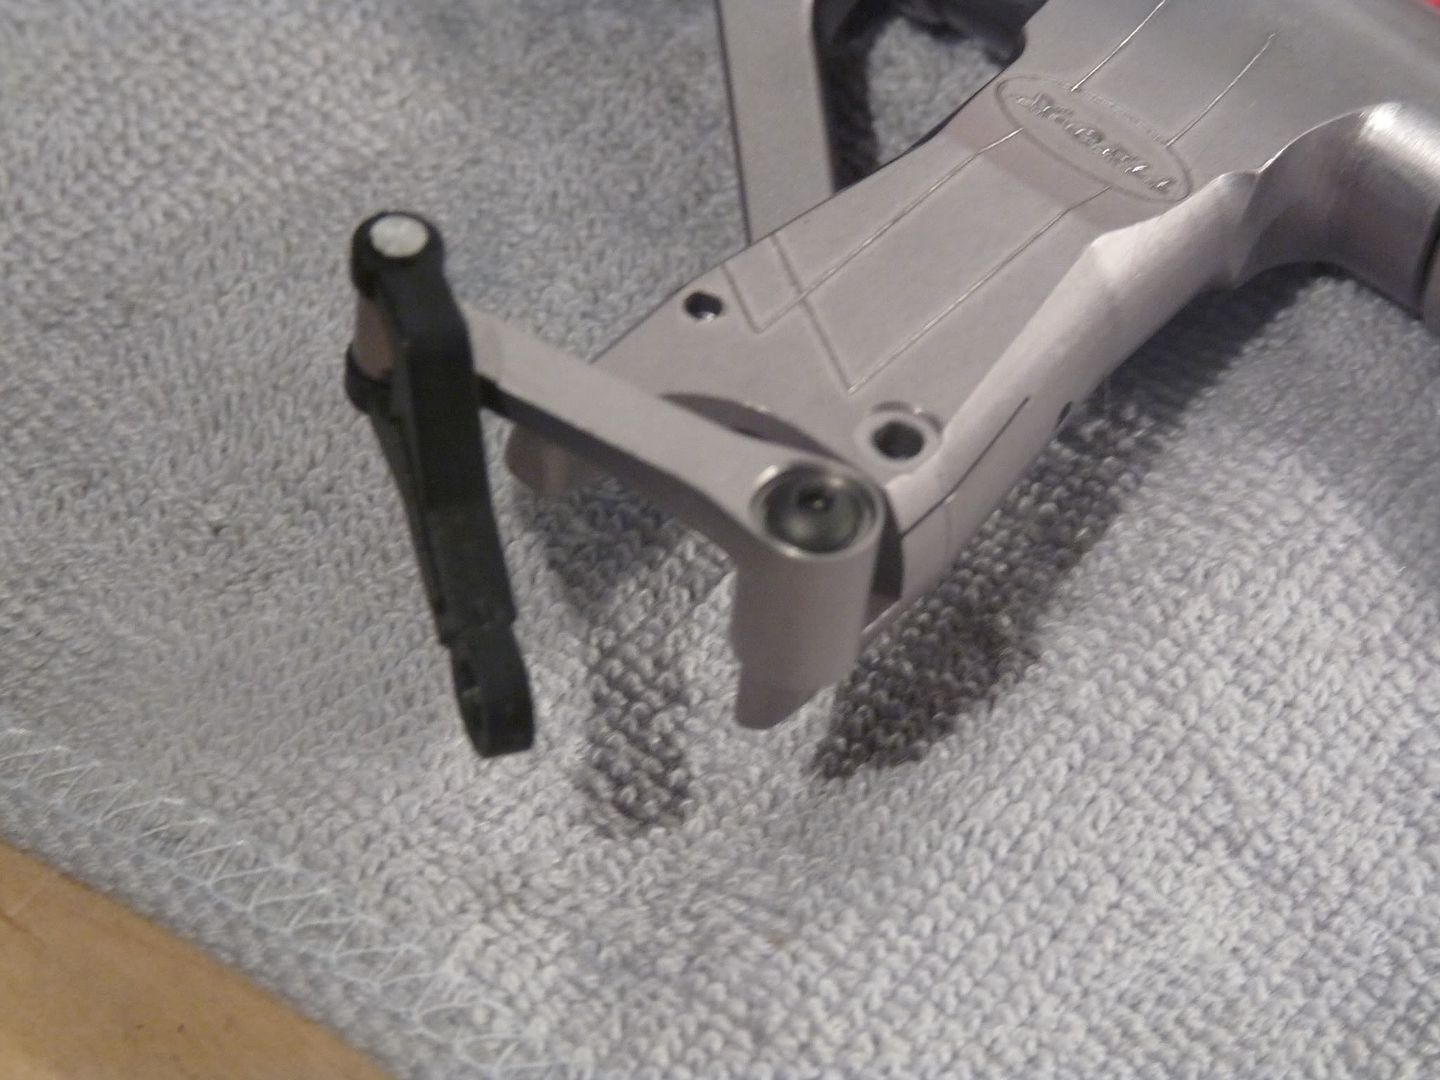 Both installed: 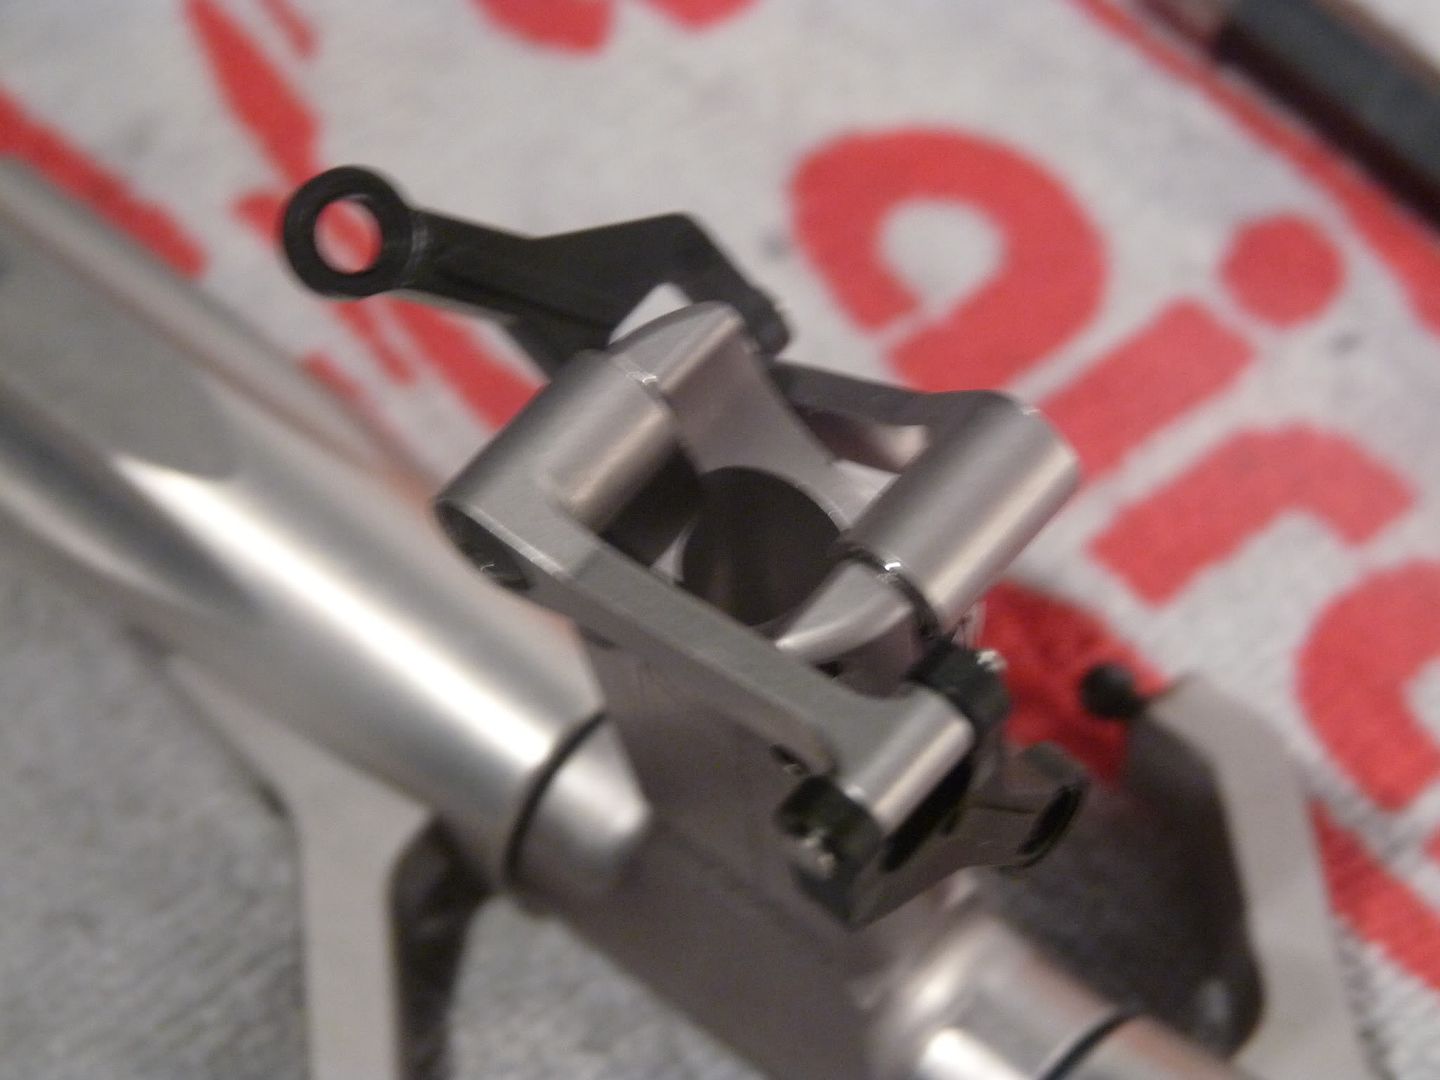 Next up is the pin that slots into the shaft... A Jesus Pin if you say so. Tip Install the pin that has the rounded edges first. Then loctite the screw and install. Becareful not to tighten the screw too much the head rounds off on the grub! 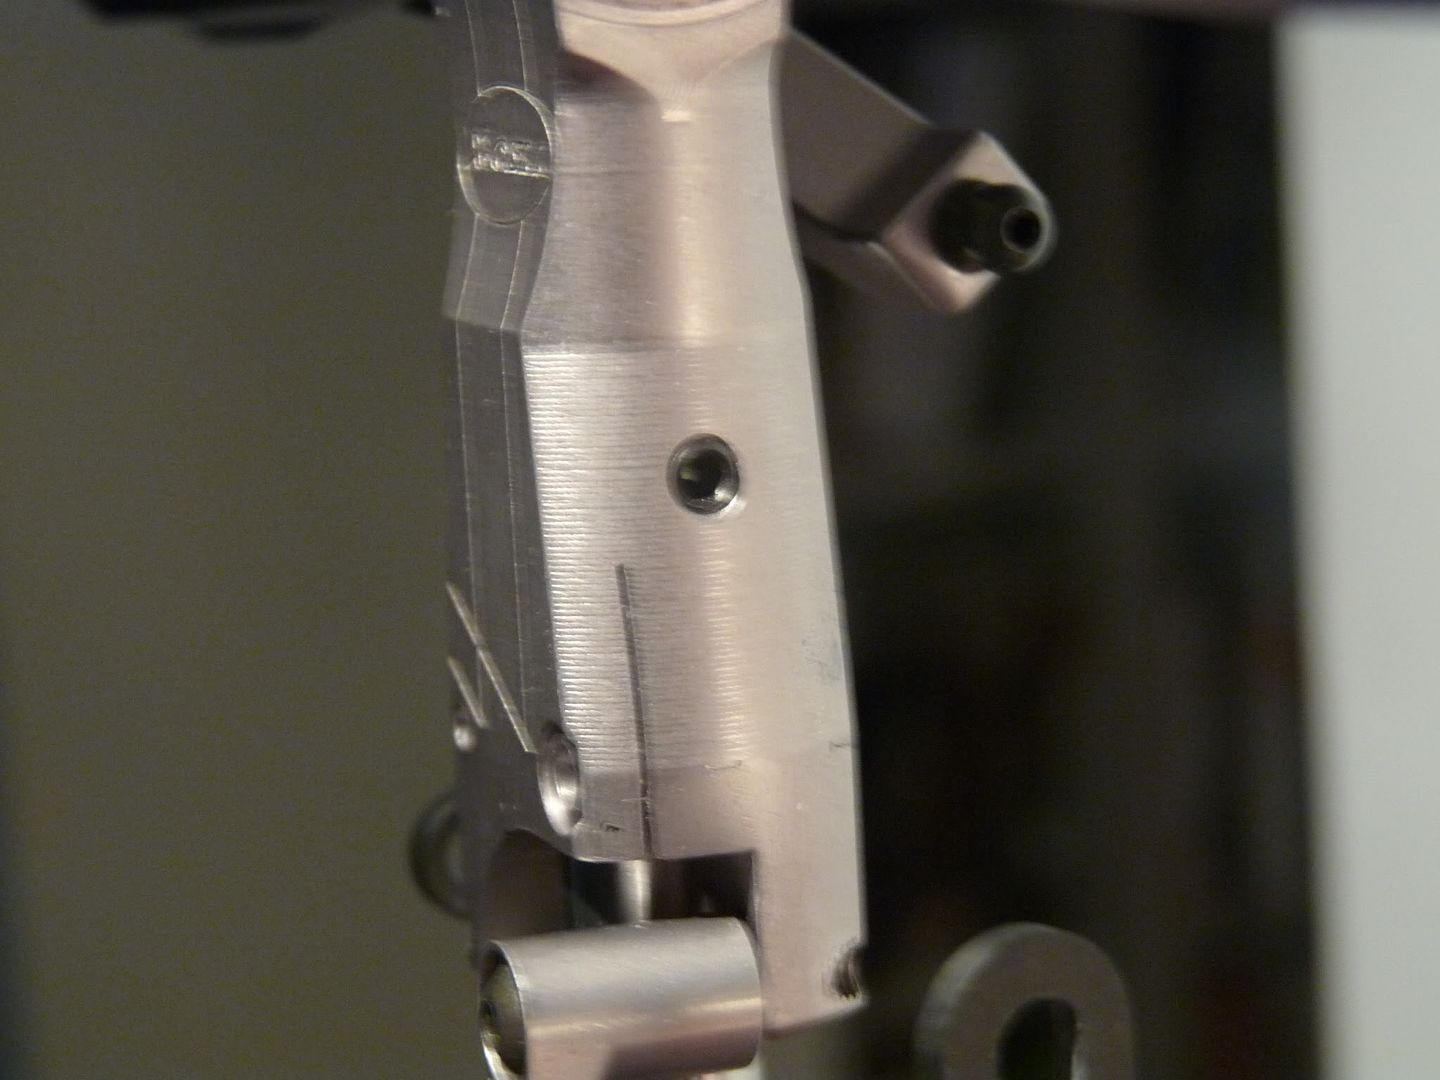 I forgot to take pictures of the making up of the blade grip linkages, But.. I doubt this is a biggie! Anyways.. This concludes the assembly of the head and the helicopter! 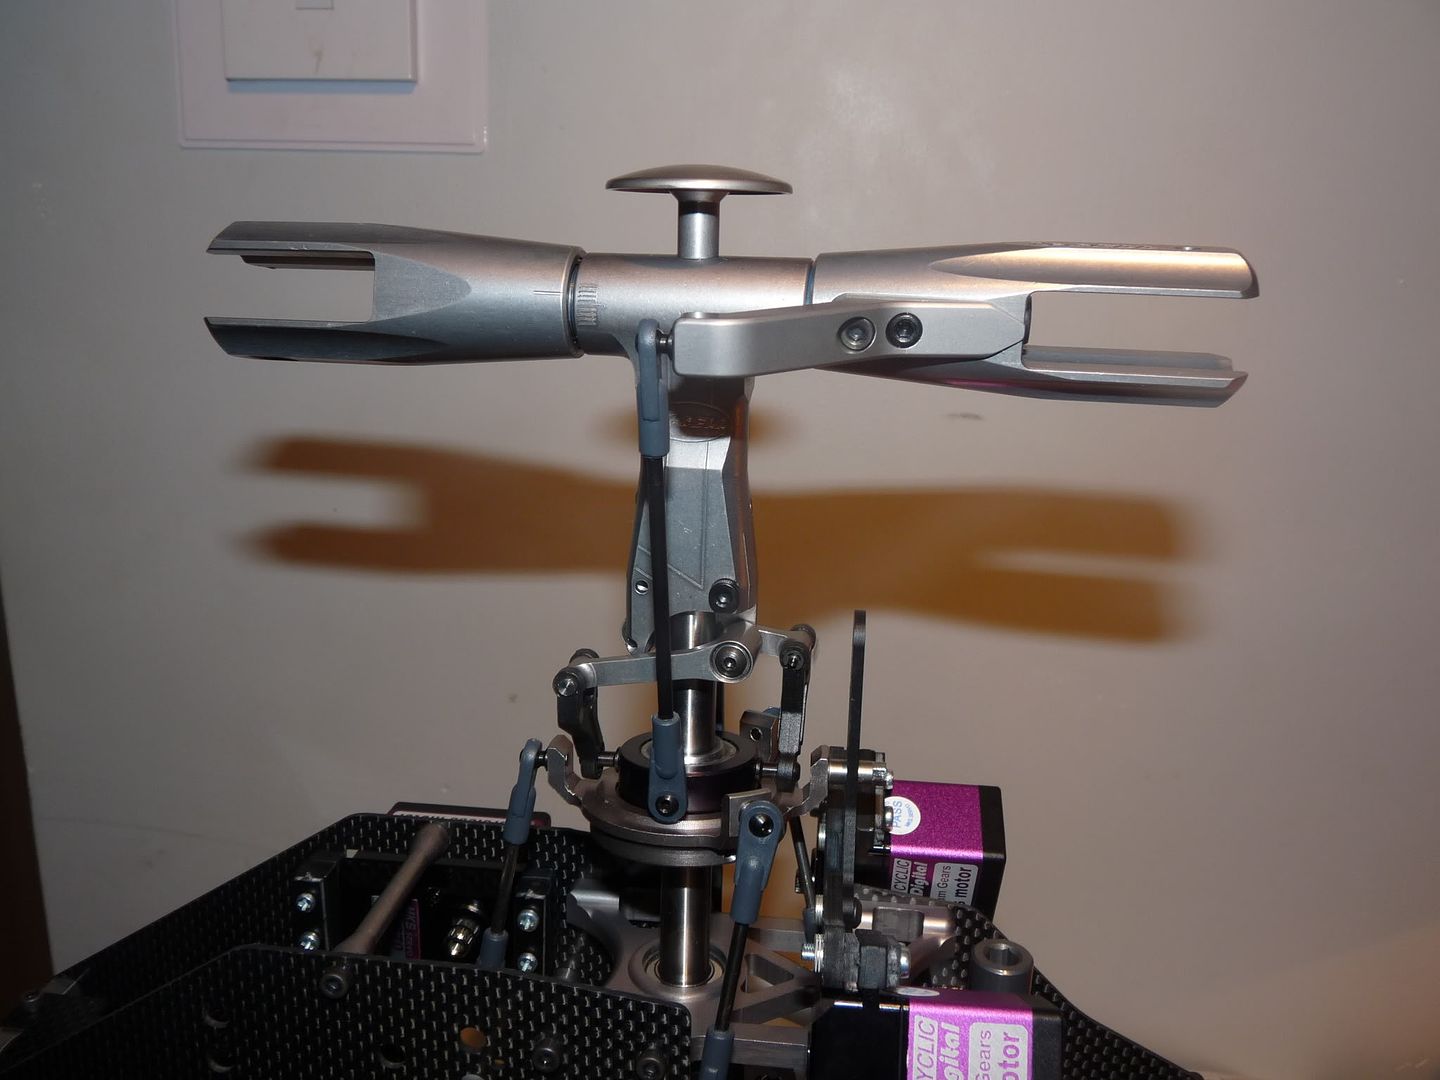 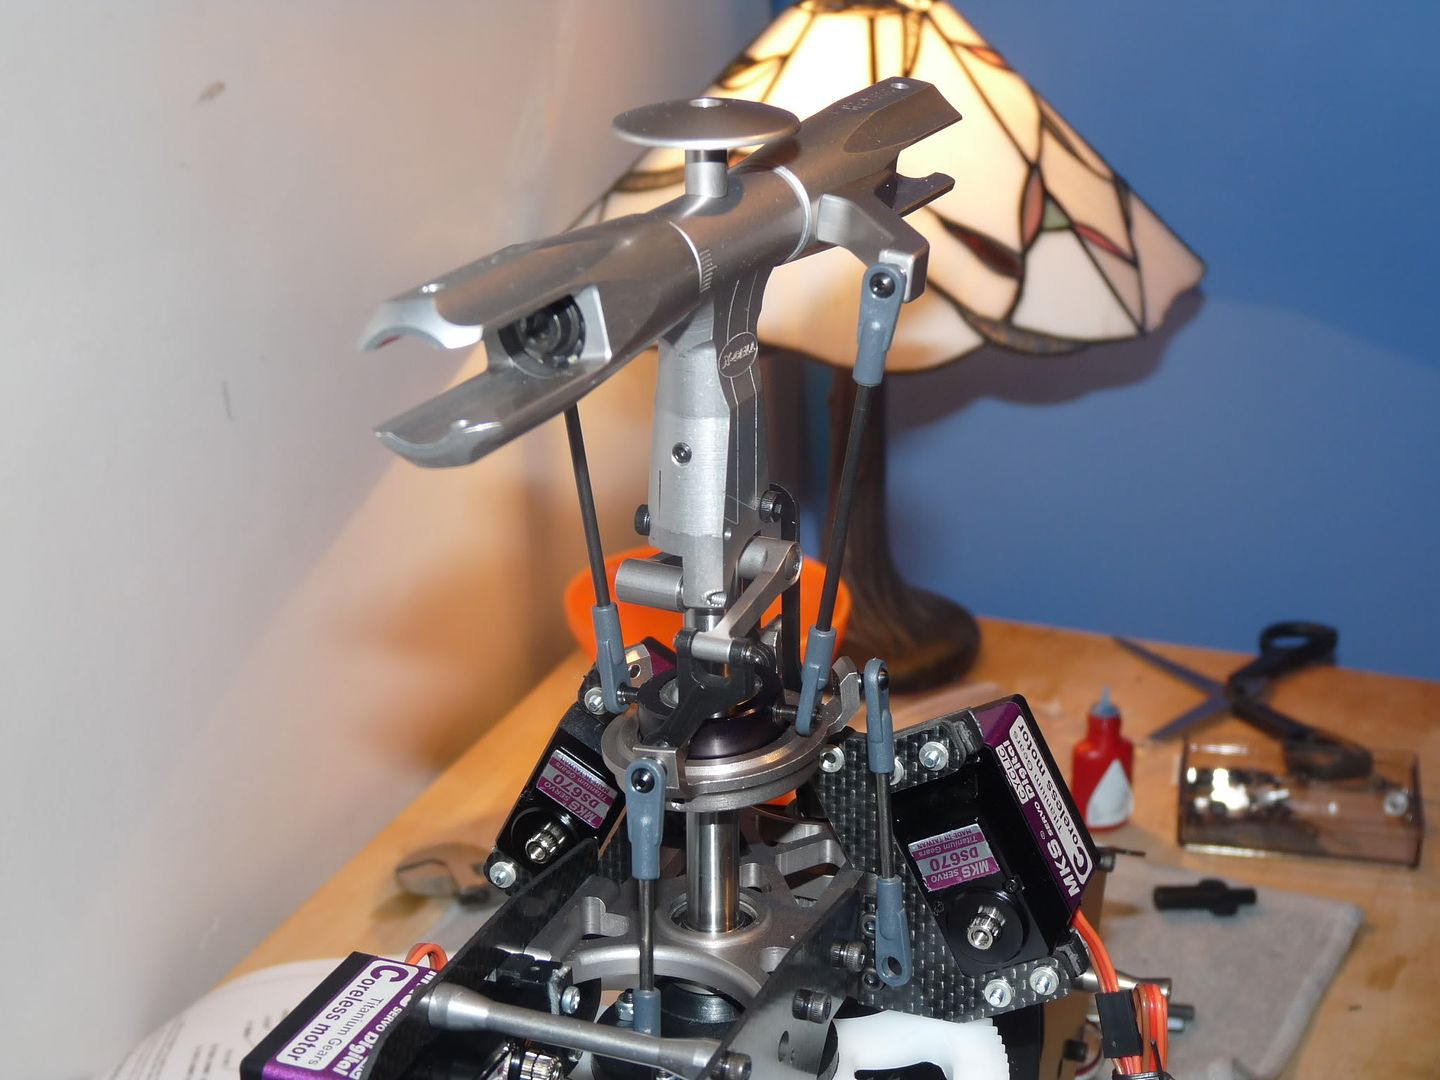 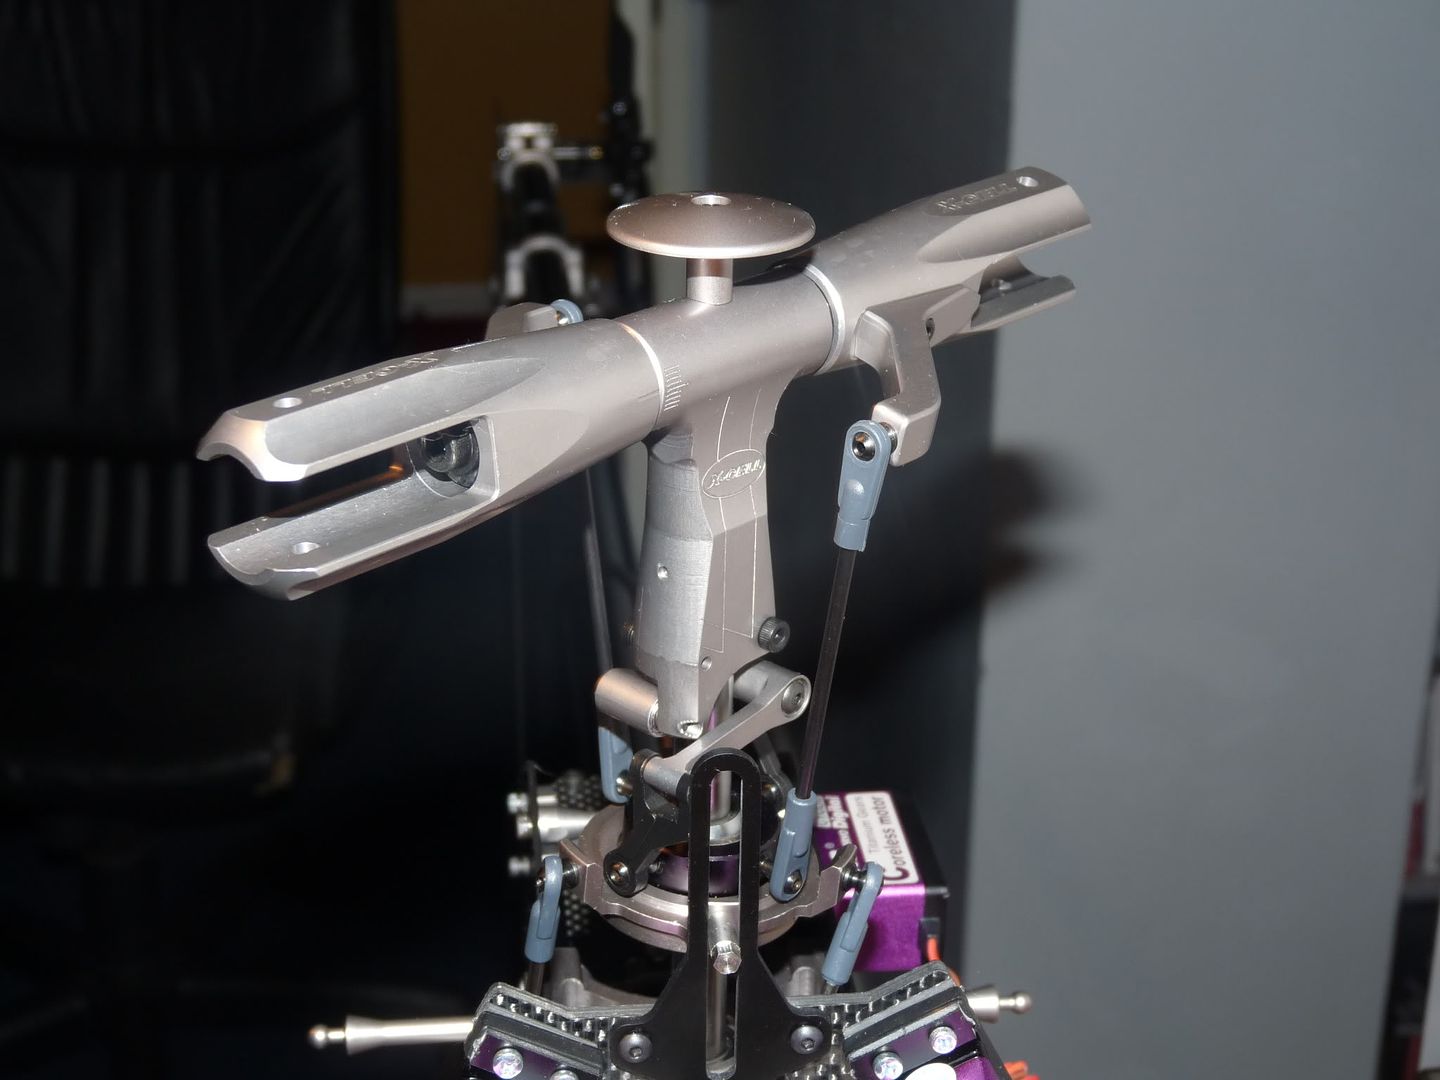 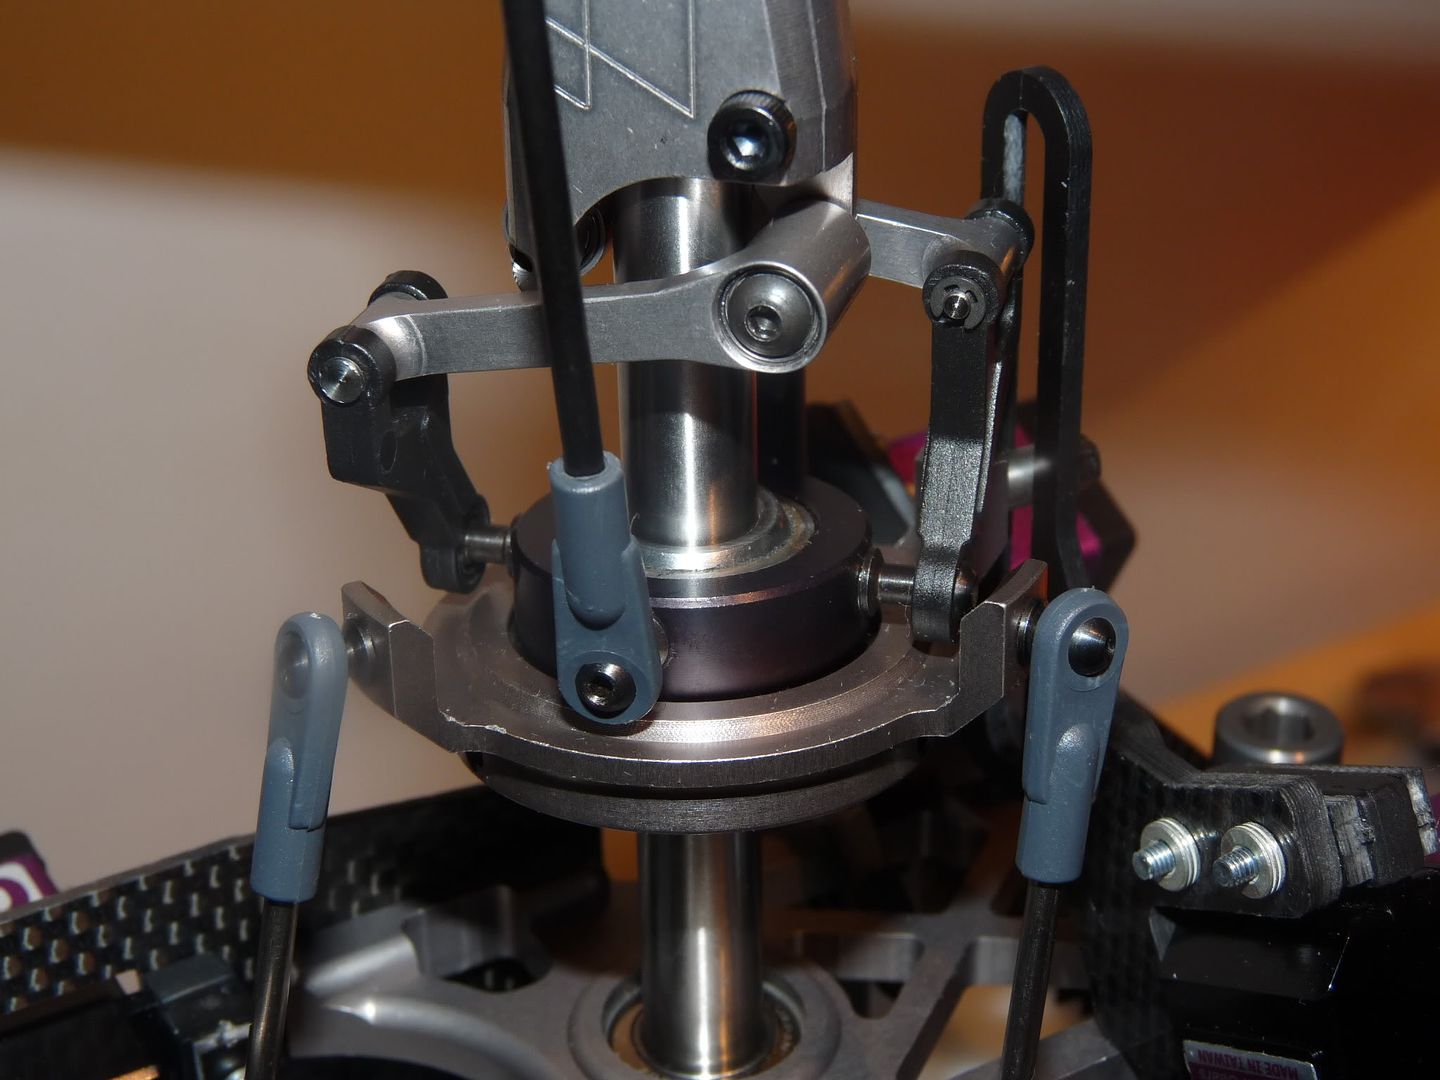 Next.. The Canopy! |
|
|
|
|
01-19-2011, 08:51 PM
|
#56 (permalink) |
|
Thread Starter
Join Date: Sep 2008
|
This is the last step of all! (Apart from the setup of course) Time to prepare the canopy! I always leave this to the end of the build. Even if the manual states to do it earlier on. First up, Making up the lower canopy thumb screws: [IMG640]http://i280.photobucket.com/albums/kk198/Nf650i/Fury%2055%20Review/Bag%206/P1020281.jpg[/IMG640 Simple loctite screw in the screws to make up the thumb screws: 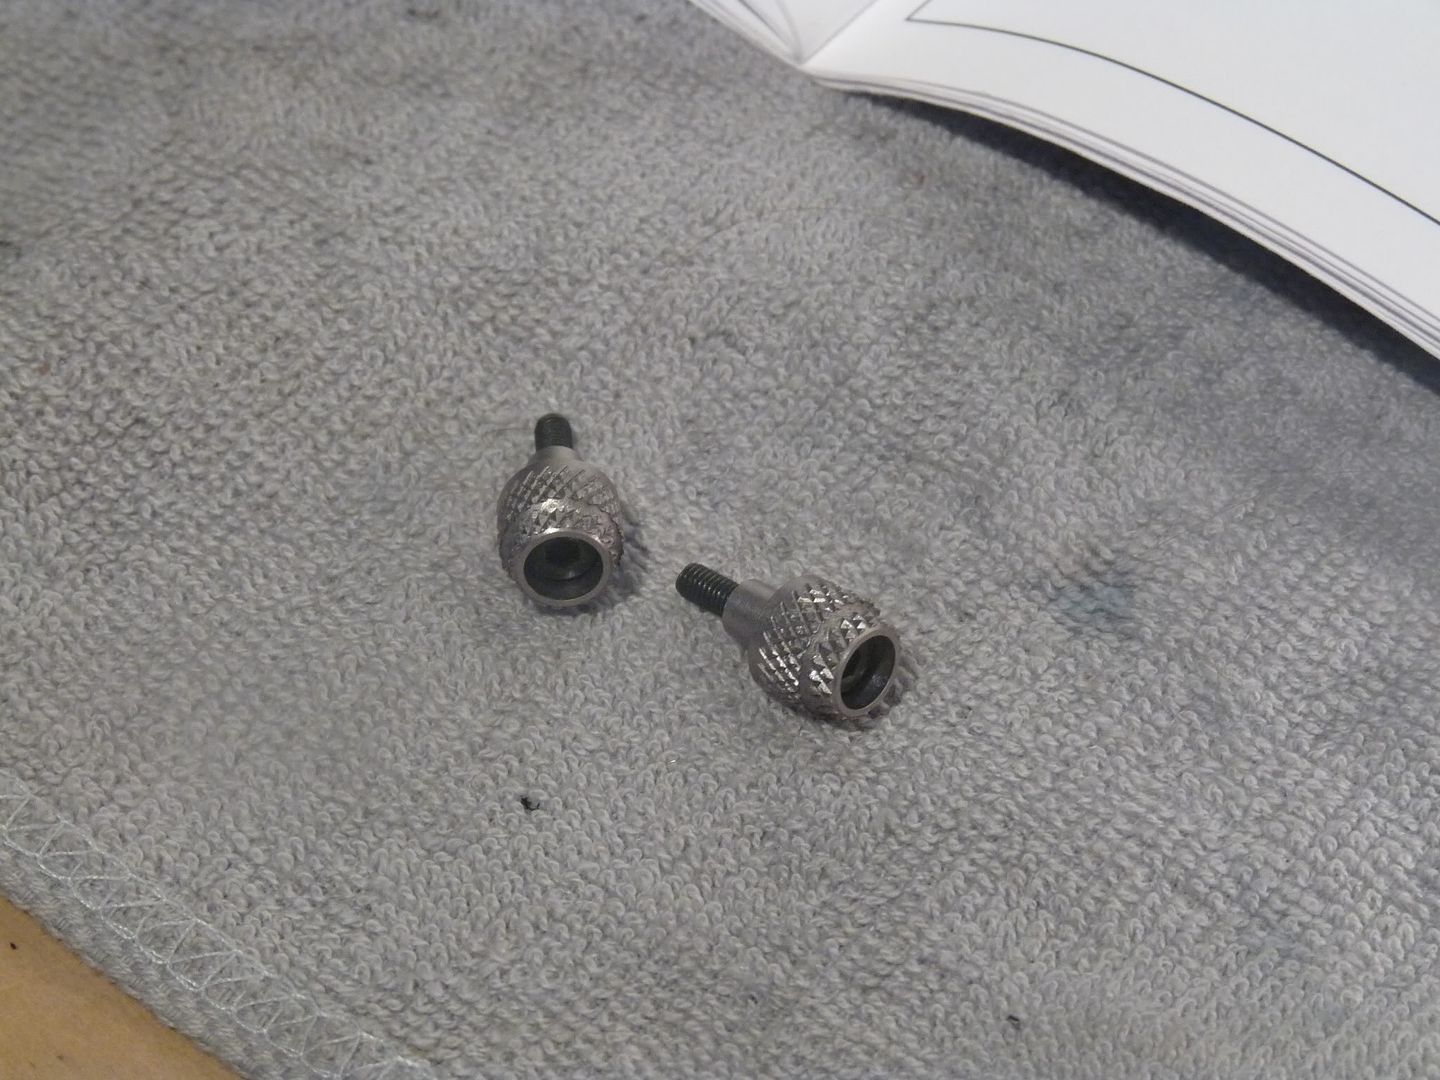 Glorious Canopy! Ready to be grommitised! 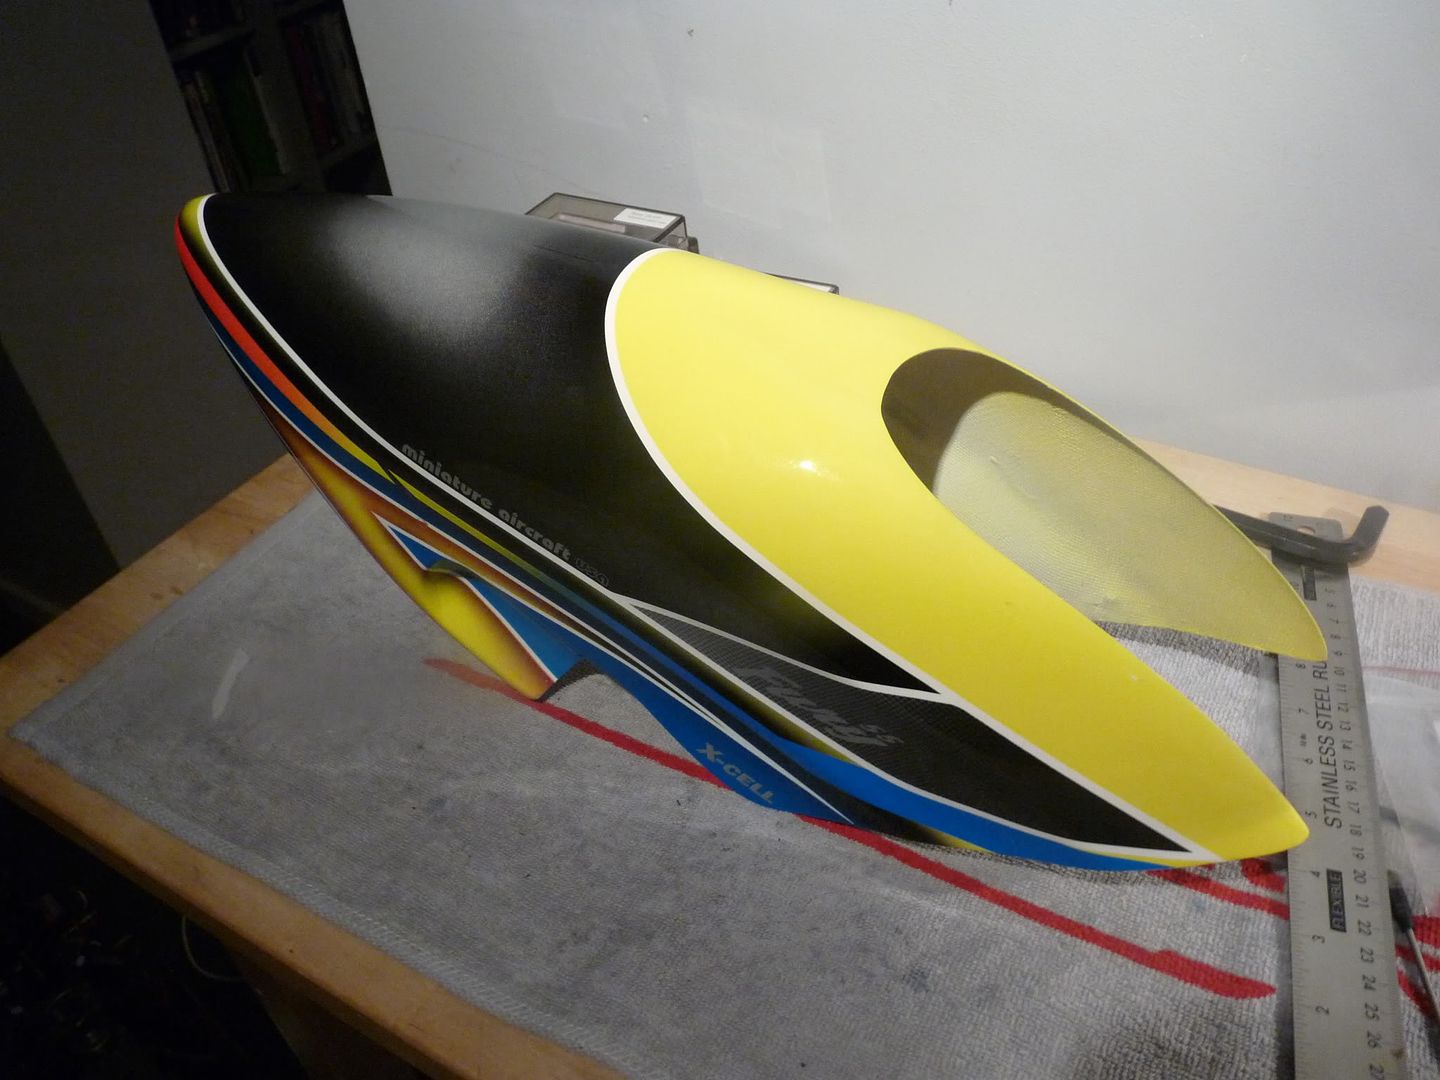 Note, Becareful when reaming out the holes for the canopy. Else you might damage the paint work and/or cause a mis-alignment. Grommits Installed 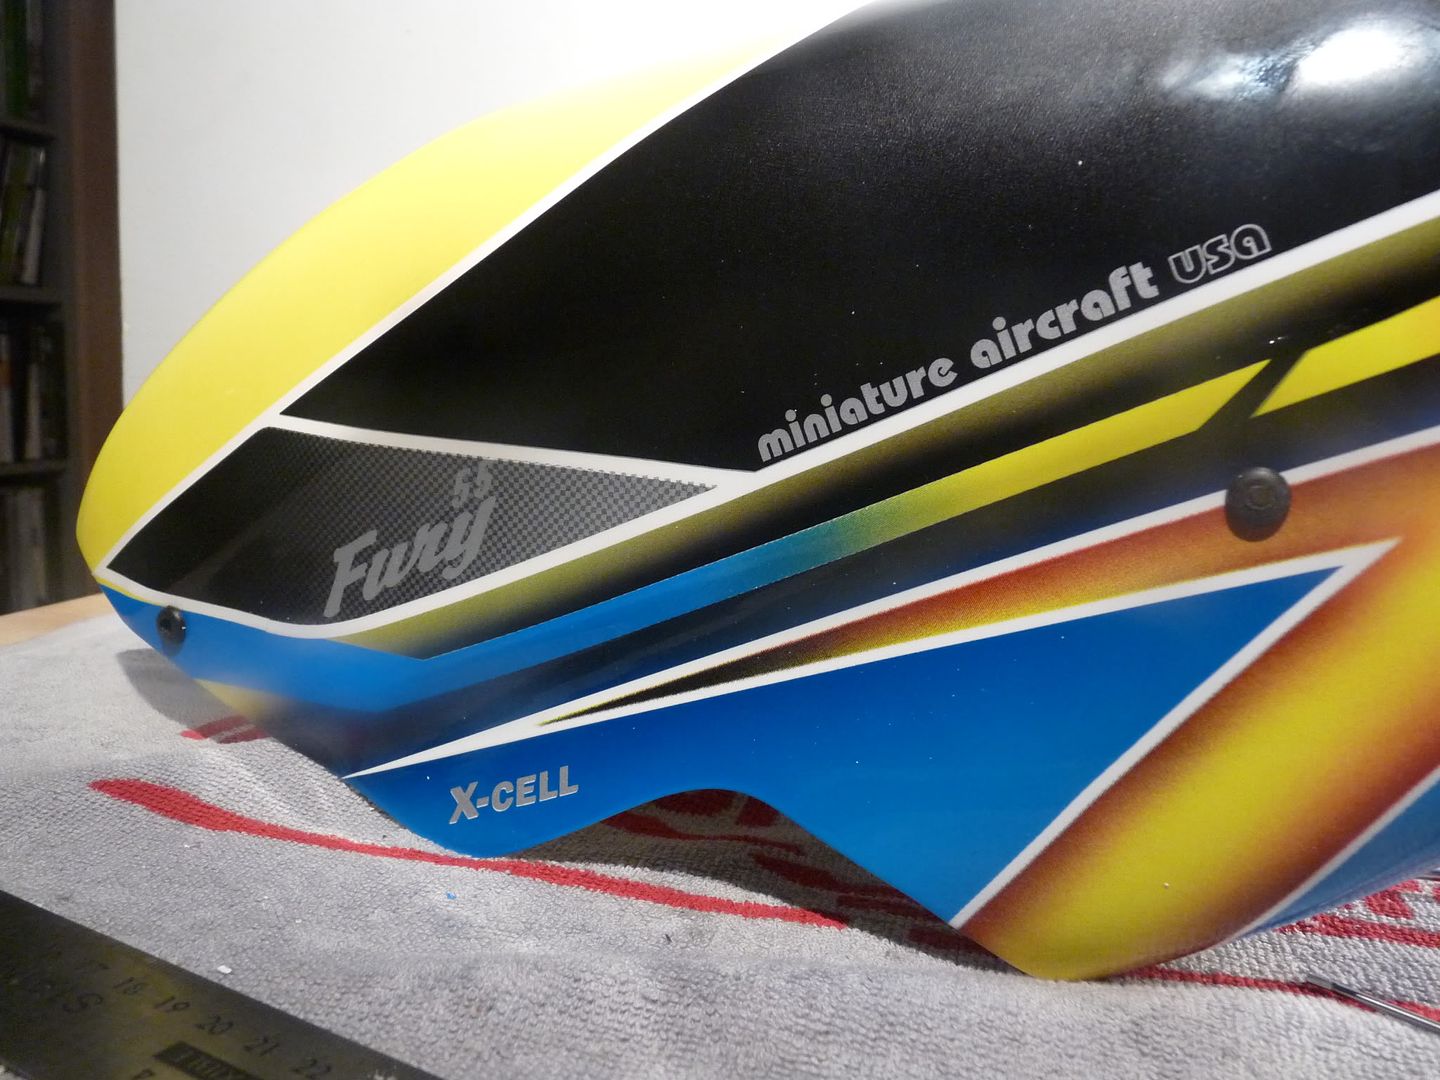 Good Alignment: 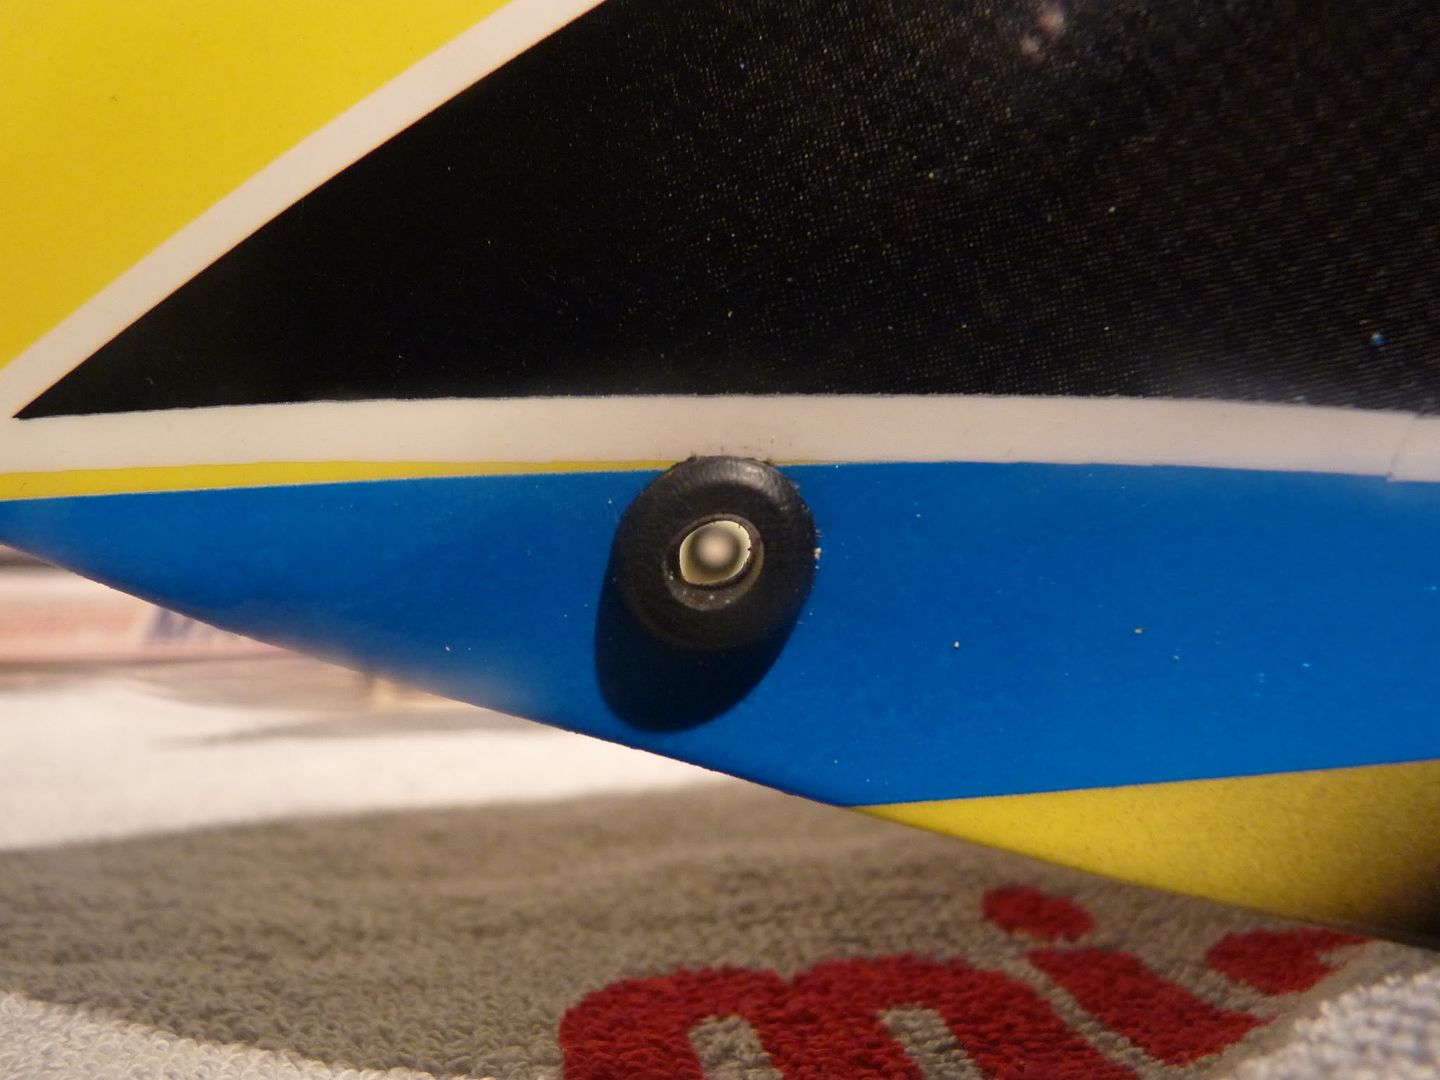 |
|
|
|
|
01-19-2011, 08:56 PM
|
#57 (permalink) |
|
Thread Starter
Join Date: Sep 2008
|
That's it ladies and gentleman, This concludes the airframe build! What a pleasure it's been to work on such a model! Build Report after this post! However, Take a look at the final pictures: 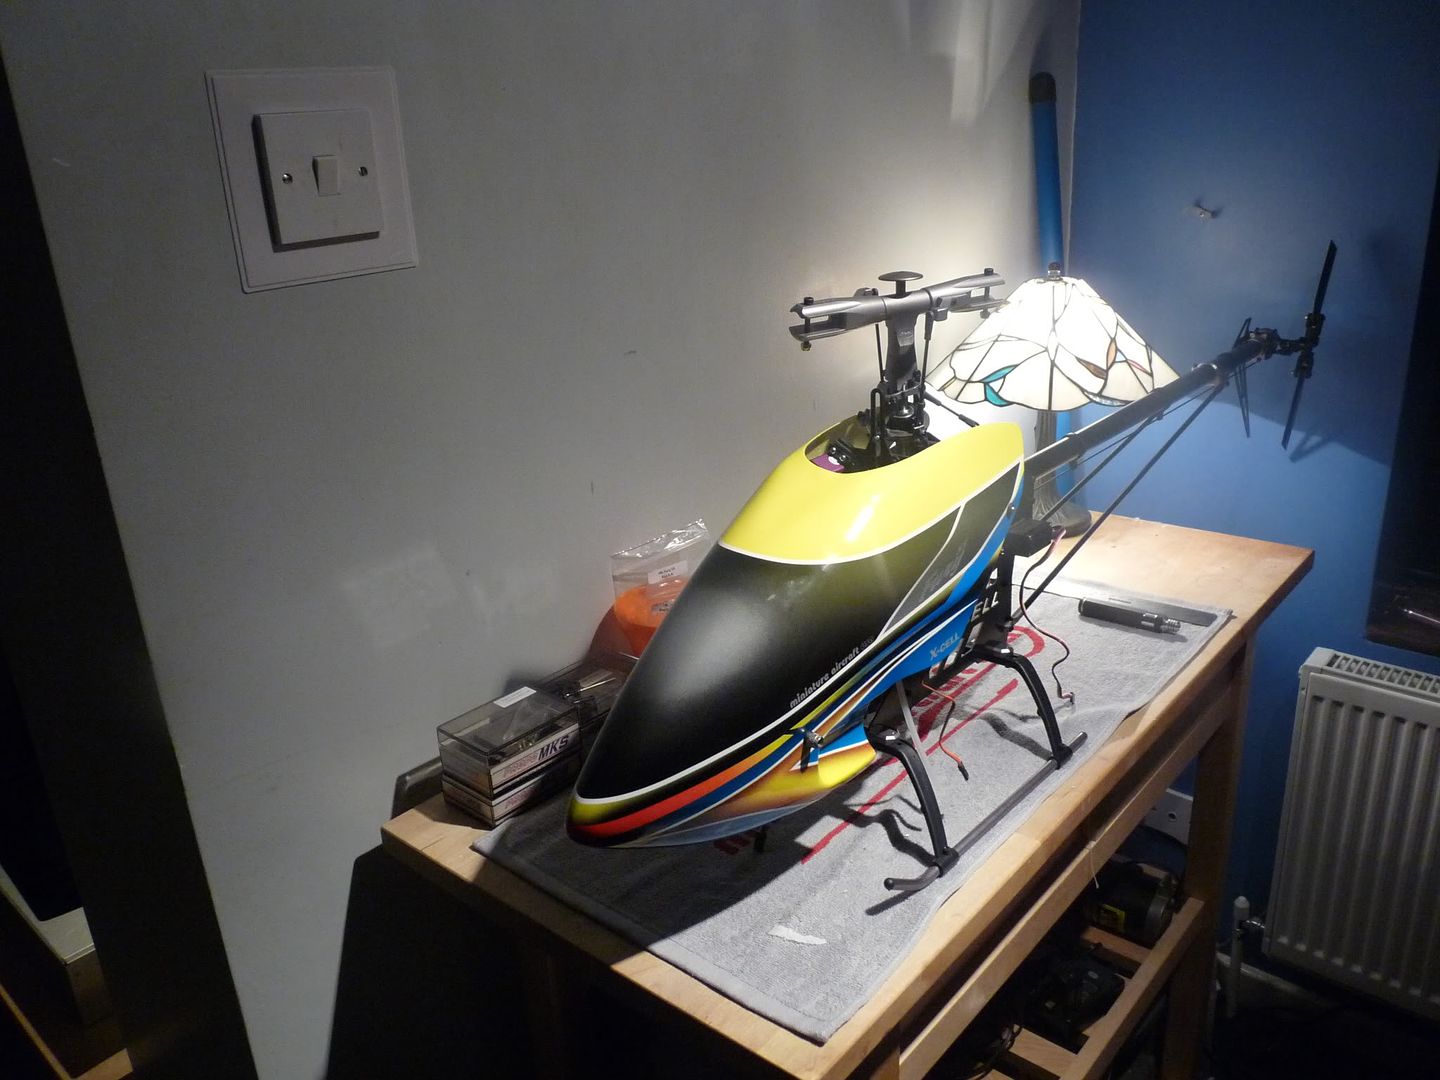 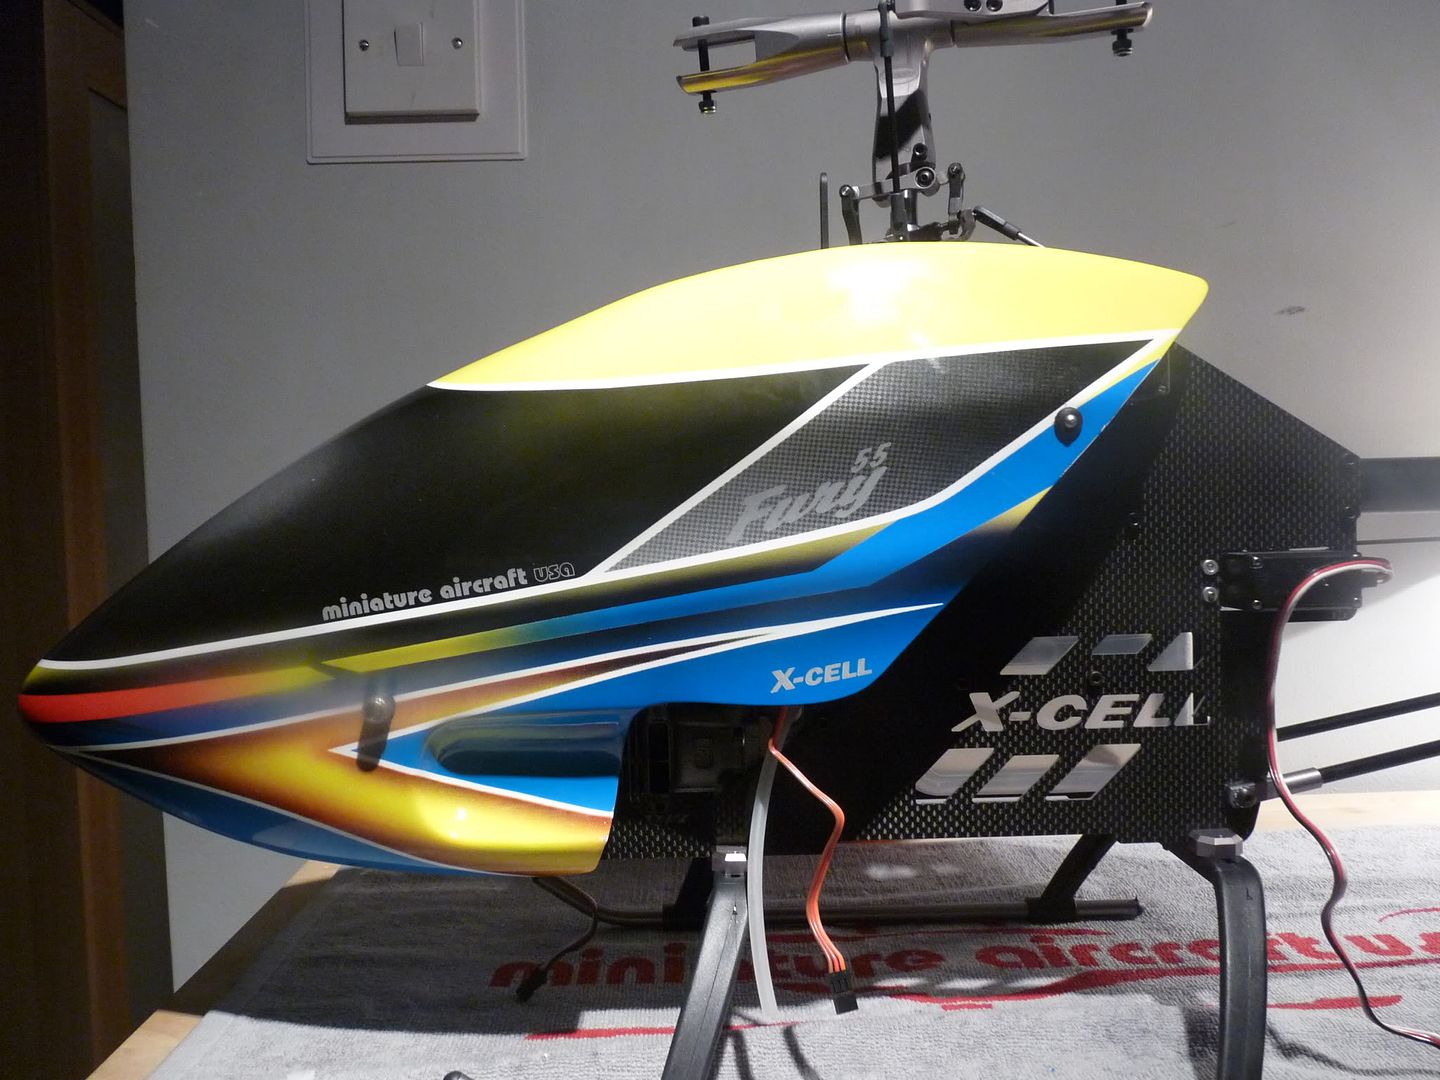 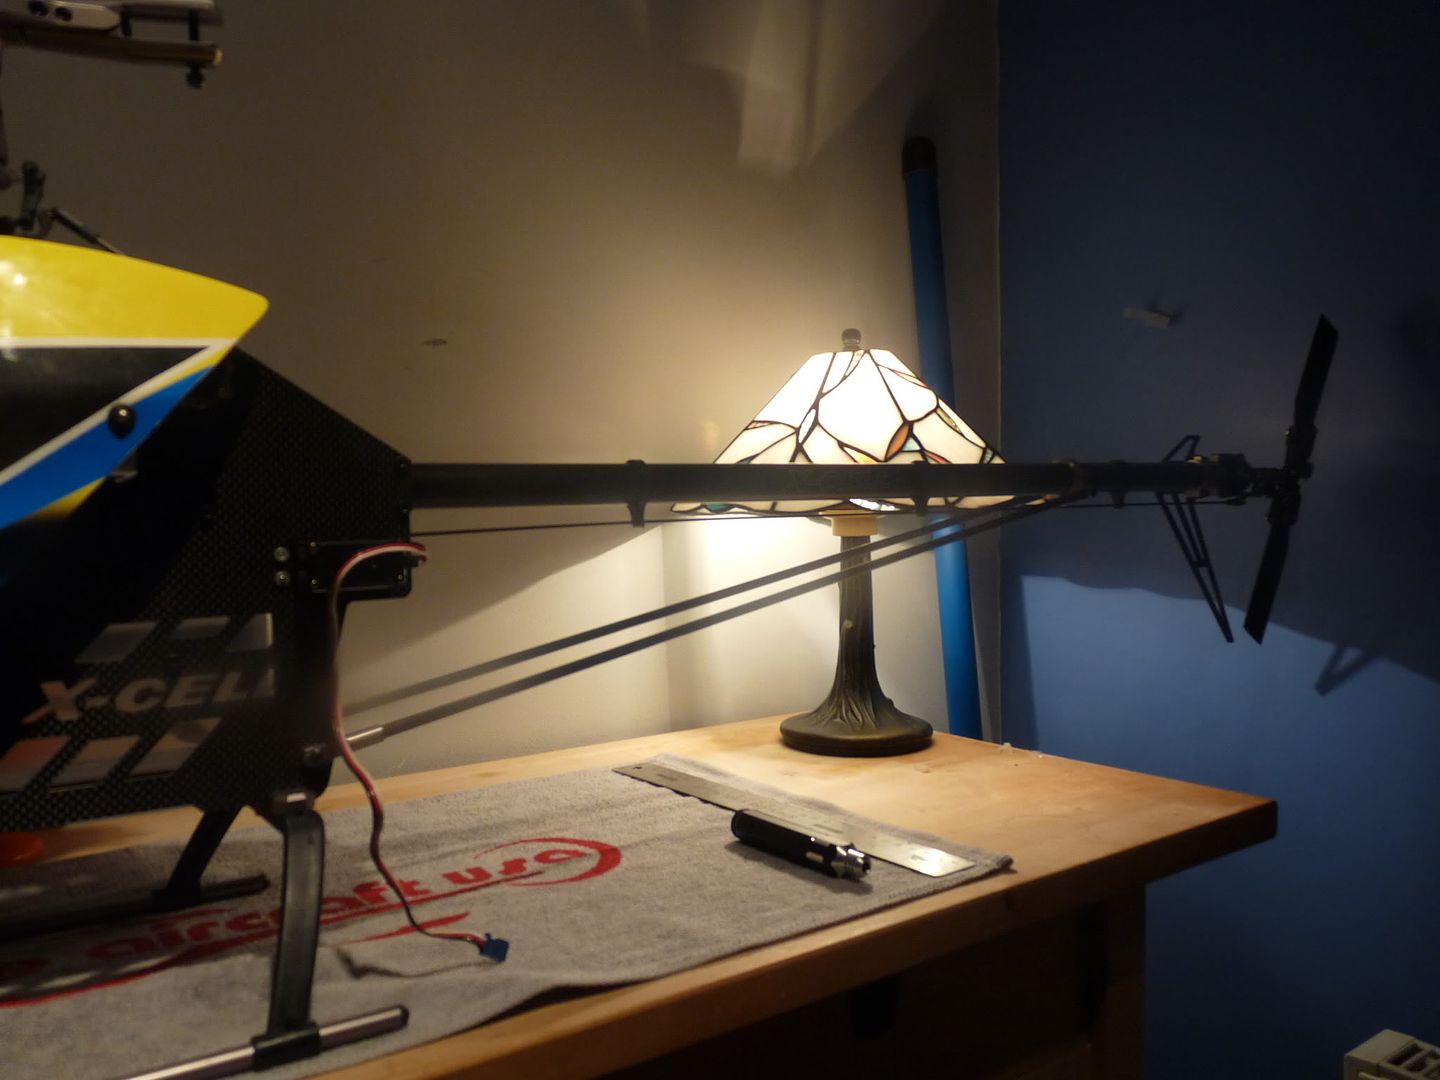 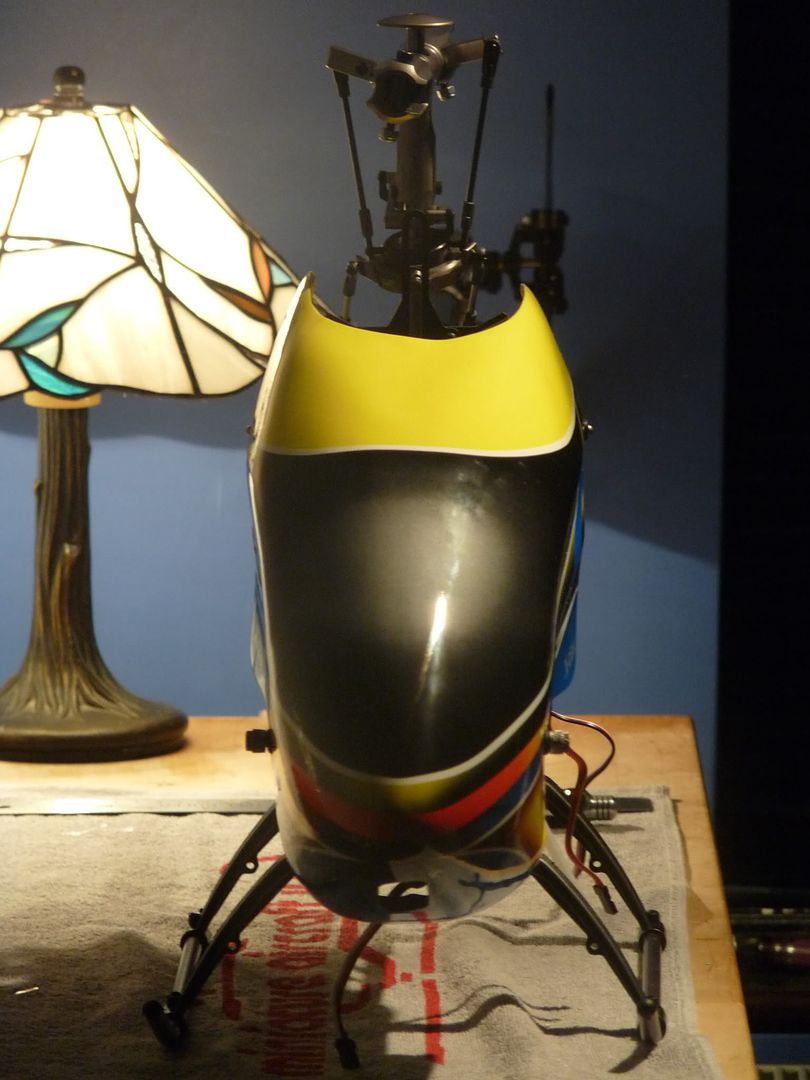 Next up is the Build Report, and Brief Setup (No In-Depth) |
|
|
|
|
01-19-2011, 09:13 PM
|
#58 (permalink) |
|
Thread Starter
Join Date: Sep 2008
|
Build Report / Overall: Well, Over the past week I have building this machine.. a machine it is indeed. It has by far been the easiest build ever. Everything goes together perfectly, and work's in harmony. I'm really finding it hard to find a fault with the build process. It's just been so smooth and a pleasure! Now, onto some not so keen bit's The Manual - It's a great quality manual. However, MA has made some changes and the one I recieved a few bit's are wrong or missing (Currently not mention of tail belt tention). So Always download the latest manual during the build. Servo Screws - I'ts more of a personal preference, But would have liked to have seen hex instead of phillips. Servo Plates - Would have liked to have seen included servo screw plates for the throttle and tail servo, Screwing directly into the servo tabs with the screws provided gave me a few concerns - However, Solved by using my own. So, What's next? A few setup pictures demonstrating the use of the servo horn alignment tool Next after that... Maiden Video! and after that...? 3D Flight Video then.. Final Conclusion I hope you have enjoyed following this build thread as much as I have had doing it. |
|
|
|
|
01-20-2011, 04:11 PM
|
#59 (permalink) |
|
Thread Starter
Join Date: Sep 2008
|
I decided to do a little basic setup, Nothing in depth. Now I have gotten all my electronics installed I just need to route my sattilite RX's Picture: 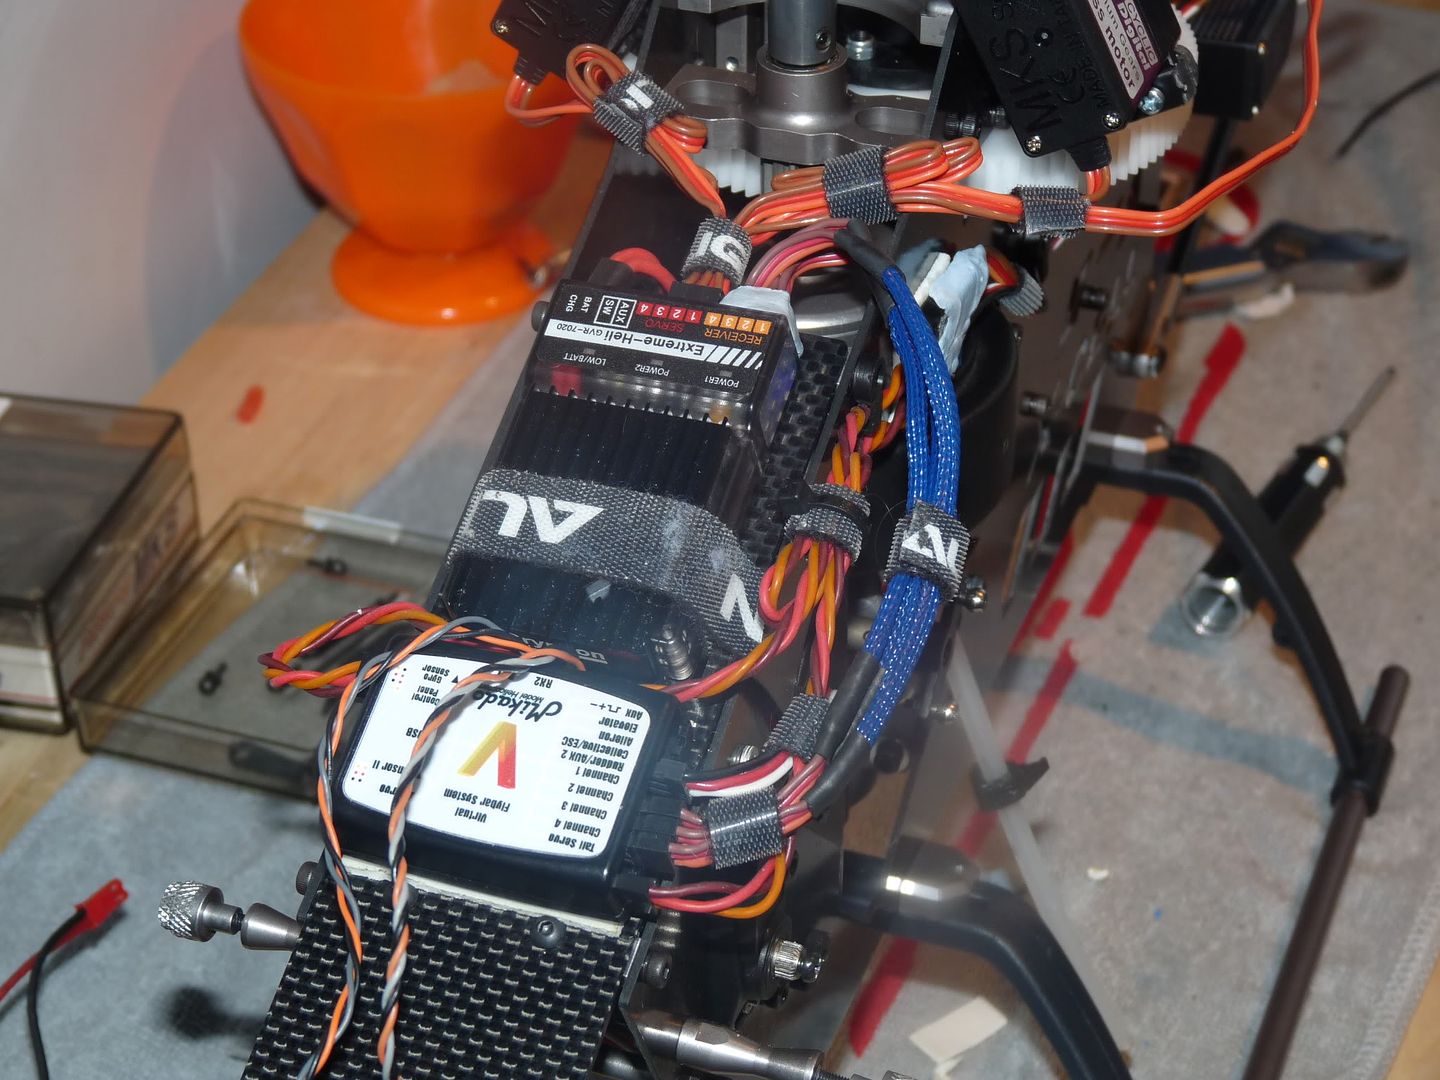 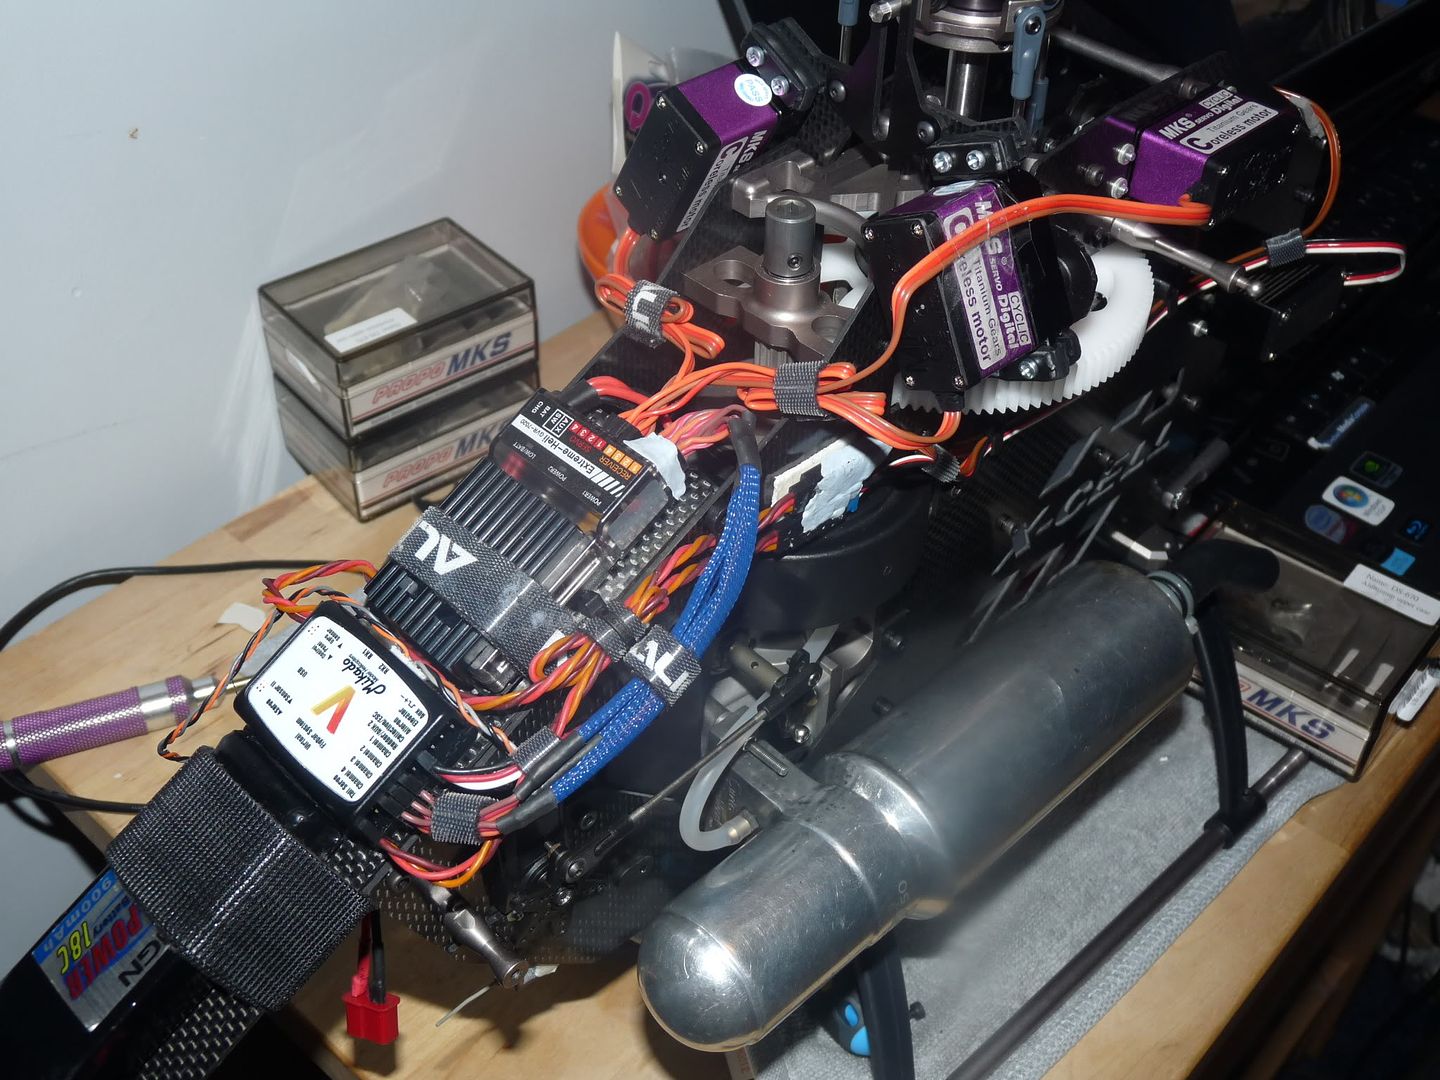 The tool included to get the arm's 90 degree's is pure innovative thinking! and make's life alot easier when setting up! (Right Click > View Image for full resolution) 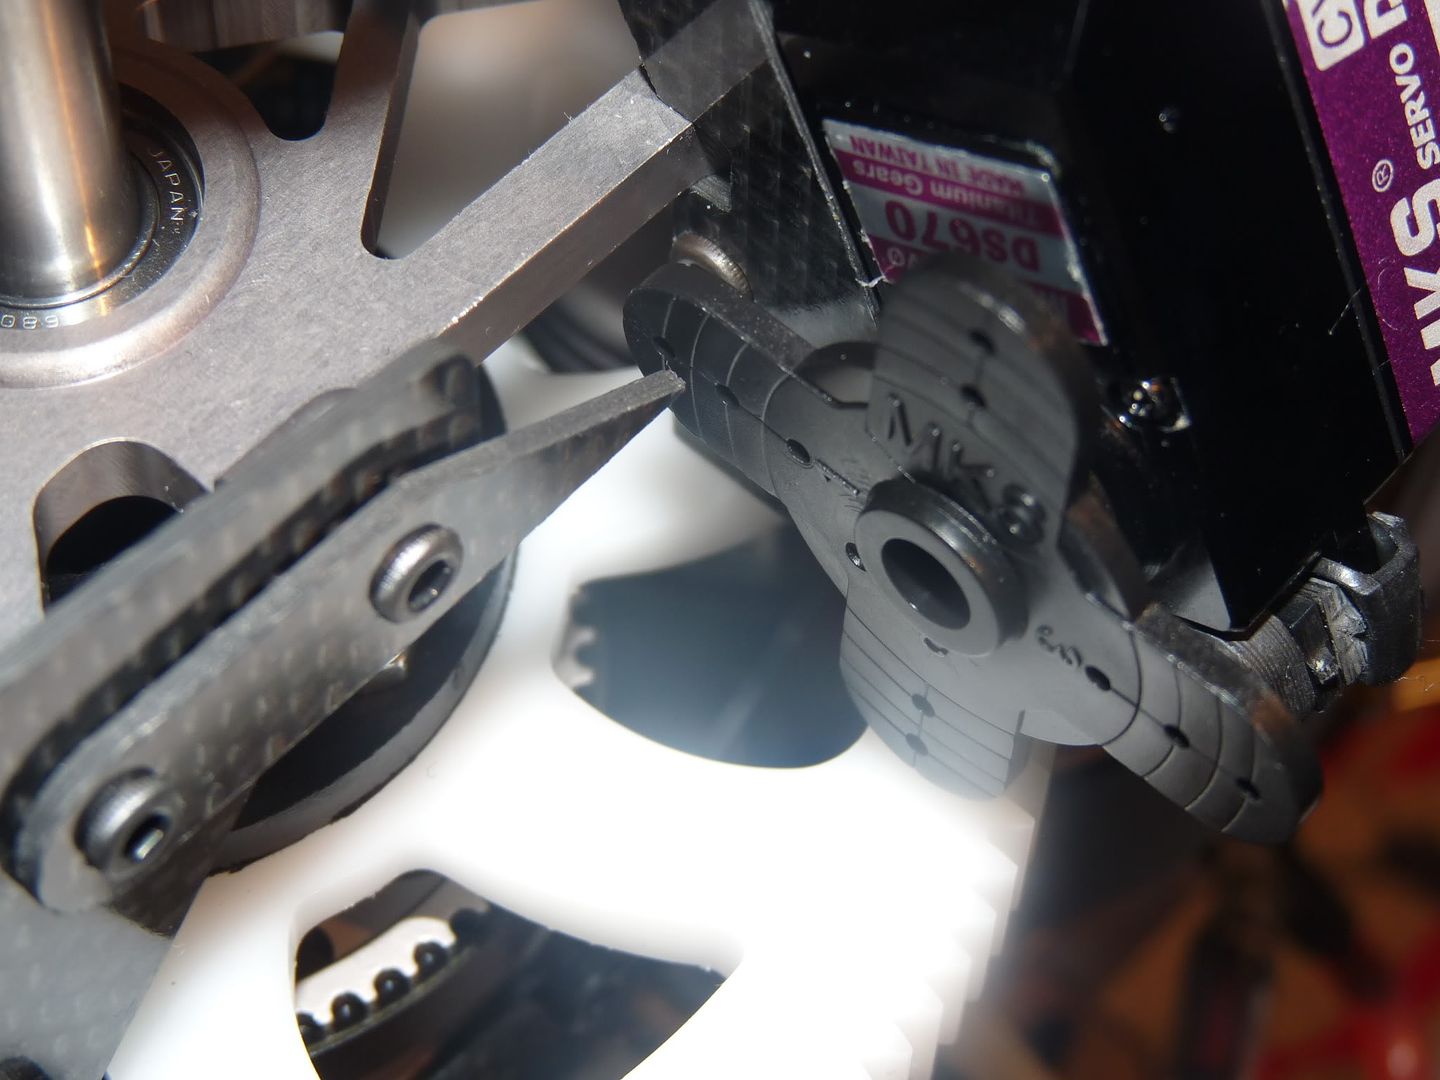 As you can see here, with the drawn on lines a perfect 90 degree's  Next we move onto the head setup please see below 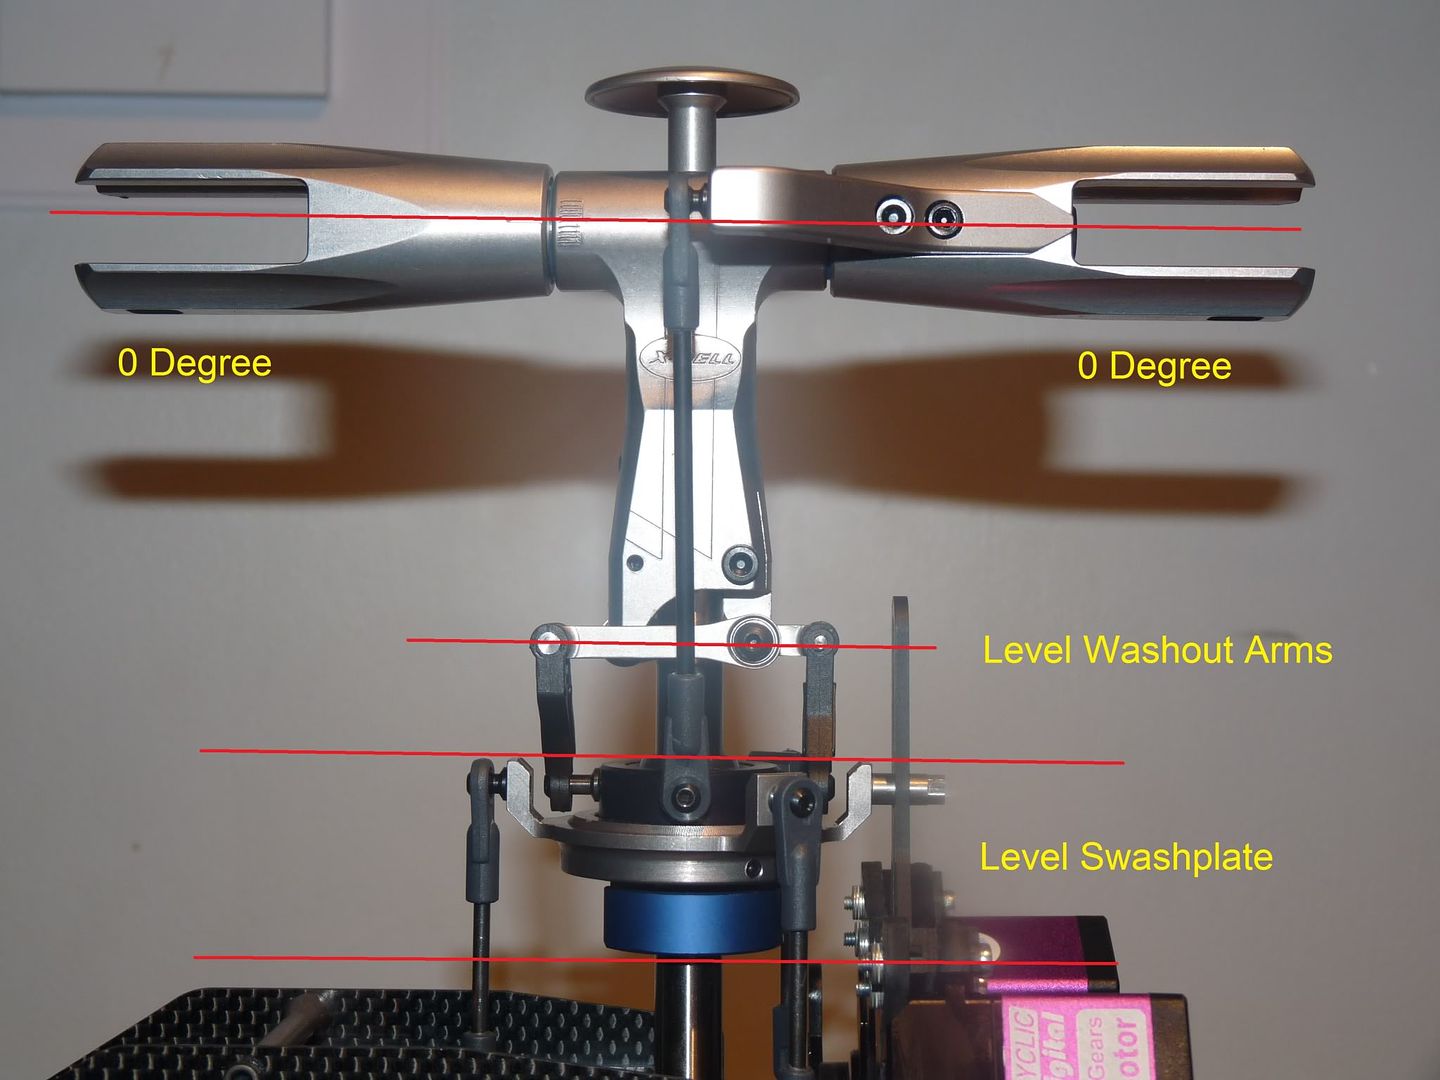 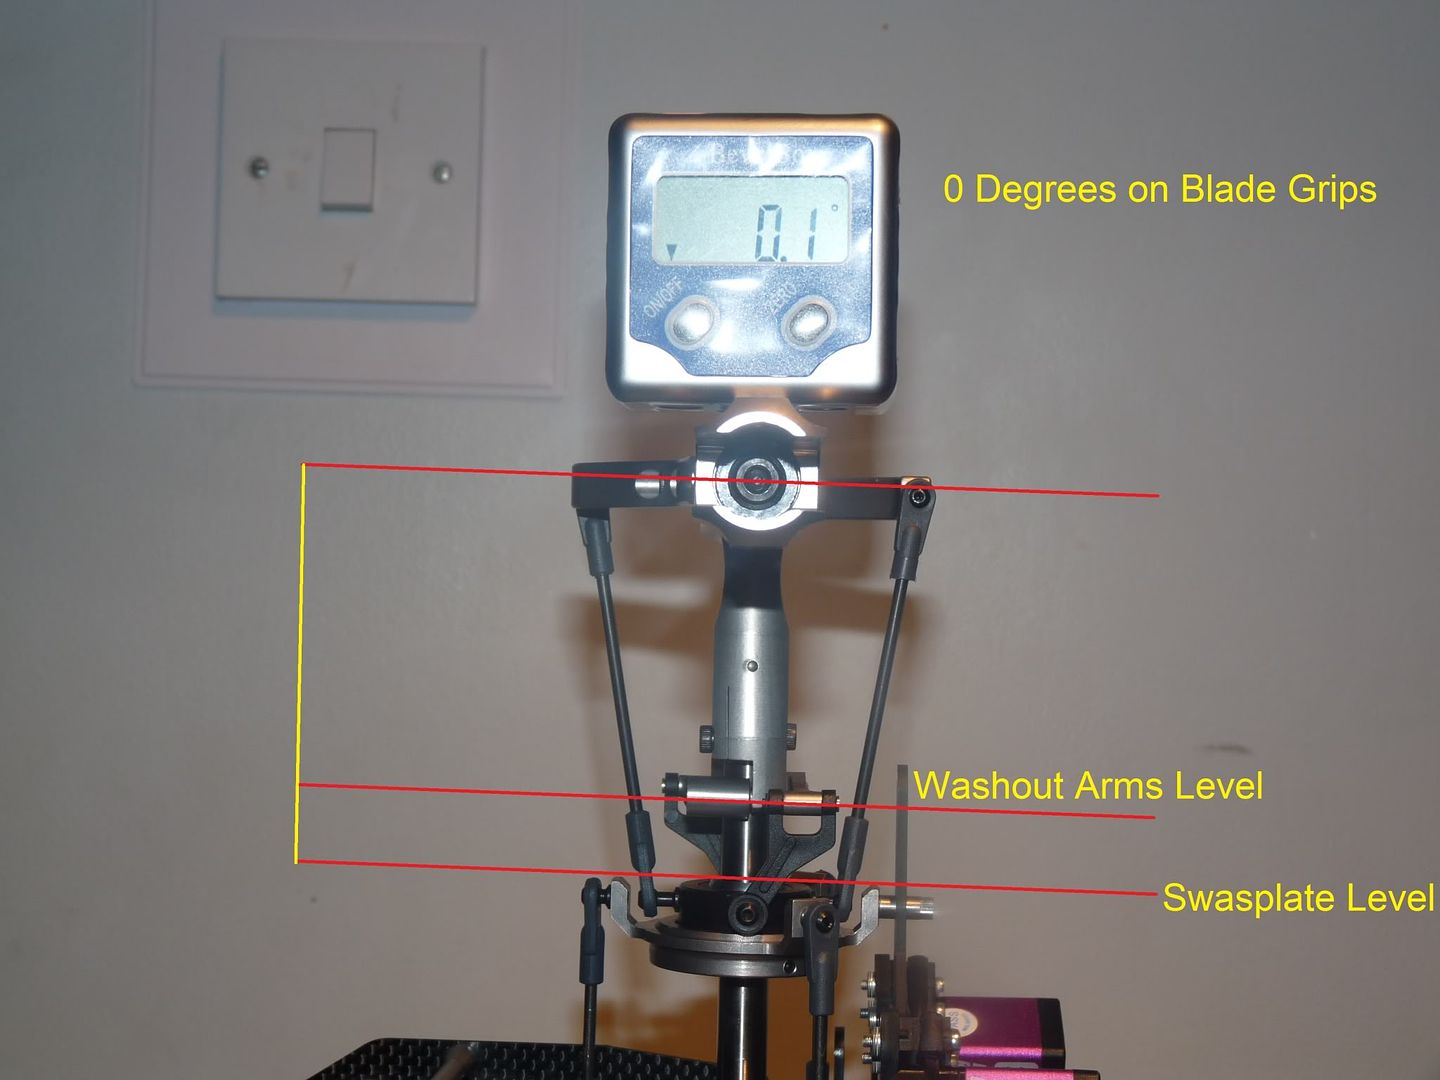 Stay tuned for the Maiden Video! |
|
|
|
|
|
|
«
Previous Thread
|
Next Thread
»
| Thread Tools | |
| Display Modes | |


 Linear Mode

|
|


