| START HERE |
|
| Register | FAQ | PM | Events | Groups | Blogs | Calendar | Mark Forums Read |
|
|
|
Unregistered
|
||||||


|
|
 |
|
|
LinkBack | Thread Tools | Display Modes |
 02-06-2015, 08:15 AM
|
#1 (permalink) |
|
Registered Users
Join Date: Feb 2006
|
Hey everyone!
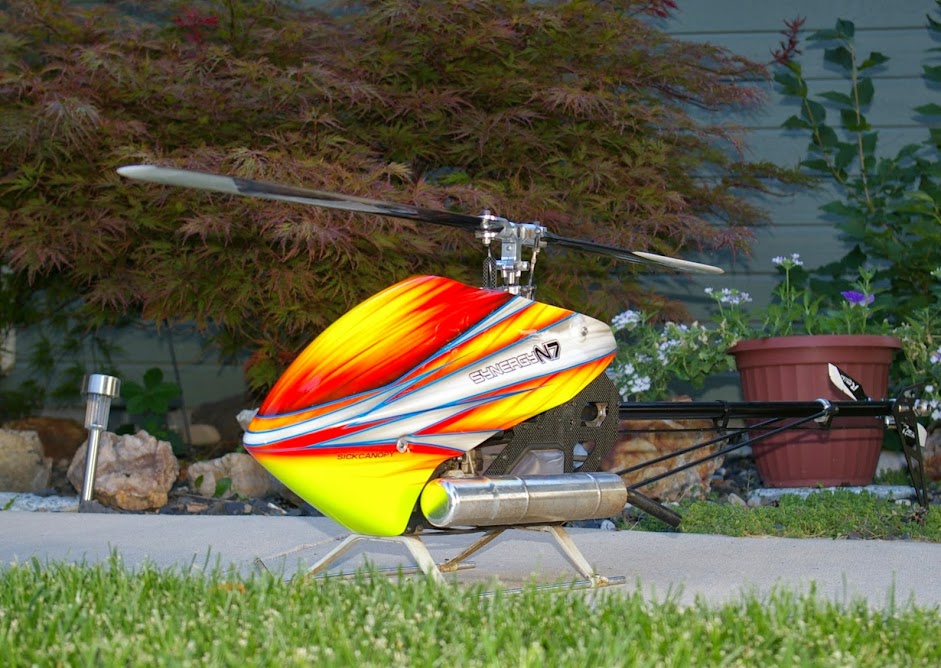
I just bought my first Synergy heli, the N7. It was a hard choice replacing (shelfing) my Team Heliproz Nitro Whiplash, but with MA & Heliproz out of business and no parts anymore...it was time to find another nitro heli. After some extensive searching and reading, I decided to try the Synergy N7 heli. I'm excited to get this heli in the air! I received my Synergy N7 a couple of days ago and started the build. So far everything is going good, a little on the slow side for me as I have little time to really dig into the heli.So right now, I have a bunch of parts and a stack of carbon fiber just sitting on my work bench...it doesn't look like anything, anything resembling a heli...LoL! Tonight...it will build into a heli! I'm in the process of sanding the edges on the carbon fiber...and I have all day tomorrow (Saturday) to see how far I will get! I found a canopy for my N7 (Synergy N7-3 on RR site). Its from Sick-Canopy. I really like the color scheme!
__________________
"I love the smell of Nitro/Gas in the morning!"  Citizen 654 |

|


|
| Sponsored Links | |||
|
Advertisement |
|
||
|
02-06-2015, 08:46 AM
|
#2 (permalink) |
|
Registered Users
Join Date: Mar 2012
|
Congrats! That's my canopy, it looks sweet in person.
 BTW, Sick Canopy isn't taking any new orders until April. Check out http://www.helilids.com/ I know Alan is getting in a new shipment this weekend, too.
__________________
Team Synergy Field Rep, Rail Blades |
|
|
|
|
02-06-2015, 12:28 PM
|
#3 (permalink) |
|
Registered Users
Thread Starter

Join Date: Feb 2006
|
Yea...I know, however, I asked Shawn if I could be placed on a waiting list and someone had dropped out when I was asking. So I took his place, but it will be awhile.
__________________
"I love the smell of Nitro/Gas in the morning!" Citizen 654 |
|
|
|
|
02-07-2015, 11:31 AM
|
#4 (permalink) |
|
Registered Users
Join Date: Mar 2012
|
Nice! That canopy is very visible in the air. I like mine a lot.
__________________
Team Synergy Field Rep, Rail Blades |
|
|
|
|
02-08-2015, 07:23 AM
|
#5 (permalink) |
|
Registered Users
|
Welcome to the Synergy family! Let us know if you have any questions
__________________
Team Synergy, Team FBL Rotors Formerly Dyecocker1 |
|
|
|
|
02-08-2015, 04:36 PM
|
#6 (permalink) |
|
Registered Users
Thread Starter
Join Date: Feb 2006
|
Once all the subassemblies were addressed (loctite) and the edges on the carbon fiber were sanded, the body built up rather quickly. It wasn't long and I was installing the servos. I started the edge sanding shortly after work on Friday, and before I knew it, it was late and I was having a difficult time keeping my eye's opened!;D So it was off to bed. I stopped at installing the second cyclic servo as the MKS servos are too tall and hit one another. After texting my buddy Mark, he made mention (as I was thinking of the same thing at the same time) to add some spacers under the mounting tabs. But at the time I was installing them and discovered the problem, I was too tired to think clearly and was thinking of buying different servos to put in. Yep, it was time for bed!
Saturday, after my morning routine, I headed to the hobby room to continue with the build. I found the spacers needed to move the two servos out by 3/16" 'ish, the thickness of the metal servo hold down plates that comes with the kit. Then I received a text from Mark wanting to go out flying!!! I said "What???" Me: "But I'm in the middle of a heli build!" Mark: "Let's go flying!" Me: "ok" So we headed out. Once back home, we looked at my progress on the N7. Then we noticed I was missing one boom support! :o! I have two tail control rods, but one boom support. So after church today, I stopped at my local hobby shop and bought a carbon fiber rod that's very close to the same size enough to get me by. Out side of that I've noticed several areas in the build that Matt paid extra attention to. Like the length of the bolts holding the clutch to the fan hub they are long enough to go into the hub. In the past, I've built a couple of helis that used bolts that are only long enough for 4 threads going into the hub! 4 threads maybe enough to hold it on, but it won't last long. The general rule I've been told is 1 and a 1/2 times the diameter of the bolt, will give enough threads to hold properly. Me I like to use as many as I can short of bottoming out the hole but that's just me. Anyhow, it's time to build some more on my N7! I have some Spartan Vortex programming to do before installing the elevator servo!
__________________
"I love the smell of Nitro/Gas in the morning!" Citizen 654 |
|
|
|
|
02-08-2015, 05:12 PM
|
#7 (permalink) |
|
Registered Users
Join Date: Nov 2013
|
Awesome! Enjoy'n my first nitro & Synergy as well.
|
|
|
|
|
02-09-2015, 11:56 AM
|
#8 (permalink) |
|
Registered Users
Join Date: Feb 2014
|
Congrats on your N7! You're right, Matt does take extra time to really think through these builds. The engineering put into these machines are fantastic! Keep us updated on your progress!
__________________
Matt Team Synergy - Xpert Servo Rep Synergy E7SE - iKon V2 - Xpert Servos / Synergy N5c- iKon V2 - Xpert Servos / Synergy E5 - iKon V2 - Xpert Servos |
|
|
|
|
02-10-2015, 10:18 AM
|
#9 (permalink) |
|
Registered Users
Thread Starter
Join Date: Feb 2006
|
Here's an update as to what I've done and where I'm at! It's a little lengthy...
My Synergy N7 build Ok, so here we are at the beginning of February and I have a new heli to build! I received my Synergy N7 from Experience RC. There shipping is very fast! I ordered the N7 Thursday night as Experience and Helidirect were the only two shops that had one in stock. I clicked on the Add to basket button on Helidirect, and the site crashed! So I ordered the N7 from Experience. Tuesday, it was at my door! I was expecting it like Wednesday/Thursday time frame The build begins I opened the box and pulled everything out to look at. Then it was time to fire up the MacBook Pro to print out the manual. Right in the middle of the print, the printer ran out of ink?!!! Great! No problem, I have a spare cartridge. I finished the print and headed off to start building my N7 finally! The manual has you start with the fuel tank. It looks like an Align tank for one of the Trex 700 V2 helis (I have the Trex 700N heli, just havent looked at it to compare). So the tank builds up like any other tank vent, feed line, clunk, etc. Next is the landing gear. For the most part, the landing gear is assembled like most except for the tube locks? They are something like a frame spacer, but only one inch long with a threaded hole through the center and a threaded cross hole where the bolt from the landing gear goes into to hold the skid tubes in place. A cool feature, the skid tubes have predrilled holes in them for the skids no measuring the skid tubes! Now, to get those tube locks in place. My first thought was to find something I could run the tube lock up front to the first hole and possibly hold in place while I screw the bolt into it. Ah a threaded rod! I had a 4-40 threaded rod the just worked. The threads were wrong in the tube lock, but who cares, as long as it will hold it in place long enough to get the skid bolt into the tube lock with some Loctite of course. This worked perfectly for all 4 tube locks. On to the clutch stack, well nothing special there, just take it apart and Loctite the screws. When I got to mounting the fan hub assembly (hub, fan, and clutch) to the motor, I found one of the fan blades was broken. It must of happened during shipping. The box that all the parts come isnt packed with anything and the parts bounce around inside. I placed an order with Experience RC for a new fan ($6.00! Not bad) and some other stuff. That showed up in 2 days!!! I continued on with the build skipping the fan shroud as I needed the fan mounted for it. Now you build up the gyro plate, rear frame plate, and radio tray. And while I was playing with some of the carbon fiber, I used this opportunity to sand all the edges on the carbon fiber. Ive learned to use rubber gloves for this as it leaves a terrible mess on your hands. With the gloves, I just take them off and throw them away along with the carbon mess! Next is the disassembly of the main gear. All the bolts in this kit are not loctited, you need to remove them all and apply loctite. There are two brass bushings that will need red loctite. The main gear is really big and beefy I like that! The front tail transmission assembly is a real work of art! It looks very sturdy along with the gears, beefy! Reassemble the boom clamp with loctite. Loctite the tail offset bell crank. I like the offset bell crank design as it places the tail push rod in the center of the boom. Nice touch! Ok, now the body starts to come together. You start by installing the main bearing blocks, frame spacers, tail and throttle servos, rear frame brace, boom clamps, front tail transmission assembly to the right frame halves, and then install the left side frame halves. On to the tid-bit stuff the motor mounts. In the kit you are supplied with motor shims. This is a nice touch. This helps in setting the proper gear-lash and alignment of the clutch stack kind of like the old Miniature Aircraft days with the X-Cell line of helis. At this time, I transgressed back to installing the motor fan assembly to my motor, now that I received the replacement fan, but nothing special here, assembly as usual. One added note here: Matt really shins here when mounting the clutch to the hub the screws are long enough to properly engage most of the threads in the fan hub! Ive built a few other helis that gave you much shorter thread length. Only 4 threads would go into the fan hub! An easy recipe for stripping threads and then needing to buy another fan hub! The rule of thumb, as Ive been taught 1 and a ½ times the diameter of the bolt should be the length going into the threaded hole. So if the bolt is a ½ in diameter, 1-1/2 times will = ¾ long, or ¾ going into the threaded hole. I fitted the fan shroud to the O.S.105 motor and quickly saw that I needed to remove some material to clear the carb stack and heat sink fins on the head. Now the fan shroud fits! I really wasnt too keen on how it assembles, using 4 long, but small diameter screws. Yea, Ive done that before, didnt really care for it then and still dont sorry Matt! Its a pain in the rear trying to get those screws to line up. I installed the motor, and it was a good fit, no problems, and no rubbing on the fan to the fan shroud. So now its time to square up the frame, this whole frame assembly is done without the frame bolts being fully tighten. What I do is insert the mainshaft through the bearing blocks and then tighten the bolts in a zig-zag fashion. One bolt on the left, opposite bolt on the right, etc. This way the main bearing are in perfect alignment to the point that the mainshaft will slide out of the bearing blocks as you rotate the body upside down. There is no drag on the mainshaft or preload on any of the bearings. The mainshaft will side in and out as you turn the body upside down and right side up. After that, I tightened the rest of the bolts on both sides of the frame. Next I installed the bottom stiffening plate, landing gear, clutch stack, radio tray and gyro plate, protective rubber for the fuel tank and then the fuel tank. At this time, the three cyclic servos are installed. However, I had a problem with the servos I decided to use...MKS HBL950HV. The servos are too tall. I had to use spacers under the mounting tabs to gain enough clearance between the two side cyclic servos. Ill check the alignment of the swashplate linkage, and if needed, I can move the linkage ball to the inside of the servo horn. I think Ill be fine havent got to this point yet. Moving on, and while my buddy Mark drools over the main body leaving his finger prints all over it LoL I started in with building the tail section. The boom is like any other brand that has a torque tube. And the tail gearbox is just the same. As I was placing the tail push rod guilds on, I noticed the boom is a straight piece of tubing! No predrilled holes or slots cut out in either end??? And no company/heli name imprinted on the boom! The instructions mention pinning the tail housing to the boom. Well I did just that. There are pros and cons to pinning or not pinning the tail or the boom to the body. The two most important reasons I can think of the tail turning up or down, and the tail box falling off the boom/the boom pulling out of the body. So I pinned it, peace of mind According to the manual; IMPORTANT! If you wish to use boom pinning feature you must drill 3mm hole! Follow these steps. 1. Install Tail Box 2. Ensure Tail Box is vertical 3. Mark drill location 4. Remove tail box and torque tube 5. Drill 3mm hole at marked location. So Mark had noticed that I was missing a boom support and had two tail carbon fiber push rods! Ok, so we found the first part missing from the kit. Sunday I stopped in my local hobby shop after church to find a replacement. It turns out they have one thats one size smaller than the factory one. Now I could bug Matt about this, and he would send a replacement one to me ASP, but he has better customers to deal with versus waiting on me hand and foot. LoL! Also, just because one small part or a cheap (not cheaply made, but cost) isnt going to deter me from buying this heli. Yes, it would be very nice that all the parts are there, but remember, we are human, we are not perfect, so a part missing is no alarm to dis the company. However, having the owner call you asking for your address so he can send the correct parts says a lot about the company. I will be talking with Matt in the near future, wanting to get to know the man in person. Moving on I mounted the main gear and mainshaft. However, Im a bit fuzzy on the mainshaft shim thing. According to the manual; Use the 10mm main shaft shim if you have vertical movement in the main shaft after assembly. This is completely normal and within tolerances. I dont see/understand where it should go, so, moving on the head and swashplate are normal remove and loctite everything and set aside. I need to start programming the Spartan Vortex VX1n so I can center the elevator servo and mount the carbon fiber control arm to the plastic horn. Once the servo is mounted, there is no way to adjust the servo arm position without removing the servo. The servo horn screw is blocked by the aileron servo, much like the Goblin helis. And this is where I went off the beaten path. So I started the programming. I created a new heli profile in my DX9. I went through most of the radio setup in the Spartan Vortex, enough to center the cyclic servos. I installed the swashplate so I could see the how the balls on the swashplate will line up with the balls on the servo horns. Theyre not perfect, as a matter of fact; the center of the swash ball is directly in-line with the servo horn (the center of the carbon fiber horn). So now it looks as if I need to move all 3 servos out enough to place the servo balls on the back side of the servo horn. So now Im wondering if I should pick a different servo for this heli Not just yet! To be continued
__________________
"I love the smell of Nitro/Gas in the morning!" Citizen 654 |
|
|
|
|
02-10-2015, 05:48 PM
|
#10 (permalink) | |
|
Registered Users
|
Quote:
The MKS servo's are a tight fit in this mounting style. I do successfully run them in all my models though. On the N7 I used a 2mm carbon spacer and the stock servo grommets and it worked out perfectly with the ball facing out
__________________
Team Synergy, Team FBL Rotors Formerly Dyecocker1 |
|
|
|
|
|
02-11-2015, 07:21 AM
|
#11 (permalink) | ||
|
Registered Users
Thread Starter
Join Date: Feb 2006
|
Quote:
Next question... Quote:
__________________
"I love the smell of Nitro/Gas in the morning!" Citizen 654 |
||
|
|
|
|
02-11-2015, 07:30 AM
|
#12 (permalink) |
|
Registered Users
|
I usually flip it so the shallower nut is on the servo side. If there are any threads sticking past I remove the excess with a dremel. But yes, again a tight fit!
Are you using the stock holes in the carbon arms also? I think the shim was made more for gear alignment than to eliminate slop since tightening the main shaft collar can do this. Failed to say that in the last post. If the main and TT drive gear are low/high. Install/remove the shim
__________________
Team Synergy, Team FBL Rotors Formerly Dyecocker1 |
|
|
|
|
02-11-2015, 11:03 AM
|
#13 (permalink) | |||
|
Registered Users
Thread Starter
Join Date: Feb 2006
|
Quote:
Quote:
Quote:
__________________
"I love the smell of Nitro/Gas in the morning!" Citizen 654 Last edited by rcnut; 02-12-2015 at 07:31 AM.. |
|||
|
|
|
|
02-12-2015, 07:39 AM
|
#14 (permalink) | |
|
Registered Users
Thread Starter
Join Date: Feb 2006
|
Ok, I was able to spend some time working servo alignment to the swash balls last night. I finally have all 3 cyclic servos setup much better, however, I had to use a fairly thick spacer for the two side servos to achieve this.
Quote:
I was going to continue with the programming until I grabed my radio only to discover I left the power switch on! For 2 days!!!  dumb guy!dumb guy!dumb guy! Life happens, and then we move on... dumb guy!dumb guy!dumb guy! Life happens, and then we move on...I shut off the radio and placed it on the charger and sat by it, watching to see if anything bad would happen. So far it powers up and the display saya 8.2v...  Its been a very, very long time since the last time I did this. Its been a very, very long time since the last time I did this.
__________________
"I love the smell of Nitro/Gas in the morning!" Citizen 654 |
|
|
|
|
|
02-13-2015, 07:07 AM
|
#15 (permalink) |
|
Registered Users
Thread Starter
Join Date: Feb 2006
|
So far my radio seems to be ok! But I will keep an eye on it just in case.
Last night, I worked on all the links. I have them set to what the manual states as a starting point. Then I "Boto-sized" all of them...dang those links are thick!!! Before going back to programming the Spartan Vortex, I worked on the wiring lay-out, and then started in on the rpm sensor. I'm not that far from finishing my N7...however, with close to record cold temps for this weekend...no madain flight this weekend...possibly next weekend! That gives me plenty of time to double check everything!
__________________
"I love the smell of Nitro/Gas in the morning!" Citizen 654 |
|
|
|
|
02-13-2015, 09:26 AM
|
#16 (permalink) |
|
Registered Users
|
A quick note, do make sure to threadlock the fuel tank pressure tap. I spent half a hour cleaning out fuel after thinking just tightness would work for a quick test flight LOL.
I had over the 10mm shim's play as well. Used standard main shaft shims from the E5 kit.
__________________
"You need more rockets. Everything is better with rockets" Mike Dipalo--Synergy RC, MKS Electronics |
|
|
|
|
02-15-2015, 07:14 AM
|
#17 (permalink) | |
|
Registered Users
Thread Starter
Join Date: Feb 2006
|
Ok, I have all the horns on and the links installed.
I did some more VX1n programming, setting up the swashplate and main blades including mounting the rotor head. I have the governor sensor set and installed, but haven't programmed it just yet. Wires are routed with one of two satellites. I need to find another place to install the second sat. I glued the metal ends on the carbon rod for the rudder servo and glued one end of the boom supports. I'll glue the other end tonight. Setup my battery on the front tray, a 5000mAh 7.4 LiPo, its a leftover from a 6 cell pack that went bad shortly after buying the pack. Cell #3 went totally dead, 0.0V, after the first charge. So I stripped it down into smaller packs. Things left to do: Setup the linkage for the throttle Mount the tail section and setup the linkages for the tail Finish programming the VX1n And finally, mount the canopy Oh yea, test flight!!! Quote:
__________________
"I love the smell of Nitro/Gas in the morning!" Citizen 654 |
|
|
|
|
|
02-16-2015, 07:56 AM
|
#18 (permalink) |
|
Registered Users
Thread Starter
Join Date: Feb 2006
|
I have the throttle linkage setup and finished, governor programmed and good to go.
Boom suports are done and ready to mount. Tail servo to the Tail Offset Bell Crank Assembly done. but need to mount the tail assembly and connect the tail push rod...and finish programming. Thing left to do... Find a location for the second satellite (I forgot to mention this before) Do another full "walk-through" the radio and Spartan Vortex (VX1n) Mount the canopy And finally...test flight!!! There might be a problem with the madien flight this coming Saturday...the weather forcasters has forcasted 5-8 inches of snow Saturday afternoon! Starting around 1:00 pm. At 1:00 pm, the chance is 37%, and at 4:00 pm the chance becomes 64%! I am also NIU's (Northern ILLinois University) unofficial test pilot. Every year, NASA puts on a competition. Anewly designed airplane that can handle a 40 pound payload. Each year a few students, that have entered their school into this competition, design/engineer a new style aircraft in hopes of achieving first place. I'm not sure what first place actually is awarded, but it is big...according to the students. They have picked this coming Saturday for their test flight! So it would be great if I could test their airplane and the madien my N7! And put a flight (or 2) on Marks G4. That would make for a very exciting day! However, and as everyone knows...This next storm could push into early next week, like Tuesday'ish? It is too early to say what will happen, but...My N7 will be ready for its madien flight...or when ever the weather will allow...
__________________
"I love the smell of Nitro/Gas in the morning!" Citizen 654 |
|
|
|
|
02-16-2015, 08:56 AM
|
#19 (permalink) |
|
Registered Users
Join Date: Mar 2012
|
Awesome! Except for the storm part...
__________________
Team Synergy Field Rep, Rail Blades |
|
|
|
|
02-18-2015, 07:40 AM
|
#20 (permalink) |
|
Registered Users
Thread Starter
Join Date: Feb 2006
|
Update!
I found a suiteable site for the second satellite. I ordered the O.S. bubbleless clunk and 2 tank grommets. The gromments came in , but no clunk! I trial fitted the canopy to see how much room I have...lots!!!
__________________
"I love the smell of Nitro/Gas in the morning!" Citizen 654 |
|
|
|
|
|
|
«
Previous Thread
|
Next Thread
»
| Thread Tools | |
| Display Modes | |


 Linear Mode

|
|


