| START HERE |
|
| Register | FAQ | PM | Events | Groups | Blogs | Calendar | Mark Forums Read |
|
|
|
Unregistered
|
||||||


| Hurricane 425 Discussion and support of the Gaui Hurricane 425 |
|
|
 |
|
|
LinkBack | Thread Tools | Display Modes |
 02-04-2012, 11:18 AM
|
#21 (permalink) |
|
Registered Users
Thread Starter

|
PTcaflyer, thanks for the tip. I got it now.
Is the original 550 FRP canopy any good @ 35$? http://www.hobbyking.com/hobbyking/s...dProduct=12464 Is FRP the same as Fiber glass canopies?
__________________
-roger OriginHobbies.com OMPHOBBY RADIOMASTER GAUI MSH-Brain2 SCORPION dealer (FI/EU) |

|


|
| Sponsored Links | |||
|
Advertisement |
|
||
|
02-04-2012, 12:44 PM
|
#22 (permalink) |
|
HF MR Support
Join Date: Aug 2008
|
YEP !
FRP = Fiberglass Reinforced Plastic or "GF" I got mine from Hobbypartz.com and was not half that price... PT
__________________
Gaui 550(Need GOT ONE!) / KK2.1.5 steveis pro/ZMR250 / Alien 450 camera ship / HJ 450 all W/KK2.1.5 Steveis pro Estes Nano/ Hubsan X4 / Syma X1 AMA 953414 CONTRIBUTOR, TEAM LAVAQUAD |
|
|
|
|
02-05-2012, 03:14 PM
|
#23 (permalink) |
|
Registered Users
Thread Starter
|
bag with roll/pitch, elevator arms.
 Identify what goes where  Assembled link balls.  Assembled roll/pitch bell cranks. 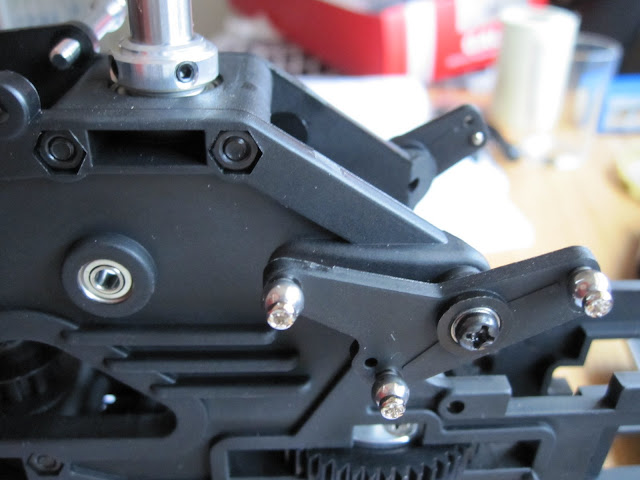 The elevator arm was not moving freely so I had to clean up the excess plastic. Used a drill bit to clean up the elevator arm. 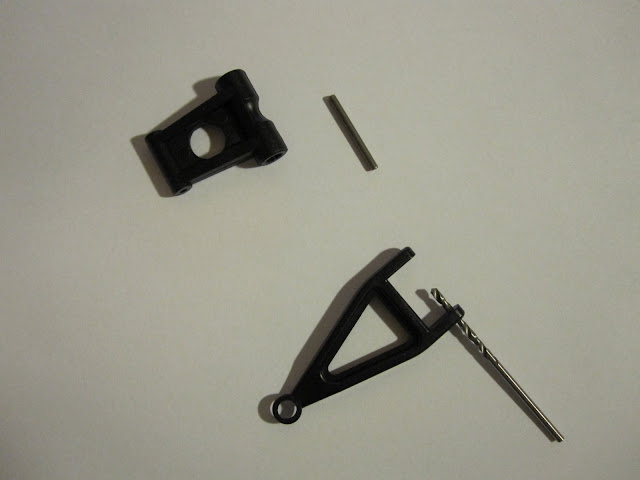 Sanded the edges of this part where the elevator arm pivots.  Installed the elevator arm. 
__________________
-roger OriginHobbies.com OMPHOBBY RADIOMASTER GAUI MSH-Brain2 SCORPION dealer (FI/EU) |
|
|
|
|
02-06-2012, 01:33 AM
|
#24 (permalink) |
|
Registered Users
Join Date: Feb 2007
Location: England
|
Roger,
Just a quick note - but you have your elevator servo arm on back-to-front Cheers, Mike |
|
|
|
|
02-06-2012, 01:49 AM
|
#25 (permalink) |
|
Registered Users
Join Date: Feb 2007
Location: England
|
Roger - just a quick note, you have your elevator lever on back-to-front.
Cheers, Mike |
|
|
|
|
02-06-2012, 04:41 AM
|
#26 (permalink) |
|
Registered Users
Thread Starter
|
Mike, thanks for pointing out. To clarify what you are saying, you mean I must flip the elevator arm (triangle) by 180 degrees, right?
How do you identify which way it goes? is there some marking?
__________________
-roger OriginHobbies.com OMPHOBBY RADIOMASTER GAUI MSH-Brain2 SCORPION dealer (FI/EU) |
|
|
|
|
02-06-2012, 06:56 AM
|
#27 (permalink) |
|
Registered Users
Join Date: Feb 2007
Location: England
|
Yep 180 degrees. The plastic arms in the kit have an offset built into them (if you look at the elevator lever the pivot point in the middle is offset from the centre-line of the 2 balls), you also need to build this offset into you servo arms (there is a diagram in the manual that shows you how to do this) or alternatively Gaui sell straight CNC arms that don't need the offset.
|
|
|
|
|
02-06-2012, 01:48 PM
|
#28 (permalink) |
|
Registered Users
Thread Starter
|
Ah, you are talking about the elevator bell crank and not the elevator arm. The elevator bell crank is free to rotate all the way and was in a random position while taking the picture. But I will keep in mind what you said while assembling the servo arms and links.
edit: Mike, I was wrong with the above statement. The elevator bell crank does not rotate all the way and I will have to disassemble and fix the orientation. Here is a picture with the correct elevator bell crank orientation. 
__________________
-roger OriginHobbies.com OMPHOBBY RADIOMASTER GAUI MSH-Brain2 SCORPION dealer (FI/EU) Last edited by stark; 02-07-2012 at 11:00 AM.. |
|
|
|
|
02-06-2012, 02:00 PM
|
#29 (permalink) |
|
Registered Users
Thread Starter
|
I did a mock up with my 6S battery pack and canopy and observed that they will fit together if I mount the battery under the front of the frame with the extra 3 piece battery mount. Also, I would have to offset the canopy mount holes a bit from the provided dimple marks, otherwise it doesn't fit.
The 3 piece battery mount.  Used CA glue and screws to fix it to the frame.  The landing skids weren't going all the way through the landing struts so I had to shave off excess plastic using an X-acto knife. The excess plastic was only on one end of the strut.  Fit the landing skids and the skid grips. 
__________________
-roger OriginHobbies.com OMPHOBBY RADIOMASTER GAUI MSH-Brain2 SCORPION dealer (FI/EU) |
|
|
|
|
02-07-2012, 10:15 AM
|
#31 (permalink) |
|
Registered Users
Join Date: Oct 2009
|
Good stuff, keep the pictures coming

__________________
MSH miniPRÔTOS & PRÔTOS 500 a better way to fly GAUI Hurricane 425 night rig & 550 the monster |
|
|
|
|
02-07-2012, 12:09 PM
|
#32 (permalink) |
|
Registered Users
Thread Starter
|
bag with head parts
 The head. I did open it up and check for correct assembly and thread-lock. 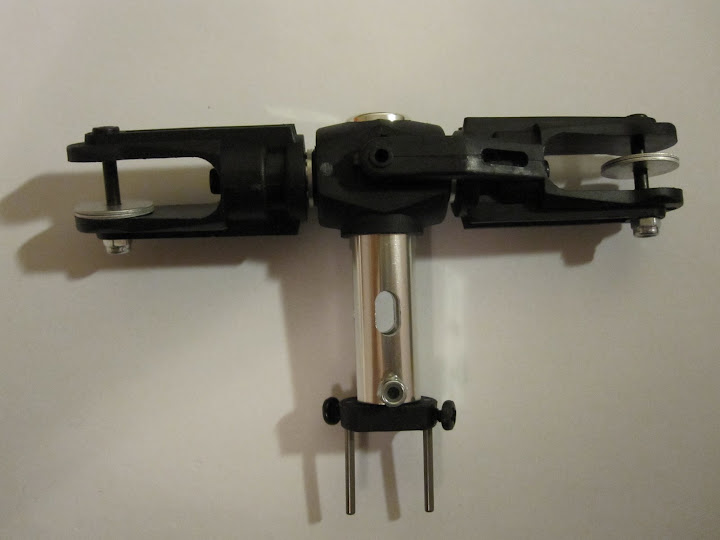 Identifying the mixing levers  on they go  Identifying the seesaw  on it goes 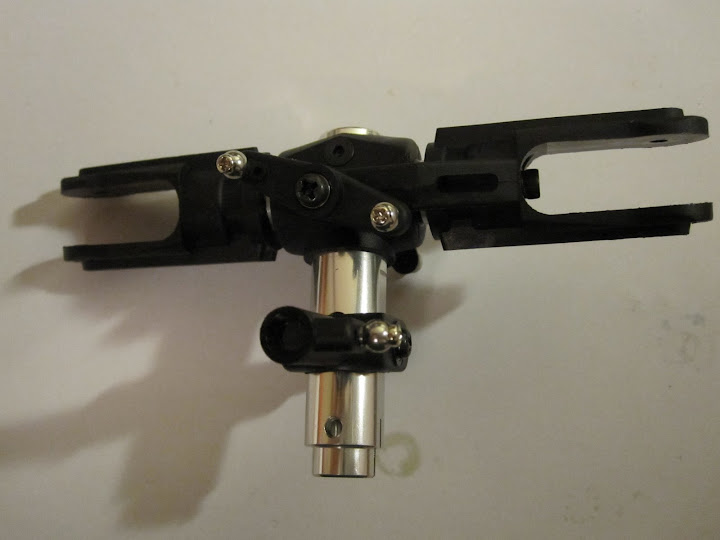 Put the flybar and flybar arms. Set the flybar to equal length on either side. 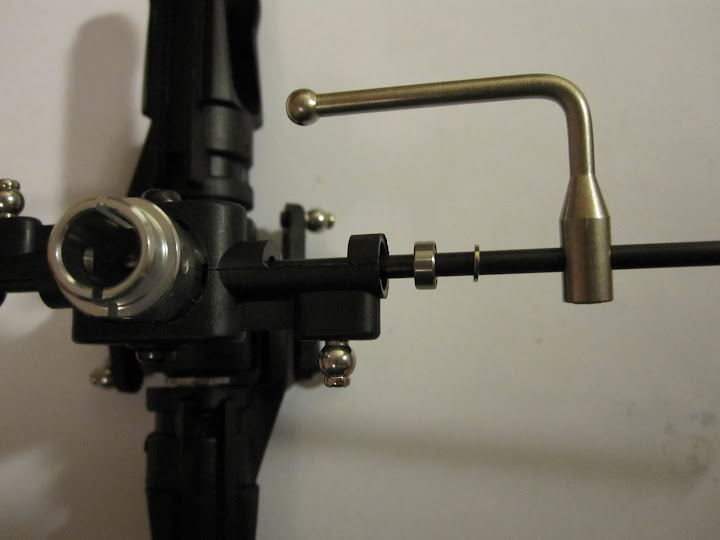 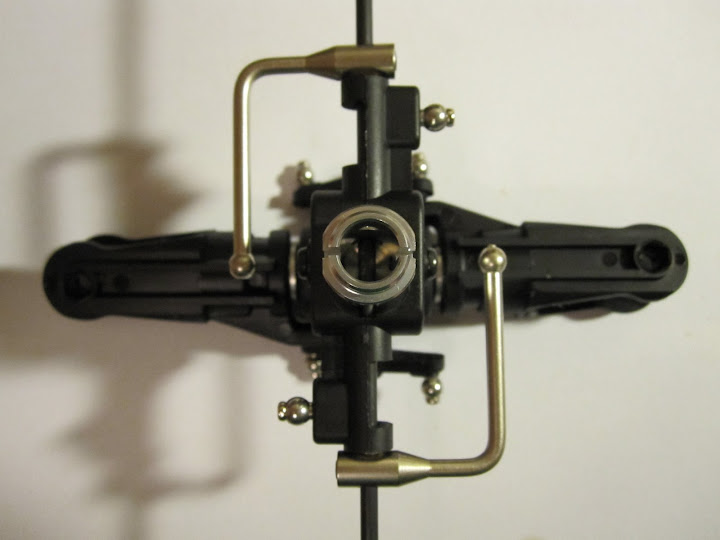 the washout guide assembly. The screws will be tightened later after I mount it on the spindle.  Washout base and arms.  The assembly wasn't smooth so I had to disassemble the arms and clean up the excess plastic using a drill bit.  Put the swash plate and the washout base + arms onto the frame. 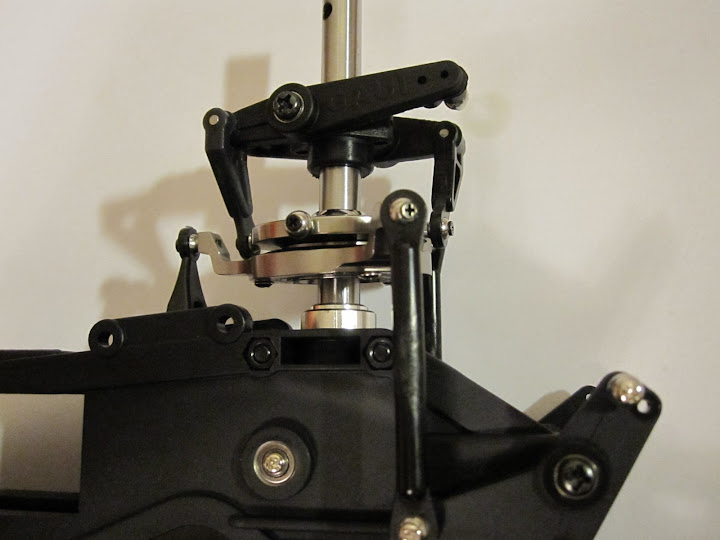 Then goes the head. Tightened the hub screws and the holding nut. Sized the ball links as necessary. Most were tight few were too lose. I discarded the loose ones. I've adjusted the link lengths as mentioned in the manual. I suppose I'll have to get back to adjusting the links when I do the CCPM setup.  Finally the flybar paddles. 
__________________
-roger OriginHobbies.com OMPHOBBY RADIOMASTER GAUI MSH-Brain2 SCORPION dealer (FI/EU) |
|
|
|
|
02-08-2012, 03:47 PM
|
#33 (permalink) |
|
Registered Users
Thread Starter
|
Bag with tail gear and belt
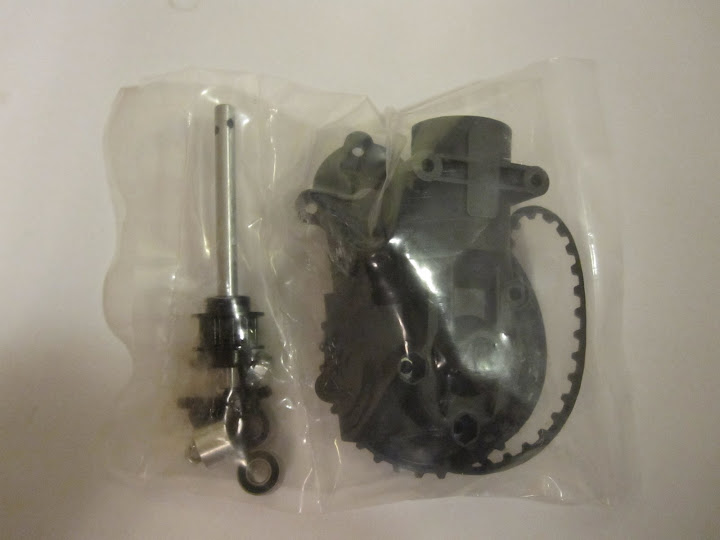 Identifying the tail gear parts 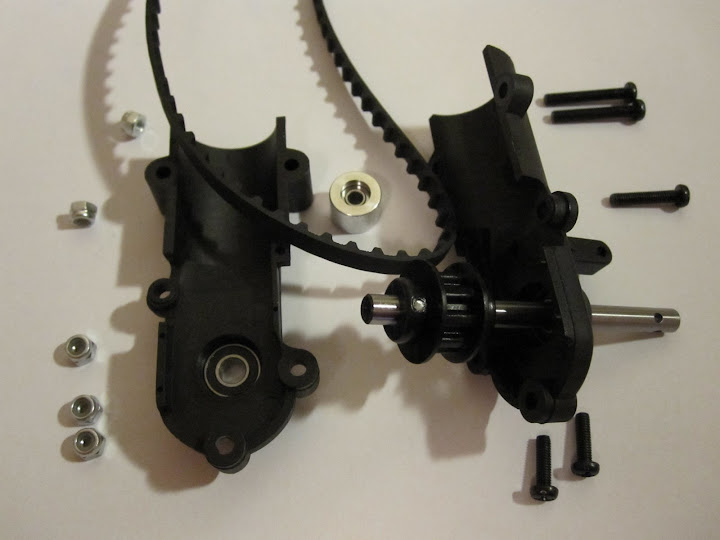 Bag with rest of the tail parts  Opened up the tail grip assembly to make sure everything is ok as per the correction sheet. 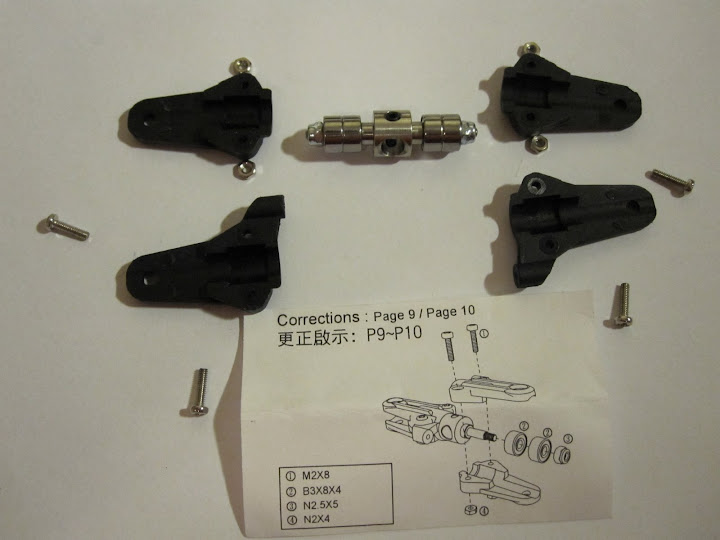 Assembled it back.   Fit the tail grip assembly onto the tail shaft. 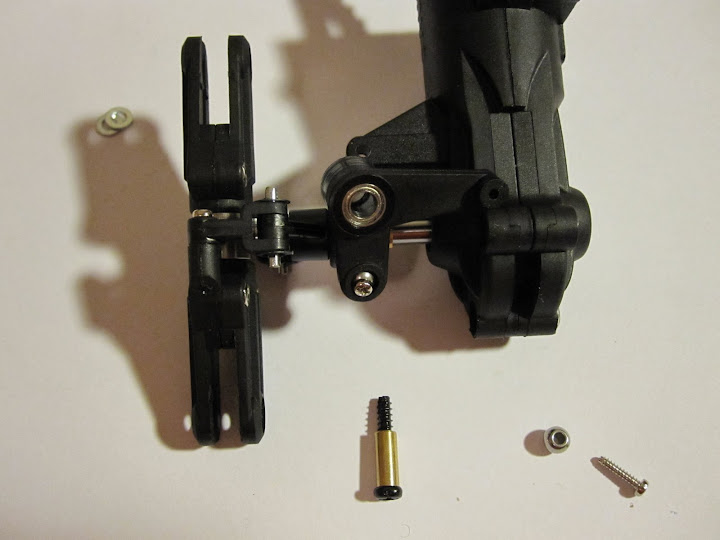 I used both washers between the lever and the tail gear box. This ensures that the tail control lever does not rub the tail gear box.  Another shot of the ready tail assembly 
__________________
-roger OriginHobbies.com OMPHOBBY RADIOMASTER GAUI MSH-Brain2 SCORPION dealer (FI/EU) |
|
|
|
|
02-10-2012, 02:56 PM
|
#34 (permalink) |
|
Registered Users
Thread Starter
|
Tail boom and fin. Had to open up the tail gear box to put the boom as it has to fit in a notch within the gear box.
 Put the tail rod supports.  Fit the boom to the frame and fixed the boom supports. 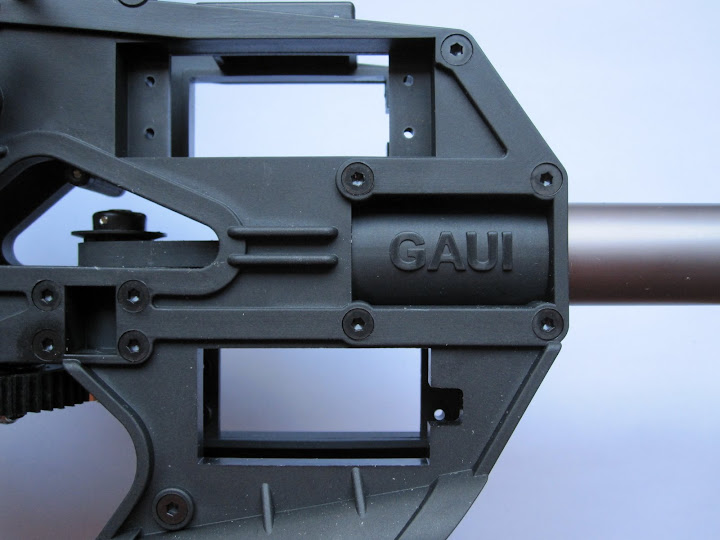 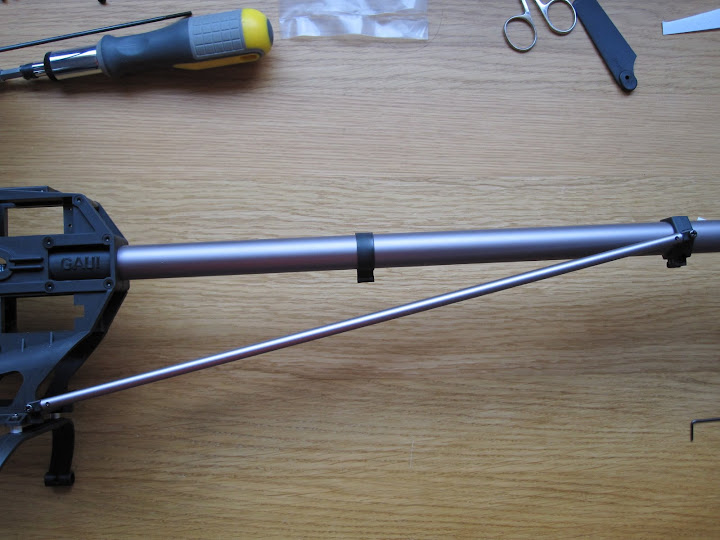 On goes the stabilizer fin.  Identifying the tail blade and bolts. 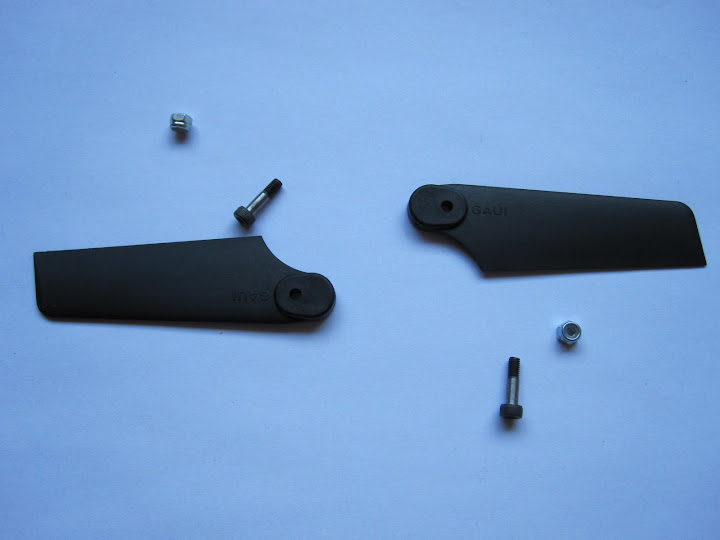 There was some excess plastic inside the tail grips which I had to sand off.  On go the tail blades. 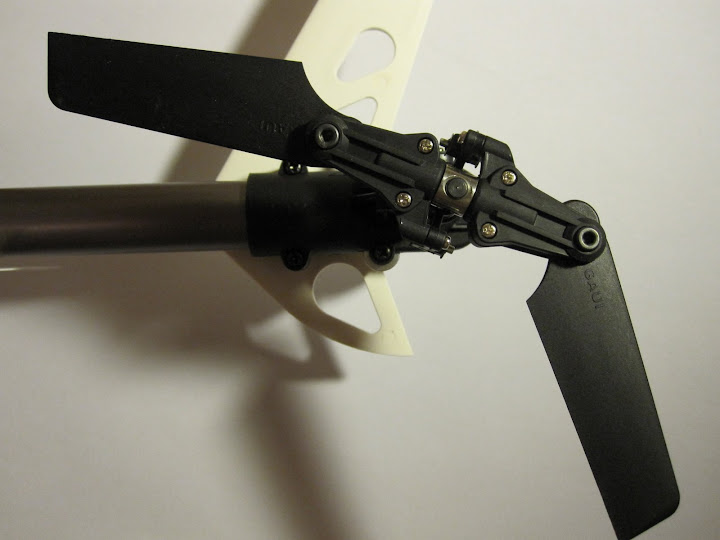 NOTE: Main blades rotate clockwise when looked at from the top of the heli, the tail blades rotate anticlockwise when looked at as in the above picture.
__________________
-roger OriginHobbies.com OMPHOBBY RADIOMASTER GAUI MSH-Brain2 SCORPION dealer (FI/EU) |
|
|
|
|
02-10-2012, 03:43 PM
|
#35 (permalink) |
|
Registered Users
Join Date: Jan 2011
|
it seems like there are alot of locnuts in the kit. that looks good to me since I'm always worried about how much loctite to use when using screws into metal like my align helis use. also, replacing a stripped nut is cheaper than having to re-buy an aluminum part after you booger the threads.
|
|
|
|
|
02-10-2012, 03:45 PM
|
#36 (permalink) |
|
Registered Users
Join Date: Oct 2009
|
I see the tail rotor hub has changed from when i got my kit a year back. My bearings are retained with a tiny screw that goes in the tail rotor hub, but your is held on by a nyloc nut. Good to see Gaui still fixing issues on older designs.
__________________
MSH miniPRÔTOS & PRÔTOS 500 a better way to fly GAUI Hurricane 425 night rig & 550 the monster |
|
|
|
|
02-10-2012, 04:17 PM
|
#37 (permalink) |
|
Registered Users
Thread Starter
|
Yes good to see the manufacturer fix issues based on user feedback. I would be surprised if they haven't fixed the One Way Bearing (OWB) yet. I'm going to use the stock OWB 19T gear that came with my kit.
Is there any way to identify the faulty OWB lot?
__________________
-roger OriginHobbies.com OMPHOBBY RADIOMASTER GAUI MSH-Brain2 SCORPION dealer (FI/EU) |
|
|
|
|
02-21-2012, 04:14 PM
|
#38 (permalink) |
|
Registered Users
Thread Starter
|
Just received the 22T Pinion. Too bad, the pinion does not fit inside the frame.
In order to fit it I would have to cut the plastic standoffs. I'm not willing to do this as I think it would weaken the frame. Plan B is to go with a higher RPM motor so I don't have to use larger pinions. I'm going ahead with the Hyperion HS3026 1210kV motor.
__________________
-roger OriginHobbies.com OMPHOBBY RADIOMASTER GAUI MSH-Brain2 SCORPION dealer (FI/EU) |
|
|
|
|
02-21-2012, 05:08 PM
|
#39 (permalink) |
|
Registered Users
Join Date: Feb 2011
|
Good choice of motor, I use this with good results. Nice and cool with 7 mins of flighttime..
Sent from my HTC Desire using Tapatalk |
|
|
|
|
02-22-2012, 04:10 AM
|
#40 (permalink) |
|
Registered Users
Thread Starter
|
7 mins is impressive
. What battery size and pinion/gears you use?
__________________
-roger OriginHobbies.com OMPHOBBY RADIOMASTER GAUI MSH-Brain2 SCORPION dealer (FI/EU) |
|
|
|
|
|
|
«
Previous Thread
|
Next Thread
»
| Thread Tools | |
| Display Modes | |


 Linear Mode

|
|


