| START HERE |
|
| Register | FAQ | PM | Events | Groups | Blogs | Calendar | Mark Forums Read |
|
|
|
Unregistered
|
||||||


| MSH Mini Protos MSH Mini Protos Helicopter Support Forum |
|
|
 |
|
|
LinkBack | Thread Tools | Display Modes |
 08-11-2011, 04:56 AM
|
#1 (permalink) |
|
Registered Users
Join Date: Jul 2007
Location: Melb, Oz
|
Ok, made a start on the Mini Protos build so thought I would start the build thread as well. I am writting this primarily for my local forum in Oz but thought it wouldn't hurt to repost it here.
I am building the heli with the factory FBL head and stretch kit including 350mm SAB blades. Setup will be: 4s 2010kv MSH motor (OEM Scorpion) YGE 60A ESC (bundled with the kit) SK720 FBL controller DS410's on cyclic MKS8910 on the tail 4s 2200 30C Turnigy packs SAB 350mm mains Heli, 4s motor and stretch kit was purchased from Pete at ElektroRC. //Dennis.
__________________
soXos: Strike 8.1 - Strike 7.1 Light - Strike 6.1 : Goosky: RS7 - RS4 - S2 - S1 soXos DB7 nightflyer : Jeti DS-16 & DS-12 I am www.soxosaustralia.com.au | soXos helis | 1st-RC Products | EGODRIFT motors | Goosky helis | Spinblades |

|


|
| Sponsored Links | |||
|
Advertisement |
|
||
|
08-11-2011, 04:57 AM
|
#2 (permalink) |
|
Registered Users
Thread Starter

Join Date: Jul 2007
Location: Melb, Oz
|
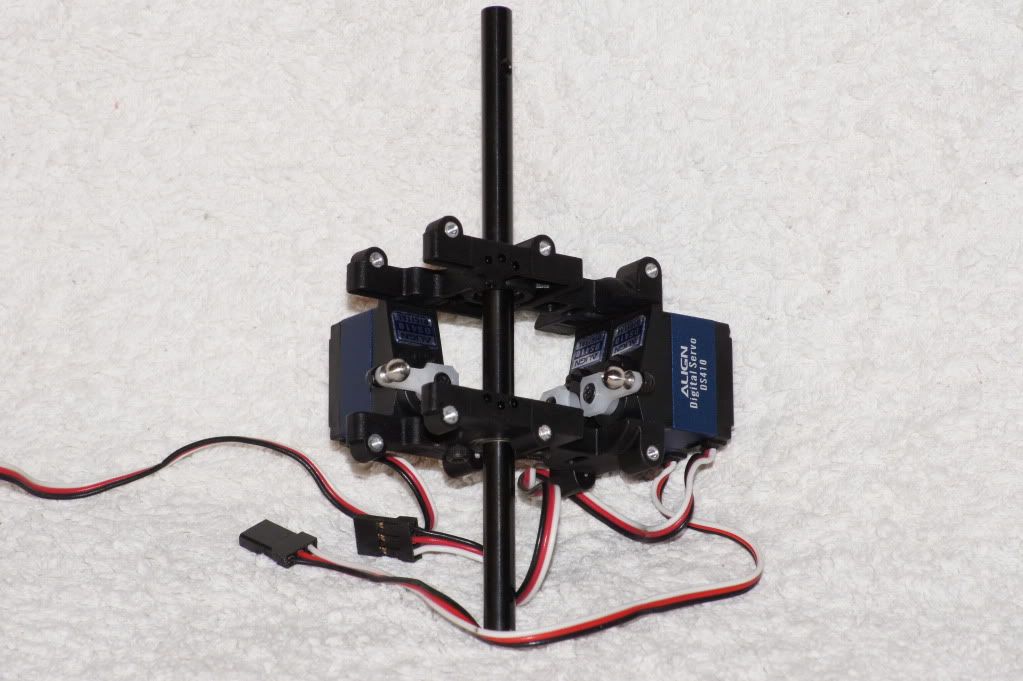
First step of the build is to mount the servos onto the main bearing blocks. Leave the servos loosely mounted at this stage as the bearing blocks need to be aligned in the main frame sides. Sitting the main shaft into the blocks helps keep them in line while bolting them together.
 While the servos are still accessable this is a good time to set the arms at 90 degrees, as I am running a FBL setup with the Skookum the trimming of the servos to get exactly 90 degrees is done in the unit, not the Tx sub trims. I ran through the initial setup steps of the FBL controller and have the servos connected to the correct inputs. The instructions recommend 15mm ball distance on the arms but a few of the people running FBL on Helifreak are recommending 13.5mm, which about where I will start and see if this keeps the setup in the range required by the Skookum (which is similar to the Vbar for throws required). BTW I mount my elevator servo on the right side whereas the instructions show it on the left side. I do this because I usually mount the tail servo on the left side of the boom to better protect the servo from boom strikes and putting one on each side keeps the heli in better lateral balance. 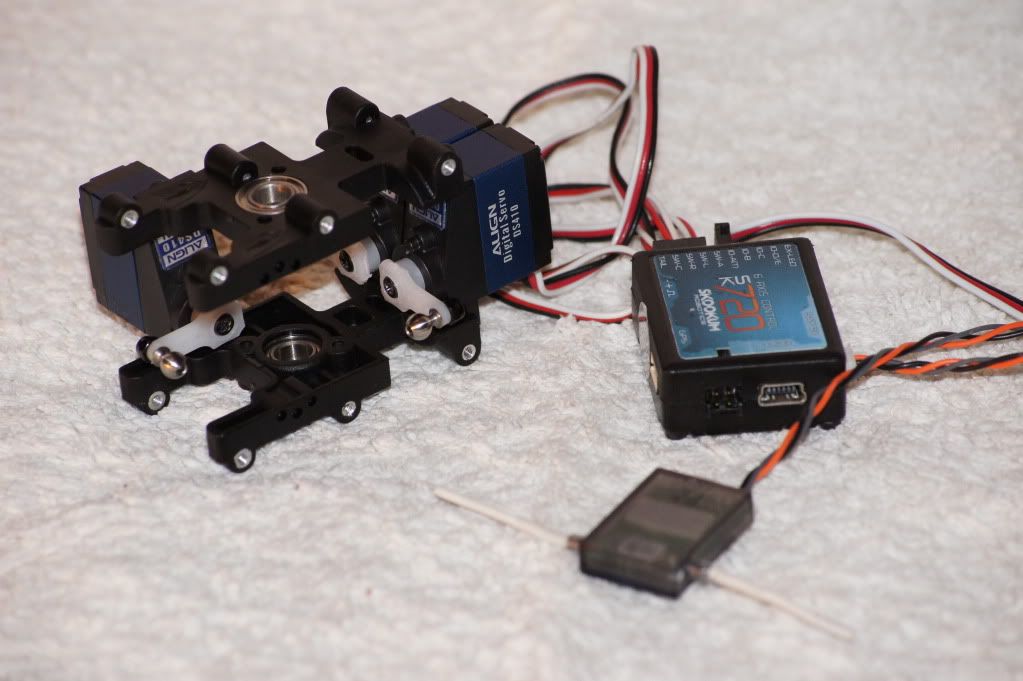 Next up are the frame sides, I love the quality of the MSH kits, the carbon is not sharp at all and socket head screws are used throughout the build. Additionally the majority of the plastic moldings have alloy screw inserts molded into them giving a secure attachment with little risk of stripping threads unless you use Gorilla force. 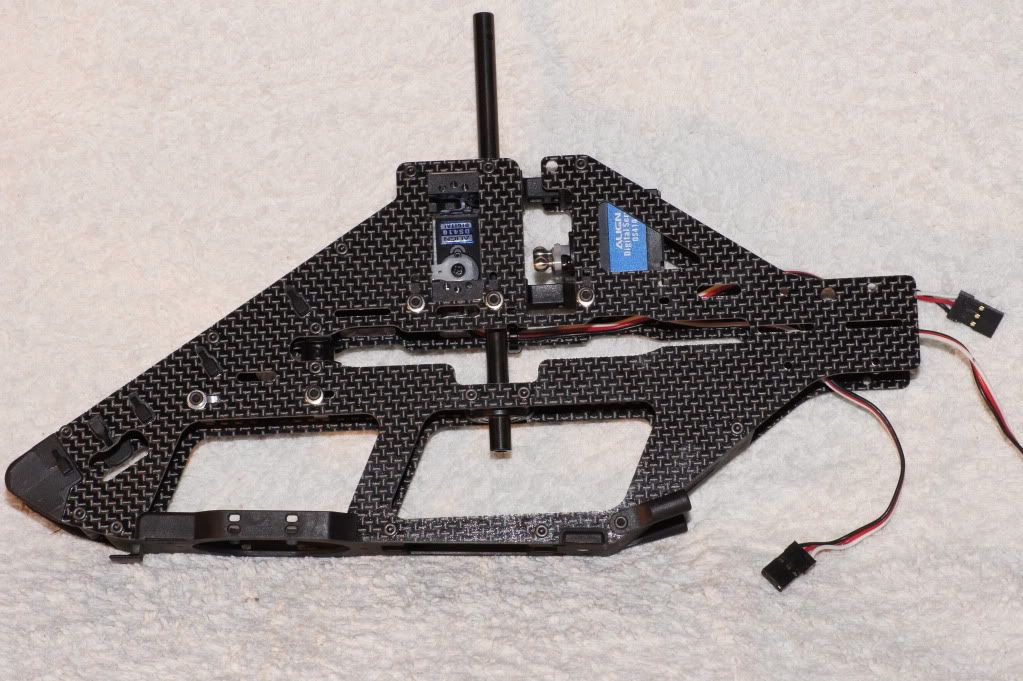 An important step here that is not really described in the manual is the method of tightening the frame. Initially you want all of the screws holding the frames to be loose, including the servos mentioned in the last step. You then put in the main shaft and while tightening the screws on the frame sides a little at a time in a cross over pattern, make sure the main shaft can freely slide up and down in the 3 main bearings. This can also be done with the base on a flat surface to make sure everything lines up correctly. When you have the frame sides both tightened and the mainshaft able to move easily up and down then tighten the servo screws. If the main shaft doesn't move with only a little effort, (best case is it will drop through the 3 bearings with no force) then back off the screws and start again. This step is very important in making sure the mainshaft is not putting side loads on the main bearing causing issues with wear, effiency and vibration. A view from the front. 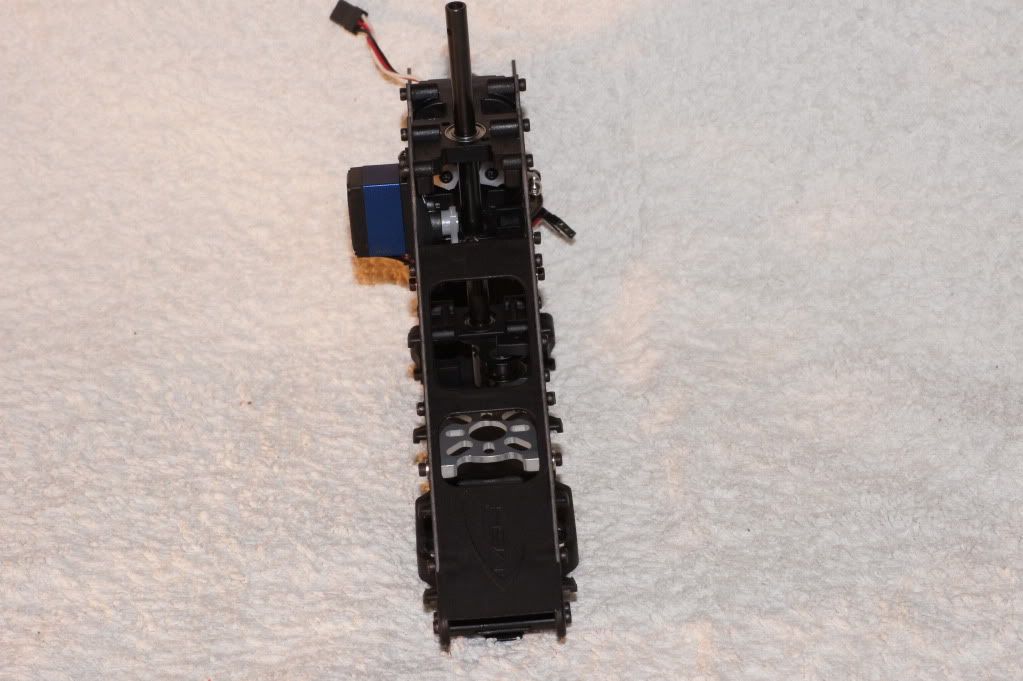 Detail of the motor mount and front pulley. 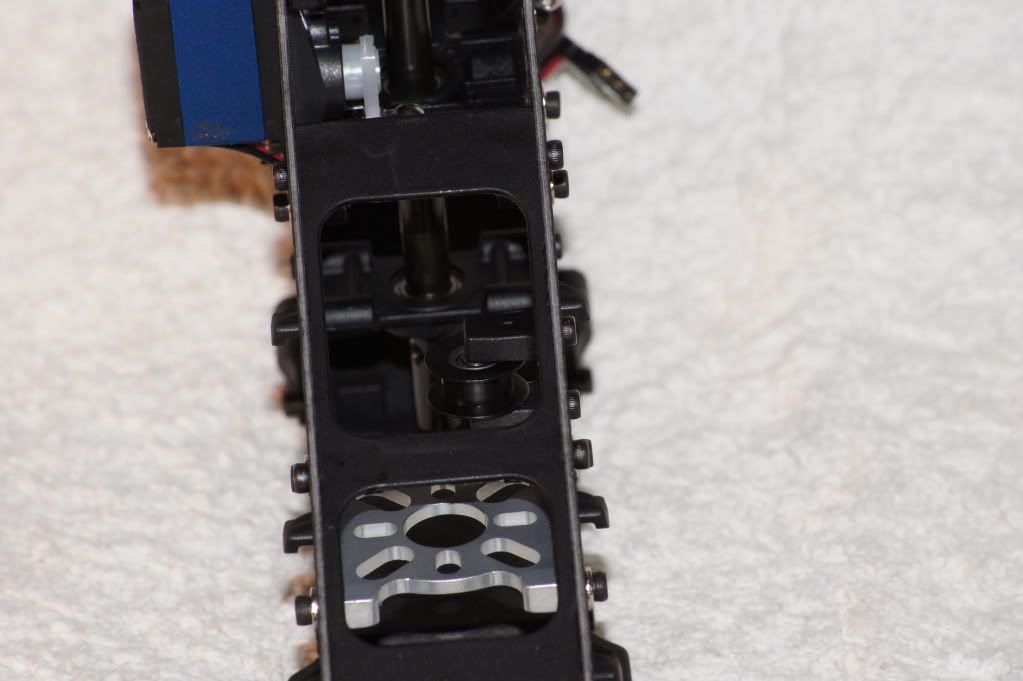 One of the other things I like about the MSH heli's is the thought that goes into little details like running the wiring. Slots are cut into the frame for the servo leads and zip ties to secure the wires so ending up with a neat setup is very easy. you can see the elevator servo and aleron servo wires secured and ready to run down in the space provided in the boom block when fitted. 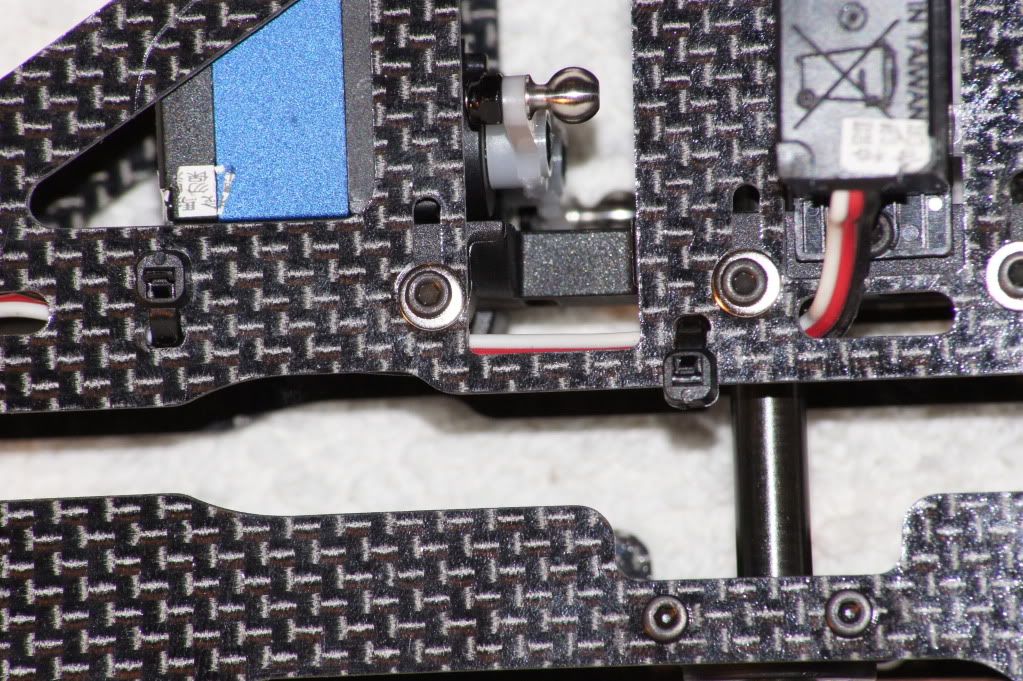 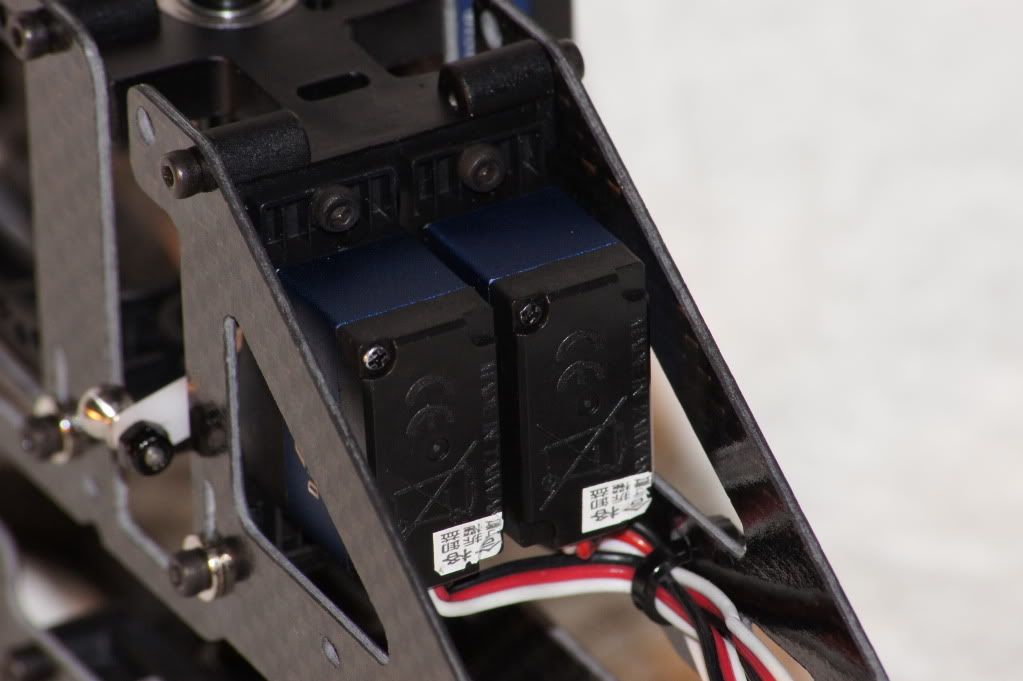 Next is the landing gear, the new design is a single piece (compared to the multi pieces on the full size Protos) and secures with 4 tags and only 2 screws.  There are a few small changes to the Mini to further tweak the Protos design (the mini really is a smaller version of the bigger Protos). One example is the anti rotation plate that now has a tag in the middle to lock it in place. On the Protos many of us move the mounting posts for the canopy forward onto the anti rotation plate but unless it is kept tight the anti rotation plate can move around a bit more that I would like. Using the tag on the mini fixes this problem. 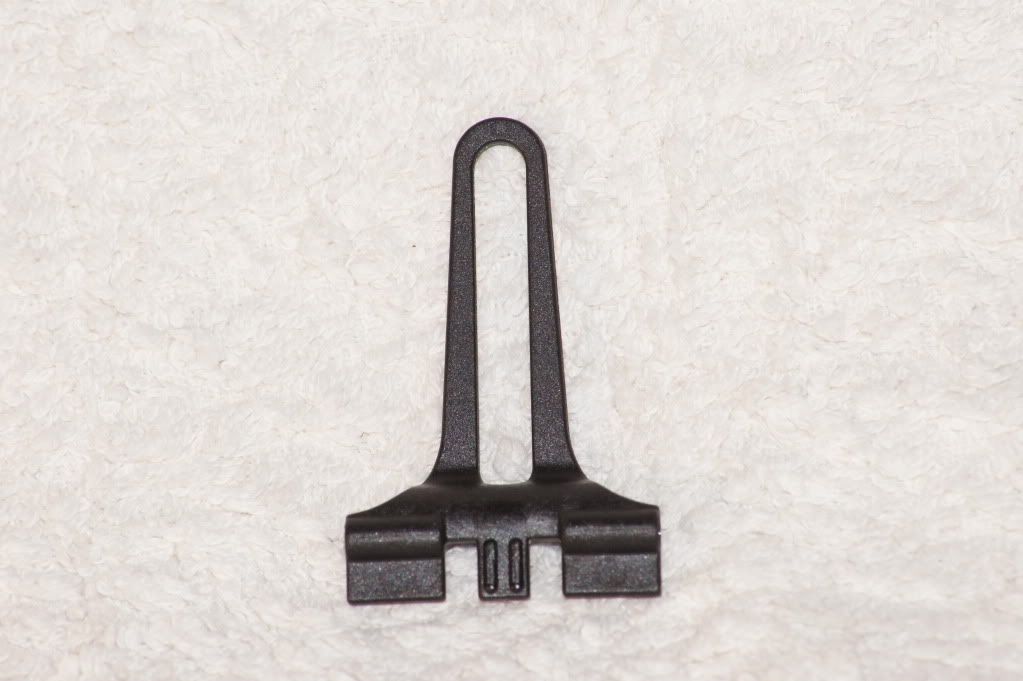 So now the main frame is complete, very light and very stiff setup. 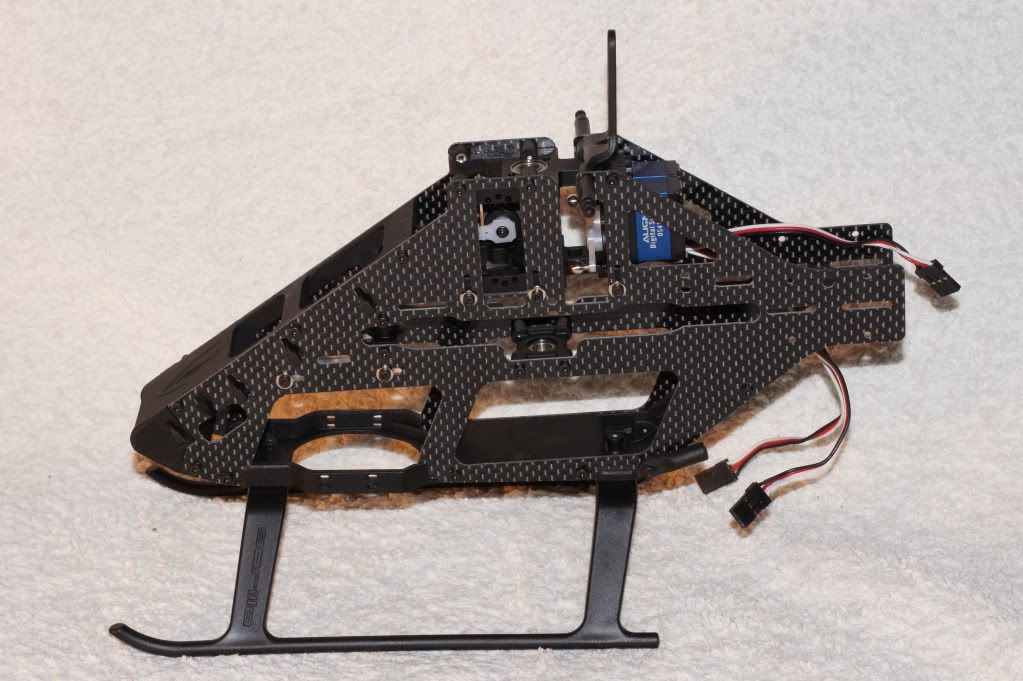 Next up is installing the maingear and mainshaft. The belt needs to be installed in the frame at this point and as usual I give it a good squirt of food safe silicone spray before fitting it. The mainshaft is held in with a bolt from the bottom and a collar on the top. The bottom bolt has been changed in design to make it easier to remove the mainshaft. On the full size this bolt is a standard socket head which can be hard to access, the new one is a non socket type head so you can get on to it with a small spanner. There have been some issues with the bolt in the top collar so you need to be careful when tightening the collar. The screw head has been ground down for clearance so you cant use too much force or the head can be stripped. I think there is an update to solve this either being developed or in the new kits. My kit has an extra screw as a spare and with my good MIP 1.5mm driver there wasn't an issue getting the collar tightened. 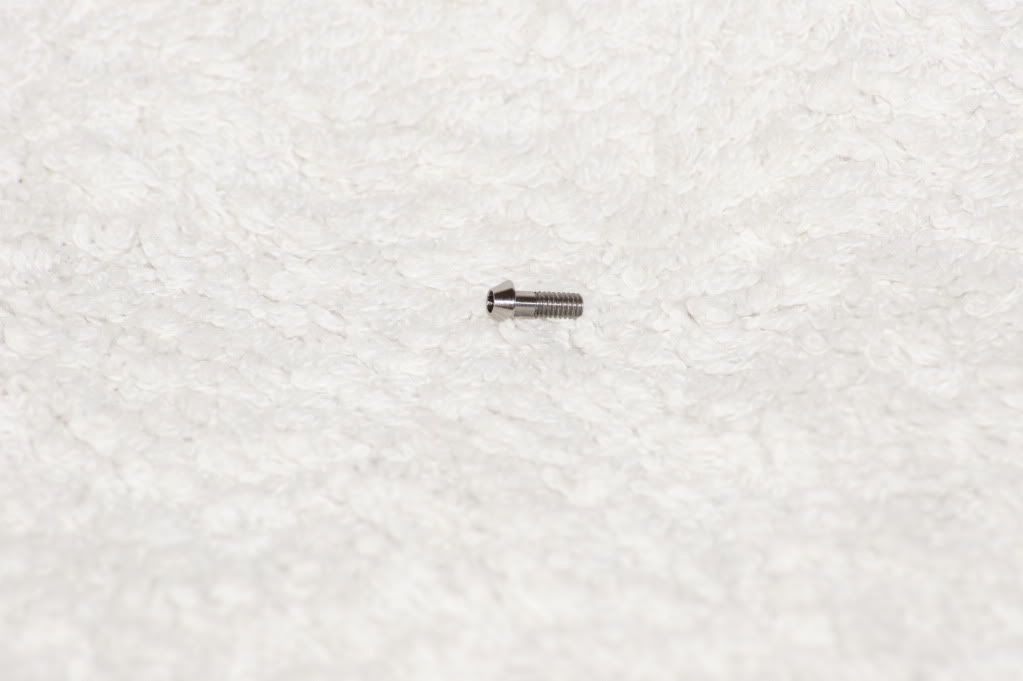 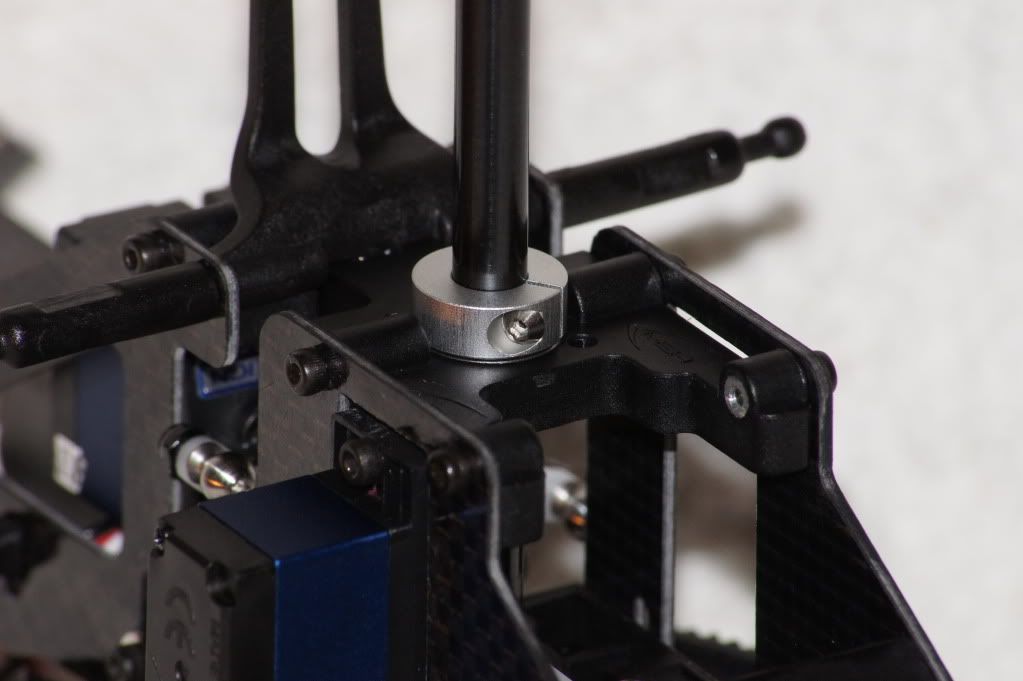 The swash is up next, as the kit includes both Flybar and Flybarless versions you need to pay attention to the balls that are fitted. You can see for my Flybarless build I have longer balls fitted to the outer swash which gives a reduced throw. The Flybar version has the same shorter balls on the inner and outer swash. 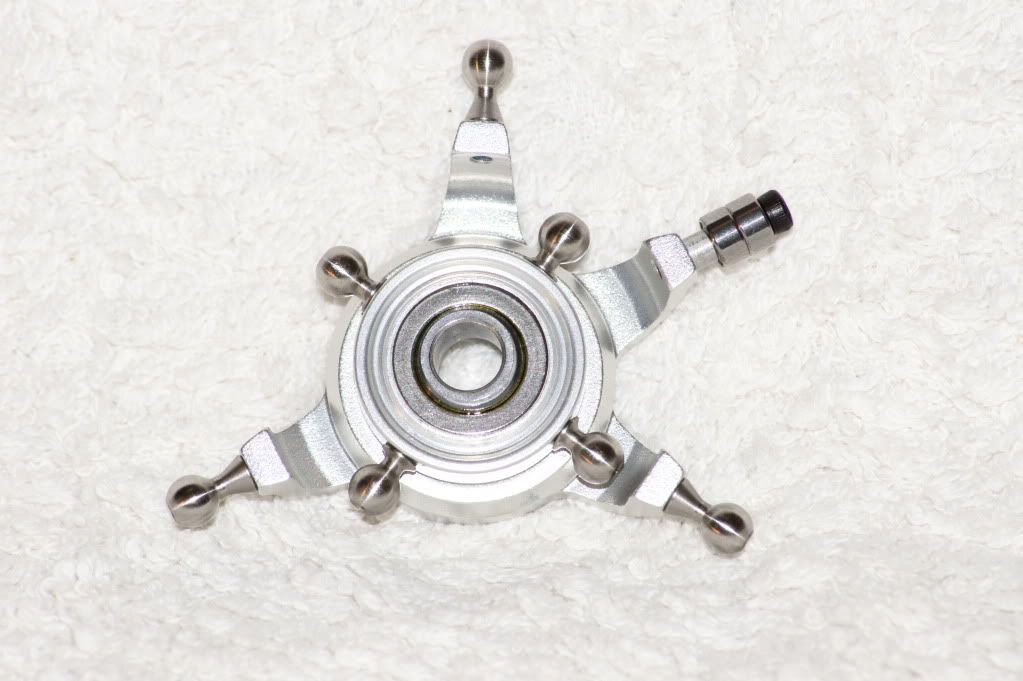 The servo arms are then made up and swash fitted to the heli. The ball links are very beefy, they are the same as fitted to the 500 and so will be well up to the job. The kit includes a link sizer so you can get a perfect fit on your links, most of my links needed just 1 turn on the center and each side to fit correctly a couple were perfect as they came so make sure you check each one before you re-size them. 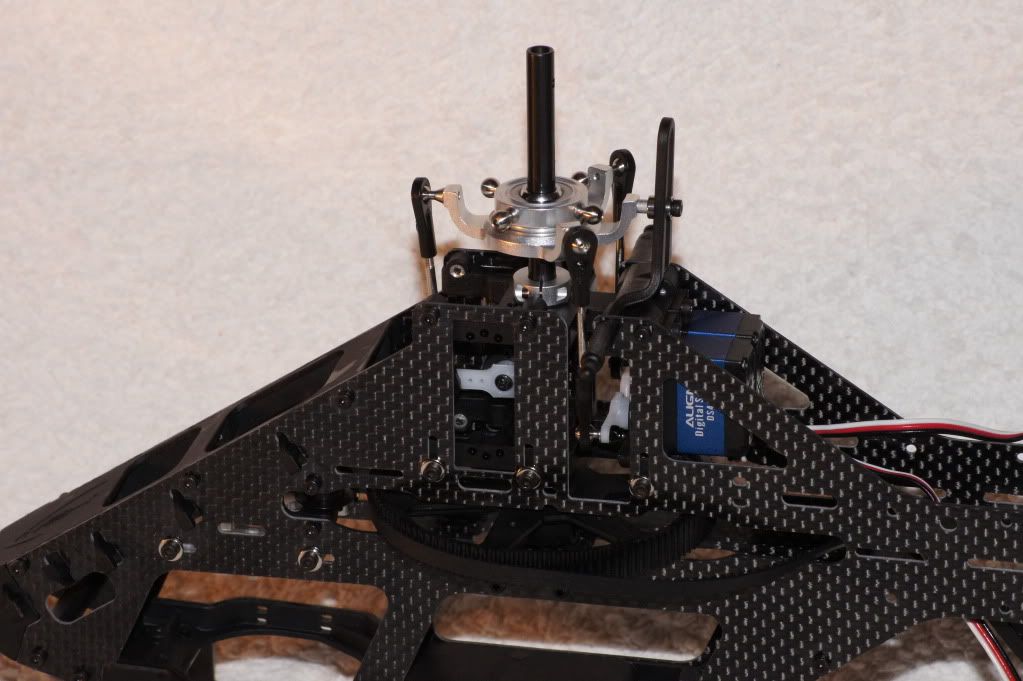 The swash driver is next, nothing complicated here, just make sure you include the washer in between the bearings to stop any binding. There is a new low profile headblock available which now incorporates the swash driver, lowers the disc and looks a bit cleaner as the hole for the seesaw is not cut into it, I may upgrade later but just went with the stock setup for now. 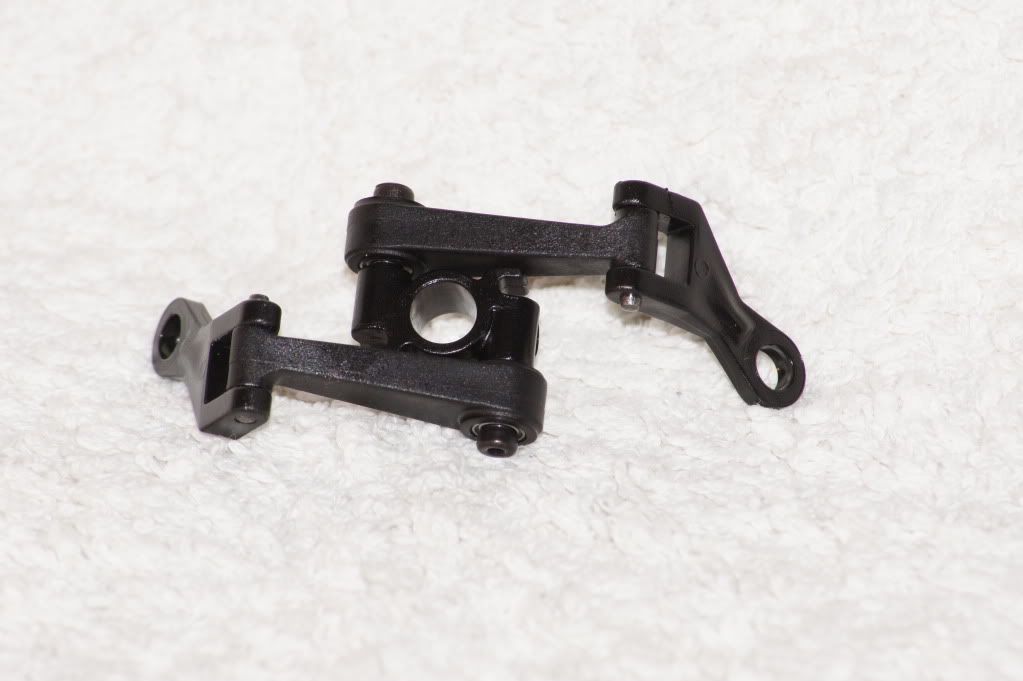 The blade grips include 2 radial and 1 thrust bearing (between the radials), make sure you pay attention to the thrust washers as the inner diameter is different by a small amount to allow the thrust bearing to work. I use Triflow grease on the thrust races. The grips are the same for both FB and FBL so where the ball posts mount have a small raised piece of plastic that on the FB version keeps the bearing that mounts there from binding. A small metal sleve is included with the posts on the FBL version to spread the load and it also looks a bit neater.  The feathering shaft is another difference between the FB and FBL versions of the kit. Make sure you use the longer shaft as this sets the delta of the head up correctly. 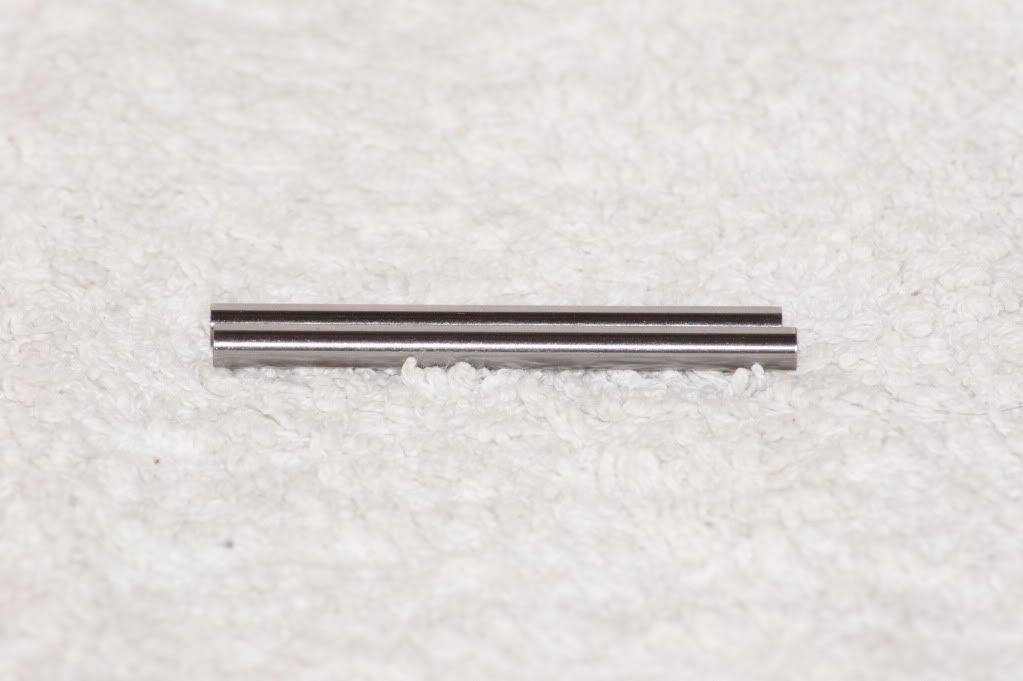 It is important to keep the grease away from the threads in the feathering shaft which is difficult when you grease both the dampers and thrust bearings. I use some of the small 2mm cap screws which fit completely in the holes and stop any grease getting in there during assembly. I also clean out, then apply the loctite to the threads in the flybar before assembly instead of applying it to the screw as normal. A small change I noticed from the instructions is the feathering bolts are shown as button head screws but proper socket head cap screws are supplied in the kit shown here with the washer fitted. I like these much better for a high load place like the feathering shaft as you can apply a bit more torque to the screws. The larger Protos has also seen this change from when it was initially released. 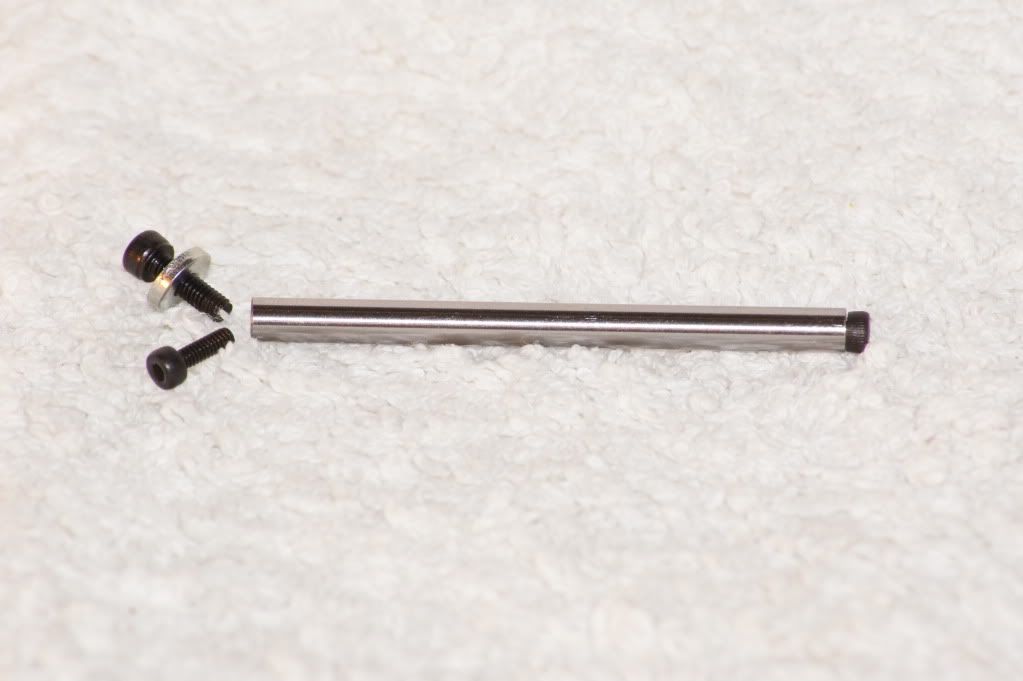 The dampers are one piece molded rubber rather than o-rings, note that they are directional and the stepped section needs to be facing outwards from the head. Due to the longer feathering shaft a larger set of stepped washers are included to go between the head and grips. It may be difficult to see but the washer on the left is thicker for the FBL and the one on the right is the thinner FB washer. 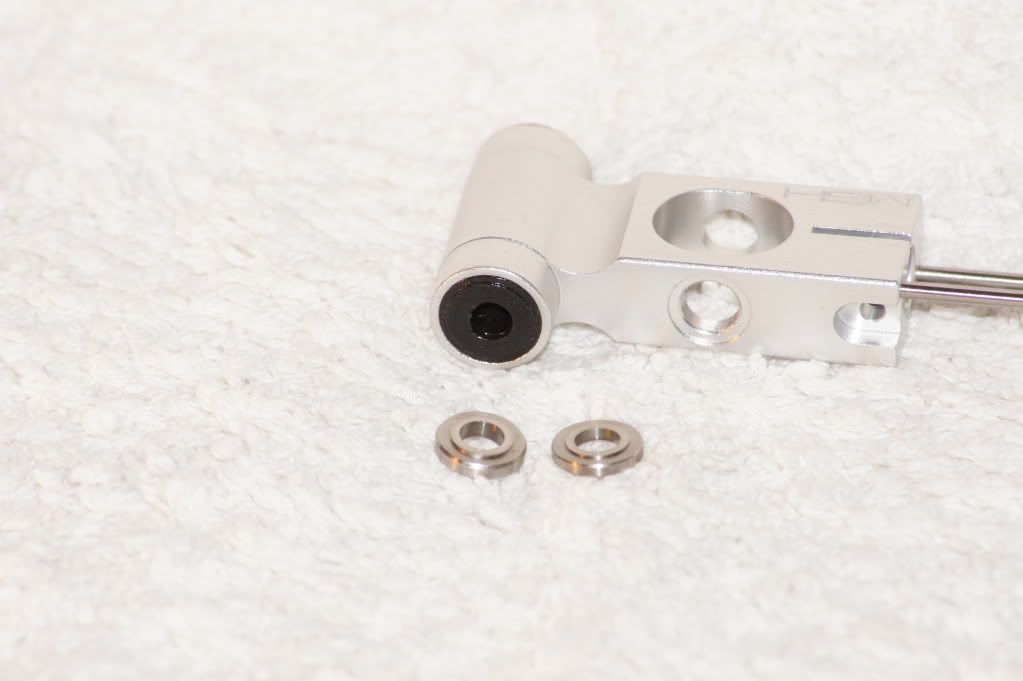 The head is now completed but I will break from the instructions and not fit it at this stage as I will be levelling the swash after installing the gear and so it will be the last step of the build. I also included the kit link reamer in the photo to show what it looks like. 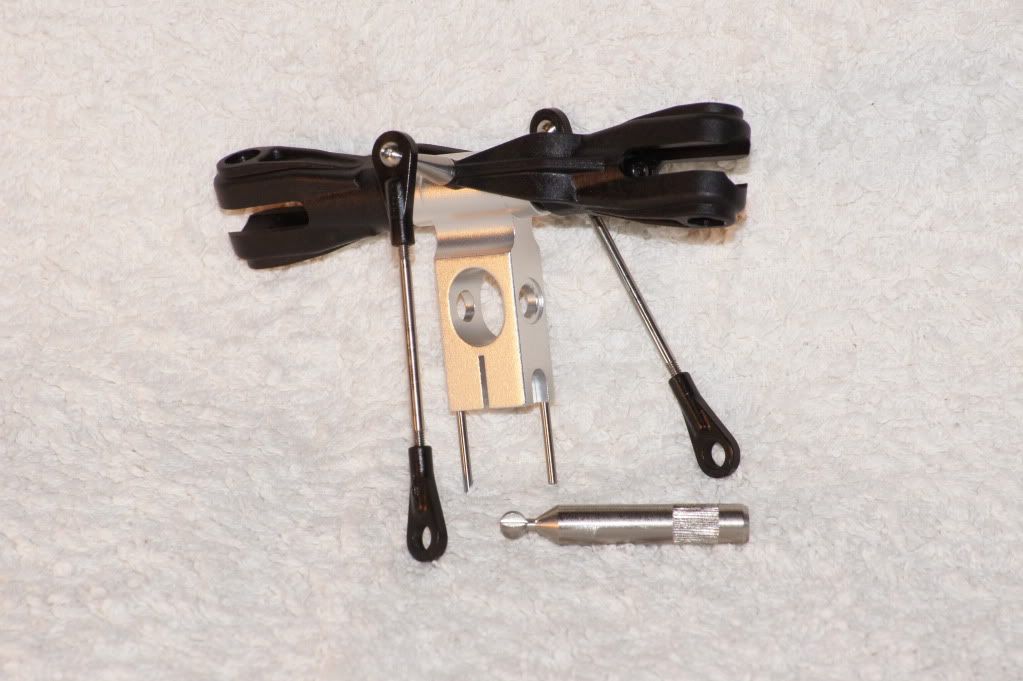 //Dennis.
__________________
soXos: Strike 8.1 - Strike 7.1 Light - Strike 6.1 : Goosky: RS7 - RS4 - S2 - S1 soXos DB7 nightflyer : Jeti DS-16 & DS-12 I am www.soxosaustralia.com.au | soXos helis | 1st-RC Products | EGODRIFT motors | Goosky helis | Spinblades |
|
|
|
|
08-11-2011, 10:41 PM
|
#3 (permalink) |
|
Registered Users
Thread Starter
Join Date: Jul 2007
Location: Melb, Oz
|
Next is preparing the boom, tail and tail servo. The boom support block and horizontal fin can be added along with the tail servo mount. I am using a MKS8910 servo with a circlular servo arm. The instructions recommend 7.5mm for the ball distance and my arm has the hole at 7mm so I will try that for the initial setup and see where my end points end up.
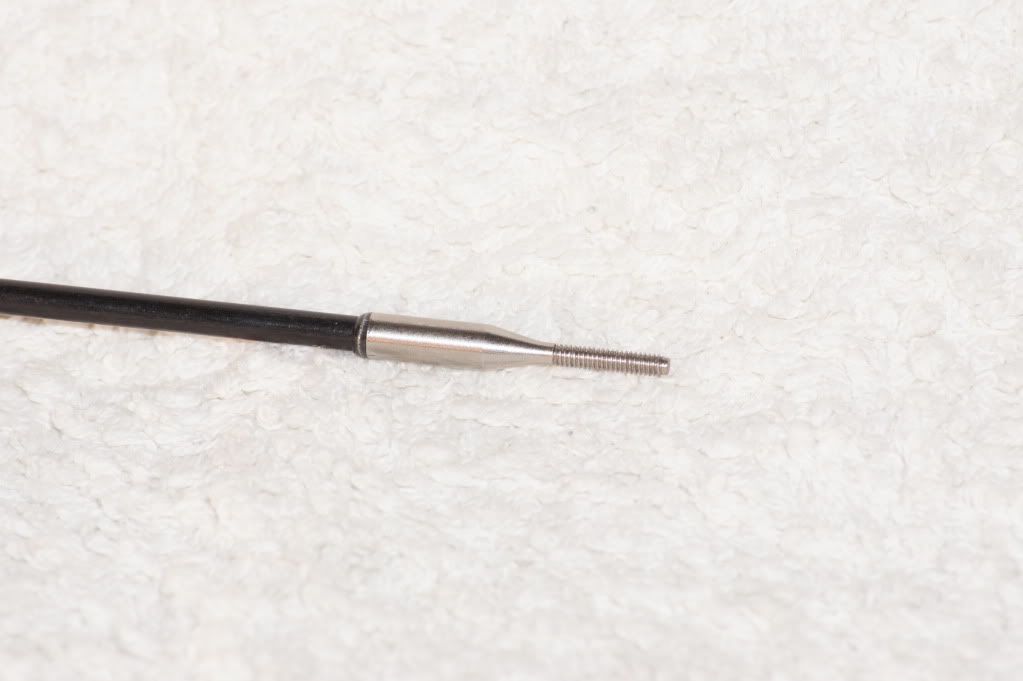
In mounting the servo ball I had to make some small modifications. There is not enough room for the lock nut to secure the ball on the bottom of the arm without hitting the top of the servo case, even the threaded part of the ball will interfere. I could have cut down the ball link with a dremel but instead decided to use some small washers to space the ball up a little and then used a normal 2mm nut with loctite to secure it. 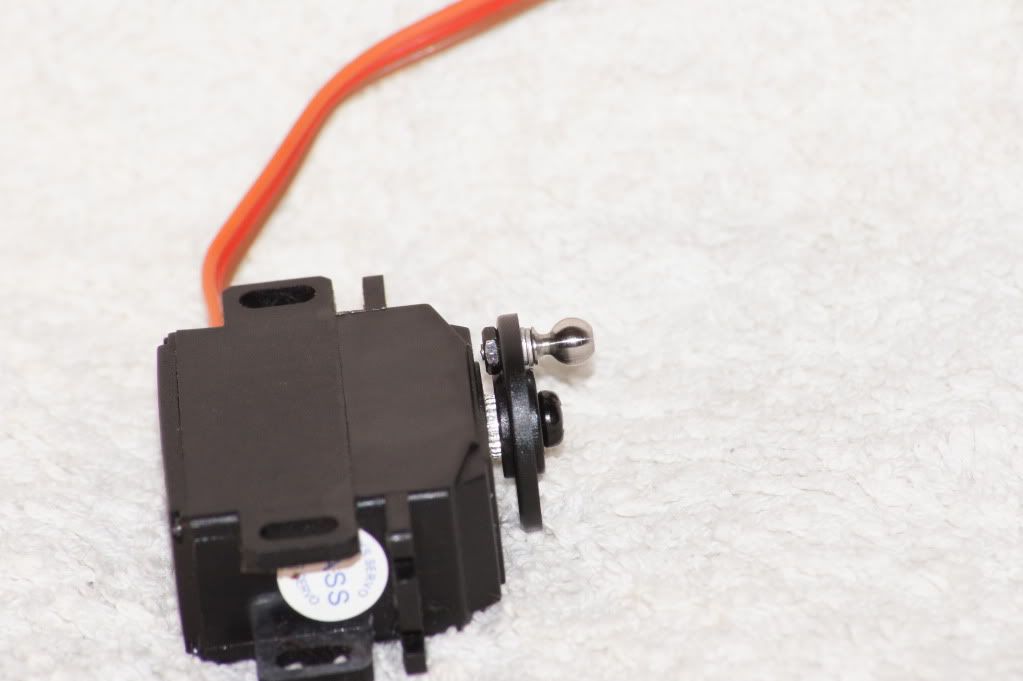 The tail servo mounting uses a servo spacer/clamp that fit into the grommet holes for the servos and come in a range of sizes to suit various servos, this is the same as the full size Protos uses on both swash and tail servo mounts. For my servo I used the C spacer but had to remove the side mounting lugs from the servo. 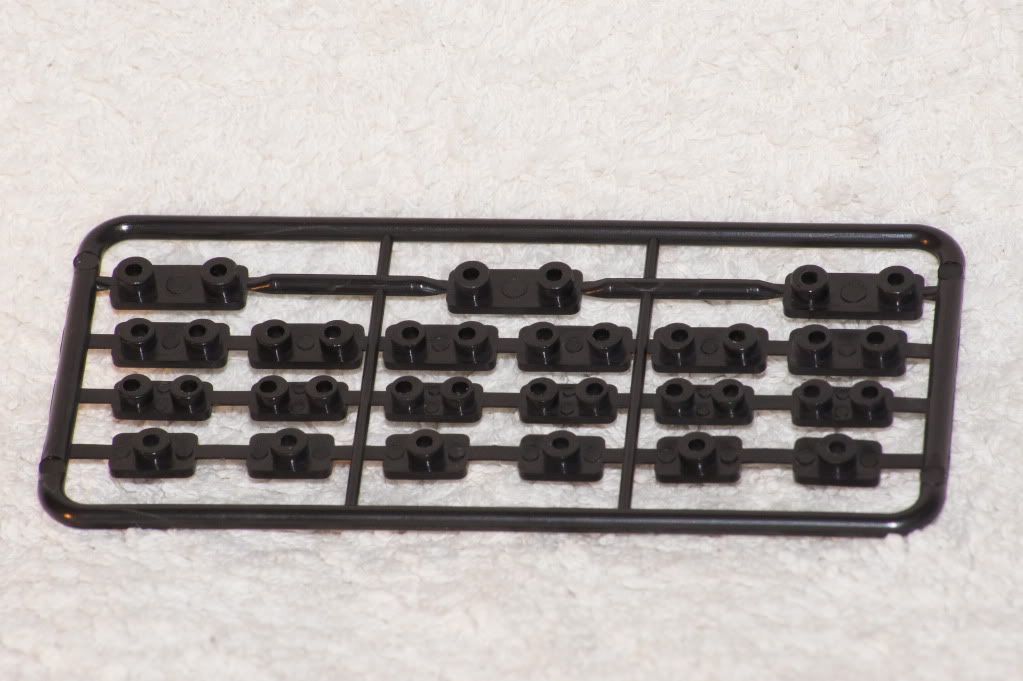 The belt pullys and boom mount are screwed onto the front of the boom. To reduce static issues the boom block is made of a conductive material and the end of the boom has the anodising removed so it can make electical contact, this way no additional static wires are required. The 2 screws used to hold the boom block together are the only self tapping (Philips head) screws in the build from memory. 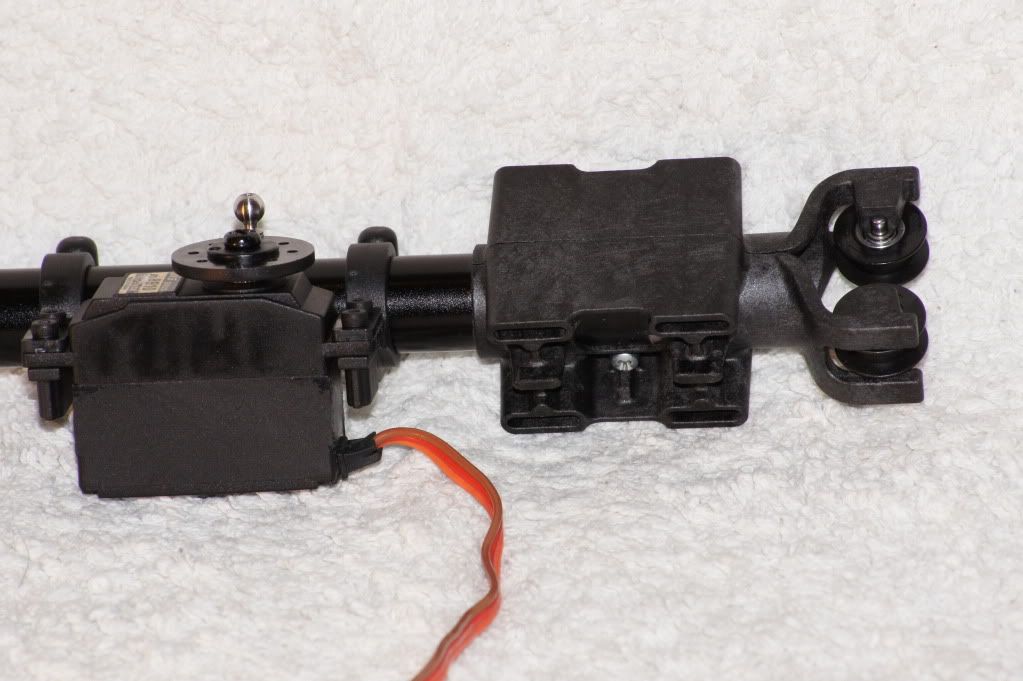 The boom assembly can now be fitted to the frame. The belt needs to be fed through the boom and a trick is to use a rubberband or peice of tape on the end like shown. Be careful not to crimp the belt, you only need to make the end a little smaller than the boom diameter and you will find the belt will feed through with no effort and won't need any wire or other tools to pull it through. 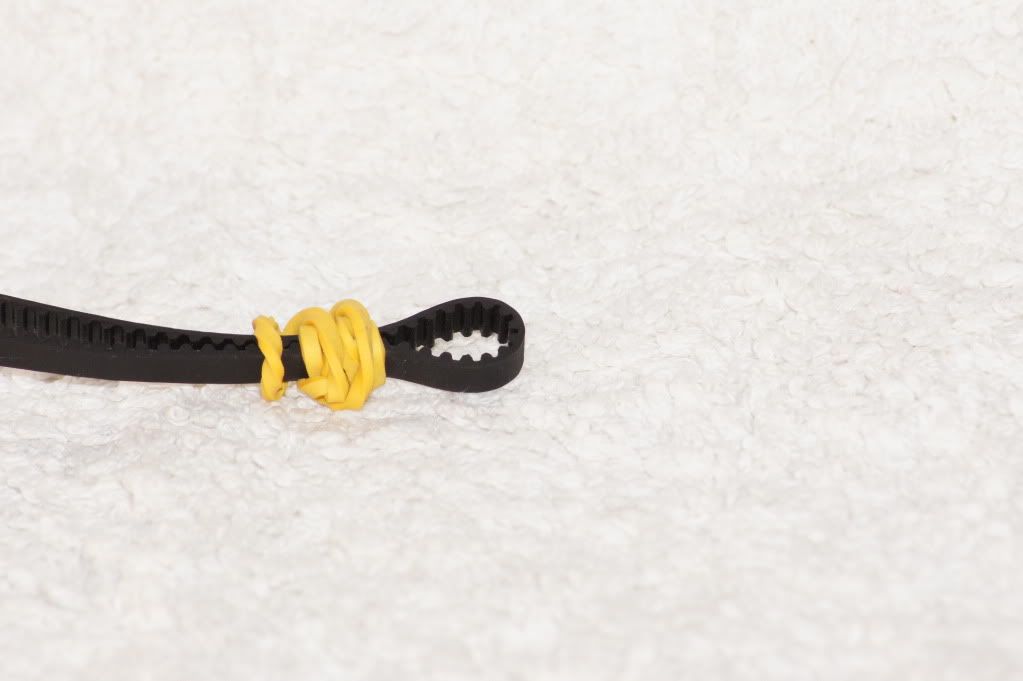 In the Protos design the whole boom block moves in the frames to adjust the rear belt tension, an addition with the mini is there are a couple of slots in the frame and tabs on the boom block to keep it all in line when adjusting it. One good tip here is to run the tail servo wire in the space between the boom block and frame now, there is plenty of room for the wire but the plug won't pass through so rather than pull it apart later it is good to get it in place now. 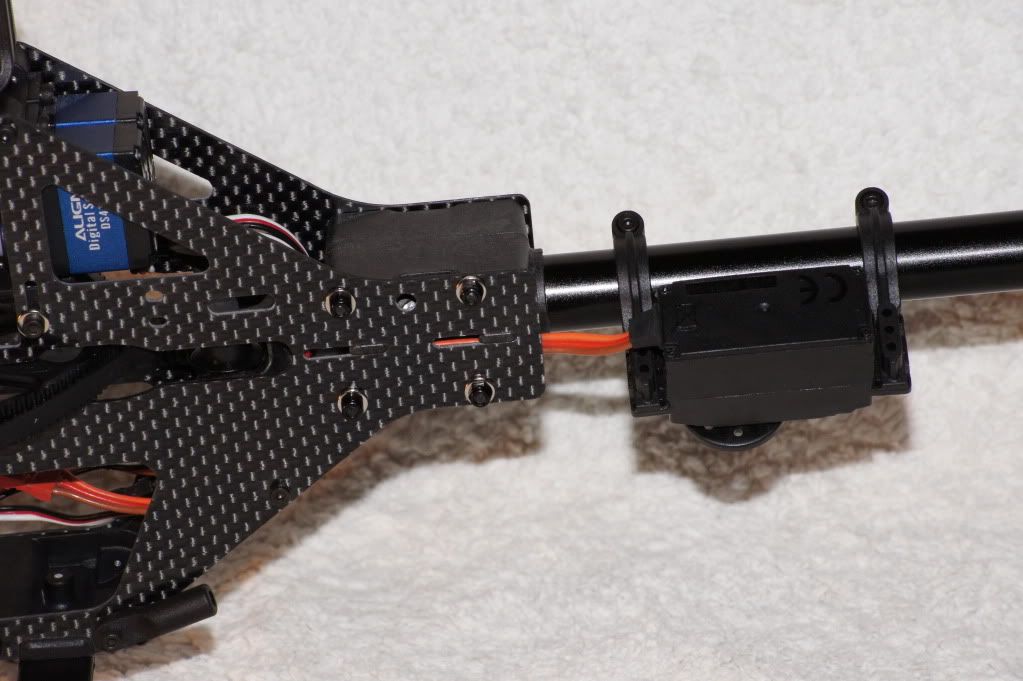 The tail box, tail shaft and fin can now be put on, pretty simple but just make sure you have the bearings seated fully, the single spacer in place and the pin fully inserted in the gear. Make sure you tighten the nuts and bolts evenly so the tail case is not distorted. 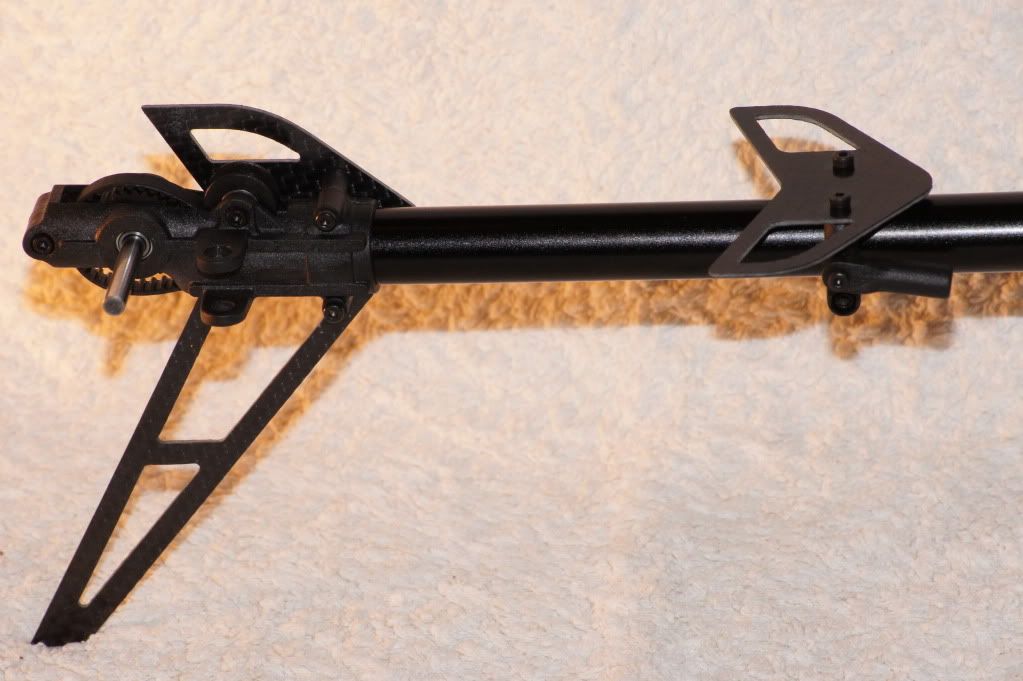 The tail slider is already assembled which is good as in the older Protos kits the assembly of this component was critical in getting a smooth tail, you only need to carfully insert the pins that hold the arms. The nylon molding is very good thoughout the kit but it doesn't hurt to de-flash pieces with a sharp hobby knife before assembly (this applys to the whole assembly). 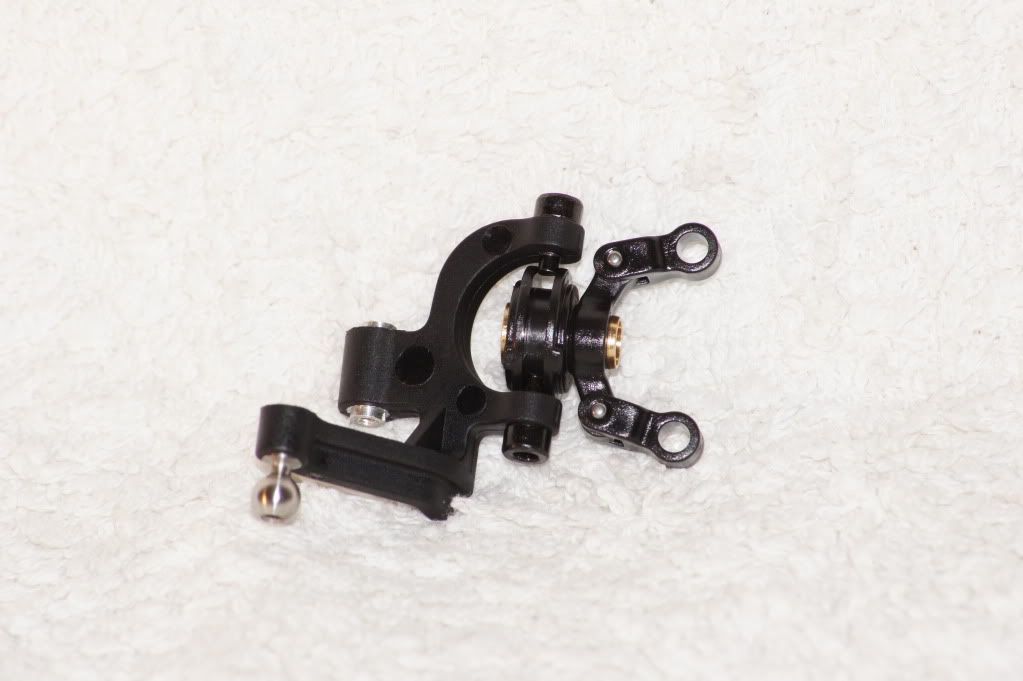 The pitch arm is inserted into the tail case and is a little bit fiddly but the instructions show in detail how to manouver the arm into place. The next step was new to me, it consisted of using a metal disk that is included in the kit to check the pitch arm has both of the screws aligned correctly and suggests using heat and bending the arm to get it set in the correct angle (see the following photo). After trying a few times I ended up going back to the way I have done it in the past with the bigger Protos and using the slot in the pitch slider as the guide on setting the angle of the screws so they didn't bind. I ended up with no binding and a very smooth tail. This is one area I think the Protos could improve, in function it works well but setting it up can be a bit painful. I did notice a spare pitch arm was included in the spares bag so if you have trouble getting the first one right you can try with the spare. 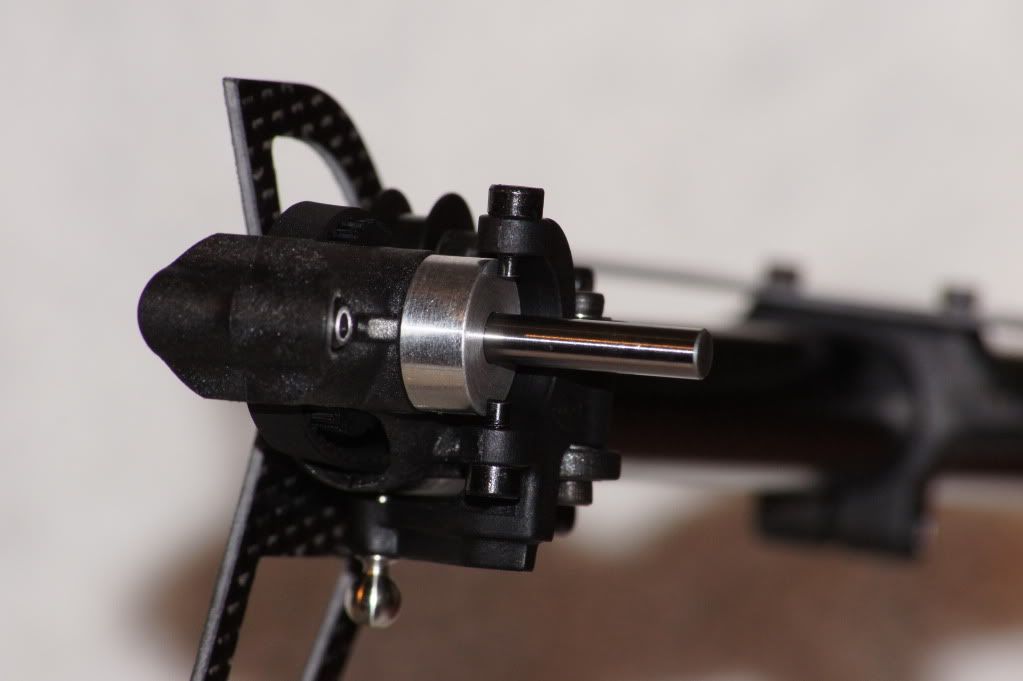 The blade grips can now be assembled, make sure the two bearings are seated fully in the blade grips, I used a 6mm drill shank to press them home. The piviot points to the grips use a plain bearing and with it all together it gives a very smooth action. Make sure as you finish each peice of the tail assembly you check that the movement of the pitch slider is smooth and if not address any issues before moving on to the next step. Here is the finished tail assembly. 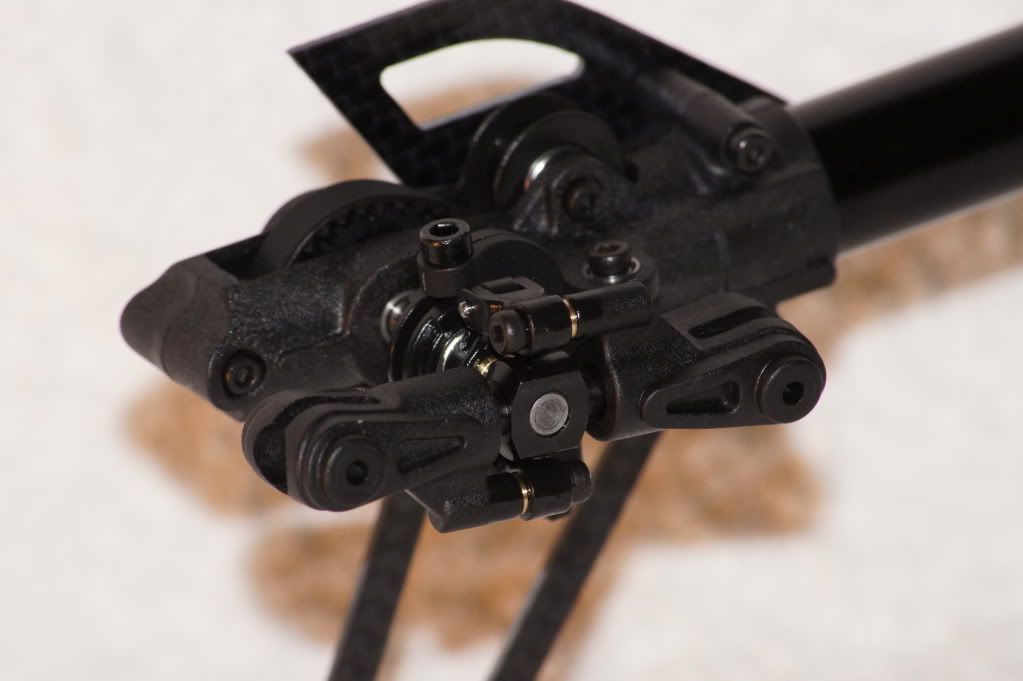 The next step is to glue the tail rod and boom supports. I use the recommended slow cure epoxy for these joint, just make sure you rough up the surface of the carbon rods and clean these and the rod ends with solvent (I use metholated spirits or denatured alcohol). Put a small amount of epoxy into the rod ends as well as on the rods themselves and twist the carbon into the rod ends when inserting to make sure the glue is evenly spread. You don't need to use much glue, you only want enough so a small filet is left at the end of the join. While the glue is setting make sure the rod ends are kept pressed on as due to the air being compressed in the holow rod they will want to move back on the rod. I put the tail rod between a couple of heavy objects while drying and the boom supports can be put in place on the heli and the boom clamp tightened to keep them in place while drying. This has most of the mechanical frame together, the fitting of the other electonic components will be the next step. Another side note is the way MSH have packaged the kit is very good, all the parts for each step are included in its own bag so it is hard to mix any parts up. The list of components for each bag is printed on the bag so you can check as you open them what is there. The only complication is the head as both the FB and FBL parts are included together so you end up with lots of parts in that bag and lots of parts left over if you build FBL. 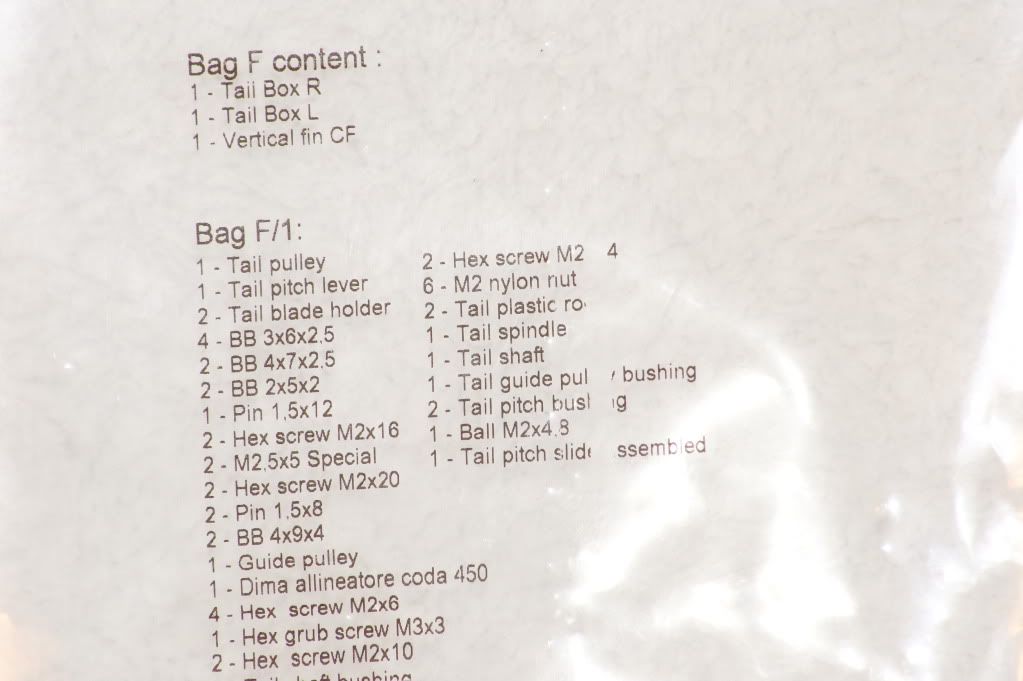
__________________
soXos: Strike 8.1 - Strike 7.1 Light - Strike 6.1 : Goosky: RS7 - RS4 - S2 - S1 soXos DB7 nightflyer : Jeti DS-16 & DS-12 I am www.soxosaustralia.com.au | soXos helis | 1st-RC Products | EGODRIFT motors | Goosky helis | Spinblades |
|
|
|
|
08-16-2011, 09:21 PM
|
#4 (permalink) |
|
Registered Users
Thread Starter
Join Date: Jul 2007
Location: Melb, Oz
|
A quick picture of the tail rod after it is dry, notice the fillet of epoxy that is formed as it is pushed together.
 I did have one piece of the kit that was faulty. One of the links for in the tail rod bag was not correctly molded, looks like there was not enough plastic injected, you can see it in front of a normal link. 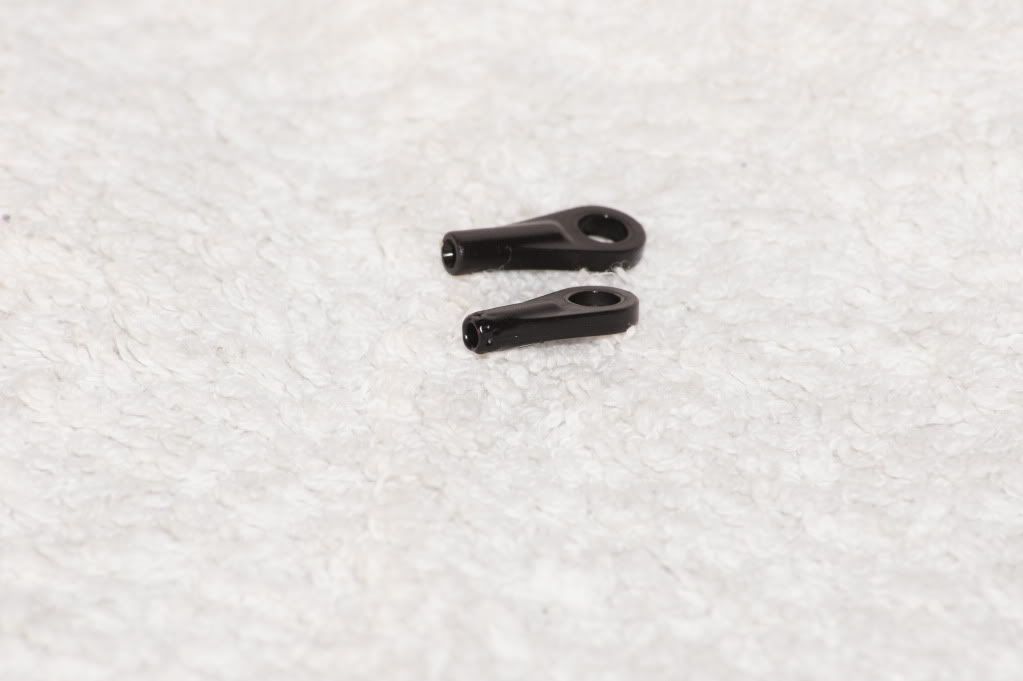 A good time to show the spare parts bag, MSH always include a few screws, washers and links in a spares bag and in this case it came in very handy as I just grabbed a link out of there. 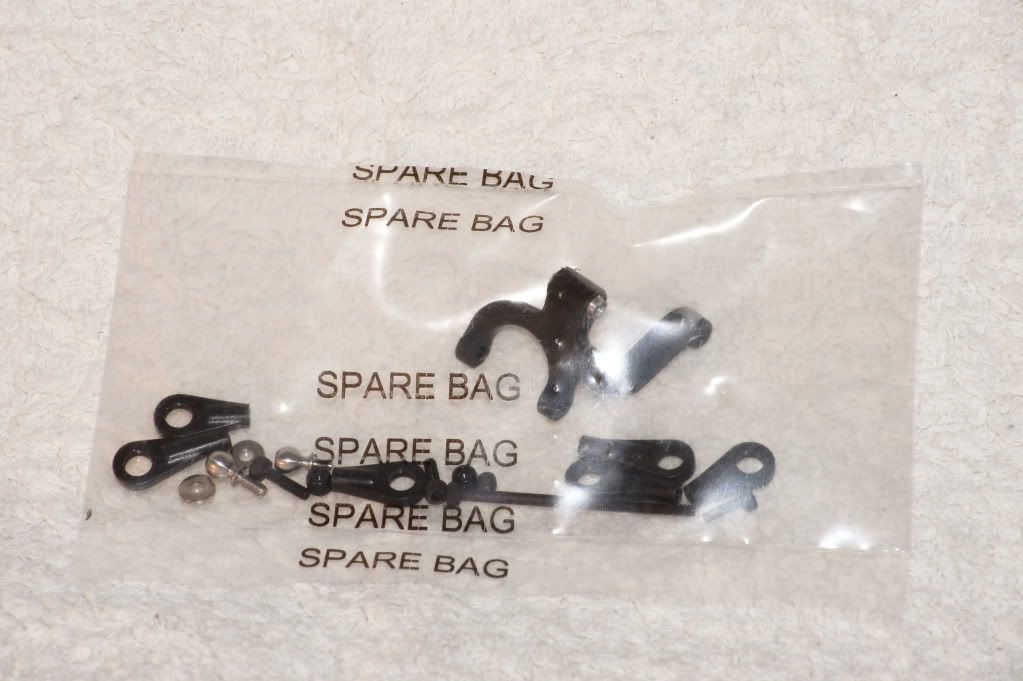 I have the new 4s (2010kv) motor with the long shaft that does not use a pinion adaptor, the pinion mounts directly onto this stepped shaft. Important that you don't use oil or grease on the oneway, it can lead to pinion slippage. I have hundreds of flights on my bigger Protos and have not had a problem with the oneway slipping or wearing out due to not being lubricated. Note also that the pinion goes on with the stepped area facing away from the motor. 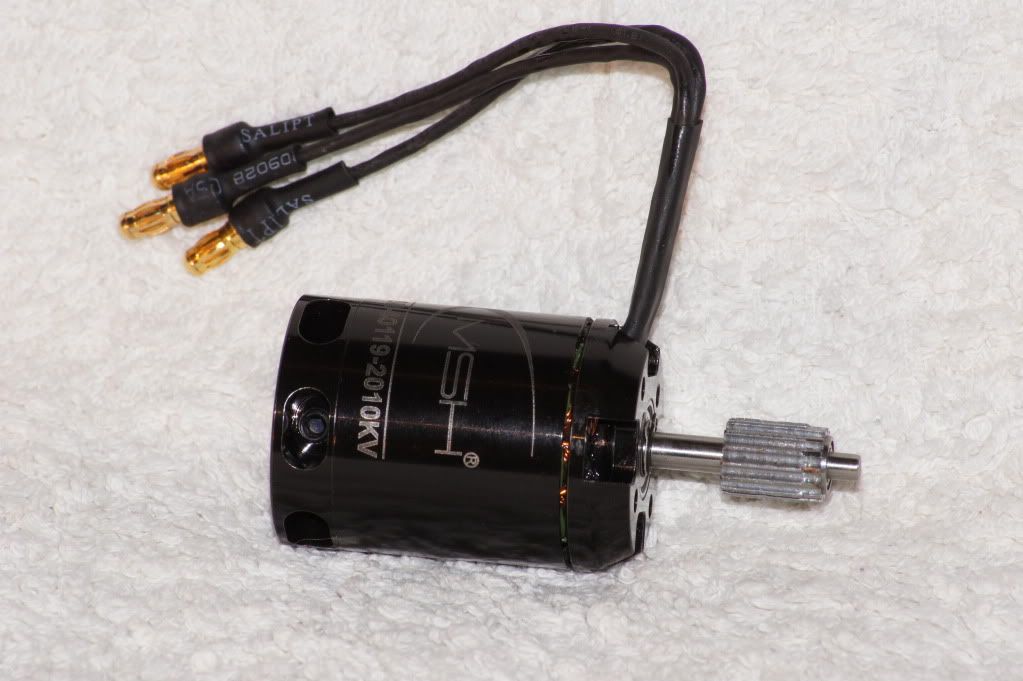 The motor attaches to the mount with 4 screws, you can see that there is a large contact area of the belt due the the pulley, from what I have been reading the front of the belt can be run pretty loose because of this.  As for the bigger model there is a pinion support that mounts into the frame, in the mini's case it is plastic instead of alloy. With the larger Protos there is a specific order that needs to be followed in setting the belt tention on the front part of the belt but it is not mentioned in the mini instructions. Maybe this is becase the belt can be run looser and so there is not as much force on the shaft. On the bigger Protos you leave the support screws loose and adjust the belt tension only tightening the motor mount screws. When it is in place and tight you lift the belt off the maingear so the load is taken off the pinion and turn the motor around a few times before you tighten the top shaft support, then put the belt back on. I followed this procedure with the mini as well just to be safe. 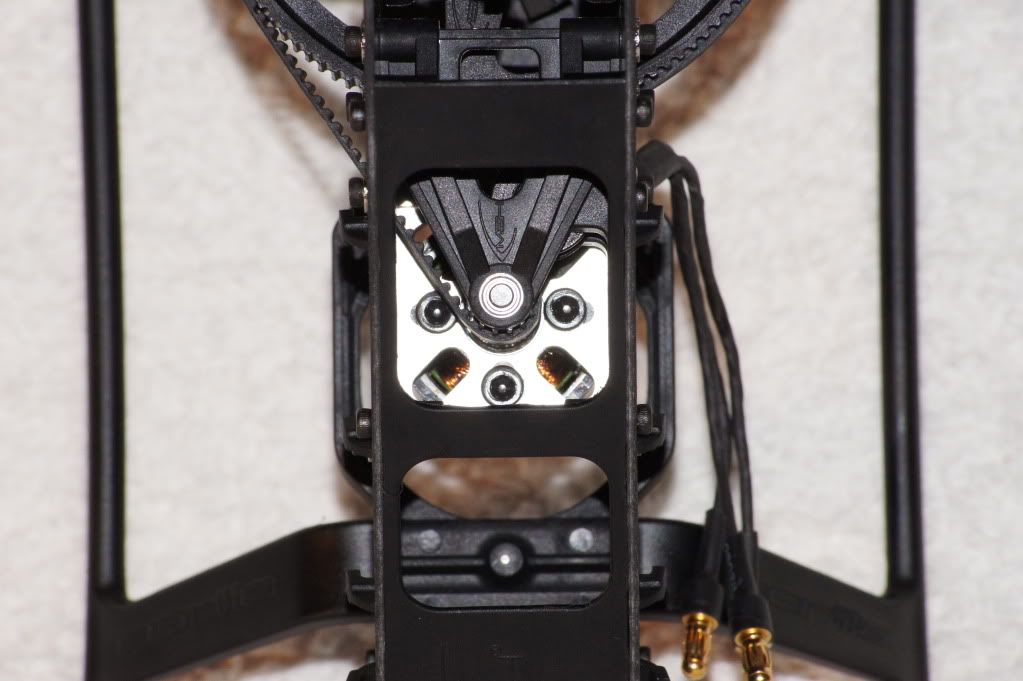 Remember that the belt tension needs to be set for the front of the belt and also the rear of the belt, the tail side can be set about the same tension as normal for a tail belt on a 450 and the front can be set the same or a little looser. The included YGE 60A ESC is a great piece of kit with a good reputation. I will start off using the built in governor in the governor store mode (like mode 11 on a Kontronik) where you can run different condition packs without effecting the governers speed. I have wired in a ET phase sensor as I plan on trying the Skookums built in Governor at a later stage and adding it now gives me Headspeed logging via the SK720 now. 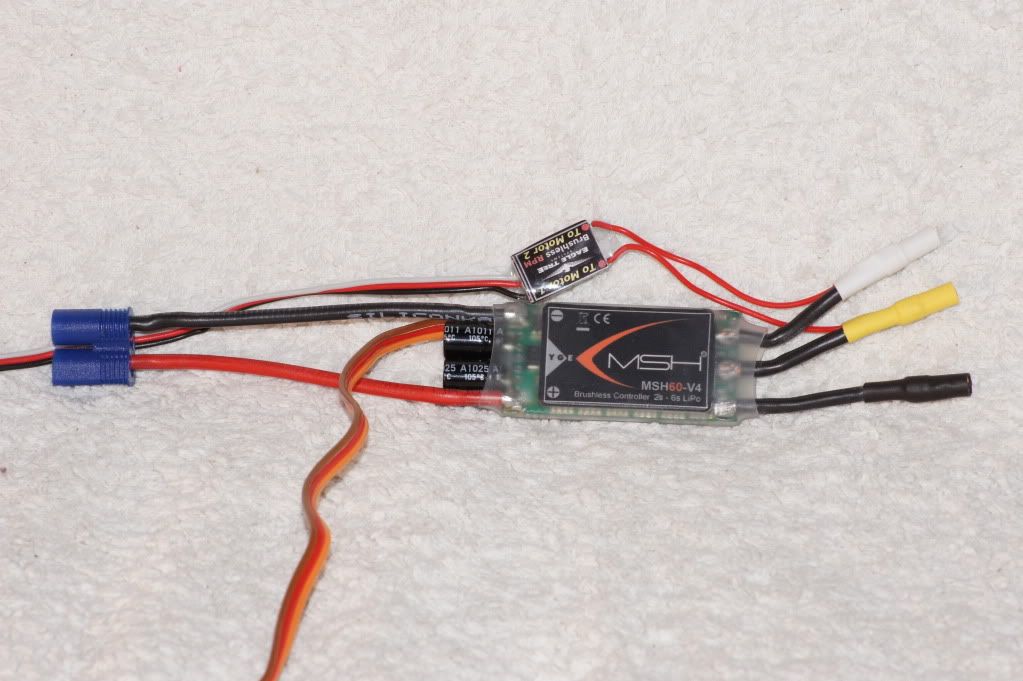 Installing the rest of the electical components is next. I have used velcro to hold the ESC in place and rather than use the included o-ring to secure it, I have put a Velcro strap around the ESC but it will also hold the front of the Lipo. I will use that O-ring from the kit to secure the back of the pack. I have temporarly mounted Skookum to do the rest of the FBL setup and work out the wiring. Checking the c.g. it looks right with the 2200mah 4s pack I am planning on using. While finalizing the FBL setup I found that putting the swash balls at 13.5mm is not an ideal setup for the Skookum and will also cause the nuts to hit the servo mounts at extremes of collective and cyclic. I am looking for some arms for the DS410's that will give me a 15mm holes, in the meantime I may try playing with the geometry and see if I can get it close by swapping to the fb head balls on the swash. So the heli is now together and needs the wires cleaned up and the arms/FBL setup sorted so it may be a couple more days before the maiden. 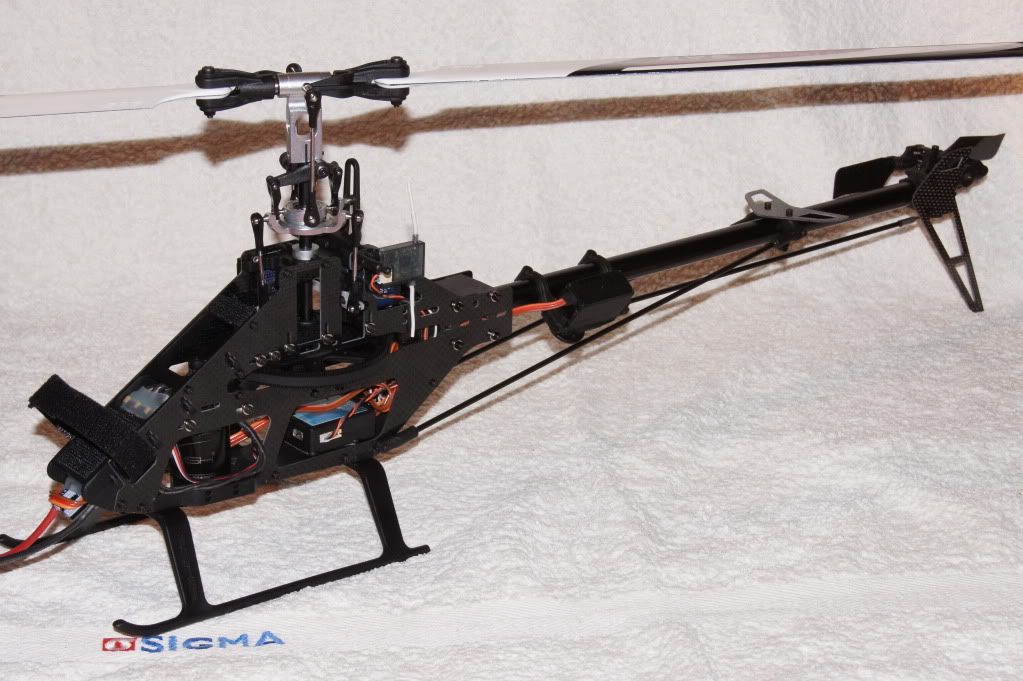 //Dennis.
__________________
soXos: Strike 8.1 - Strike 7.1 Light - Strike 6.1 : Goosky: RS7 - RS4 - S2 - S1 soXos DB7 nightflyer : Jeti DS-16 & DS-12 I am www.soxosaustralia.com.au | soXos helis | 1st-RC Products | EGODRIFT motors | Goosky helis | Spinblades |
|
|
|
|
08-22-2011, 04:59 AM
|
#5 (permalink) |
|
Registered Users
Thread Starter
Join Date: Jul 2007
Location: Melb, Oz
|
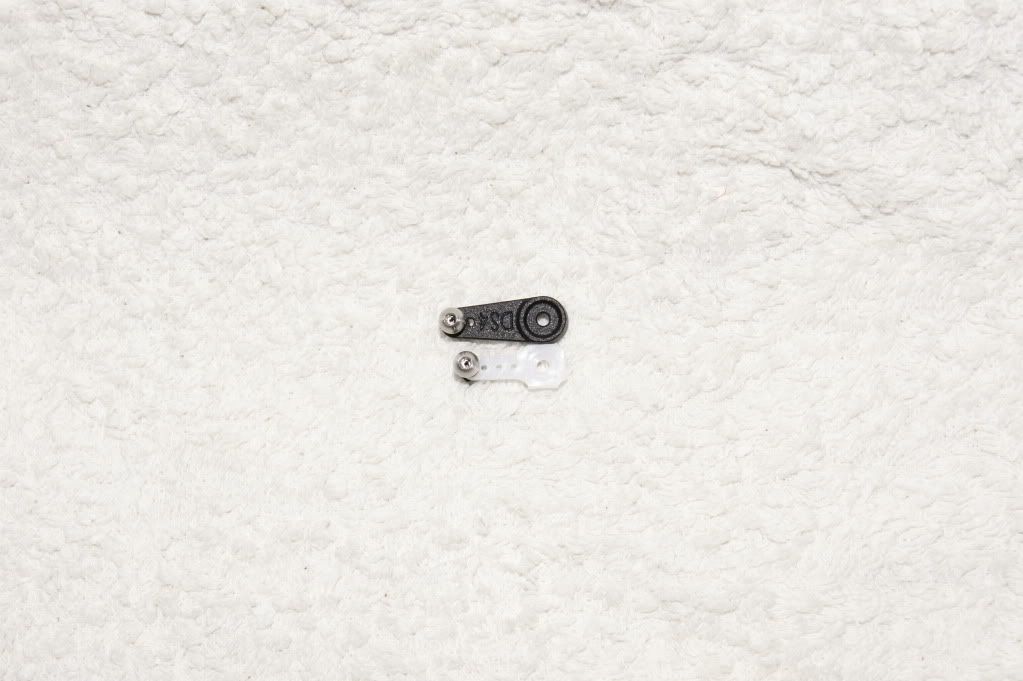
Managed to find the correct arms, they are made by align and give a 15mm hole. Here is one against the standard DS410 arms that come with the Trex250.
 After fitting these I still ended up going back to the FB balls on the swash to get the right geometry for the Skookum, I think the standard FBL setup would suit the BeastX ok but you may need to do as I have for the Vbar to get the geometry optimal. I setup the YGE ESC in Governor Store mode and set headspeeds to 2400rpm normal, 2800rpm IU1 and 3000rpm IU2. I did the final mount of the Skookum with 2 layers of 3M 4010 gel tape after using some hotglue to keep the plugs in place. Tided up the wiring and it was off to the park for a maiden flight. A couple of pictures before the flight report, the install came up very clean. 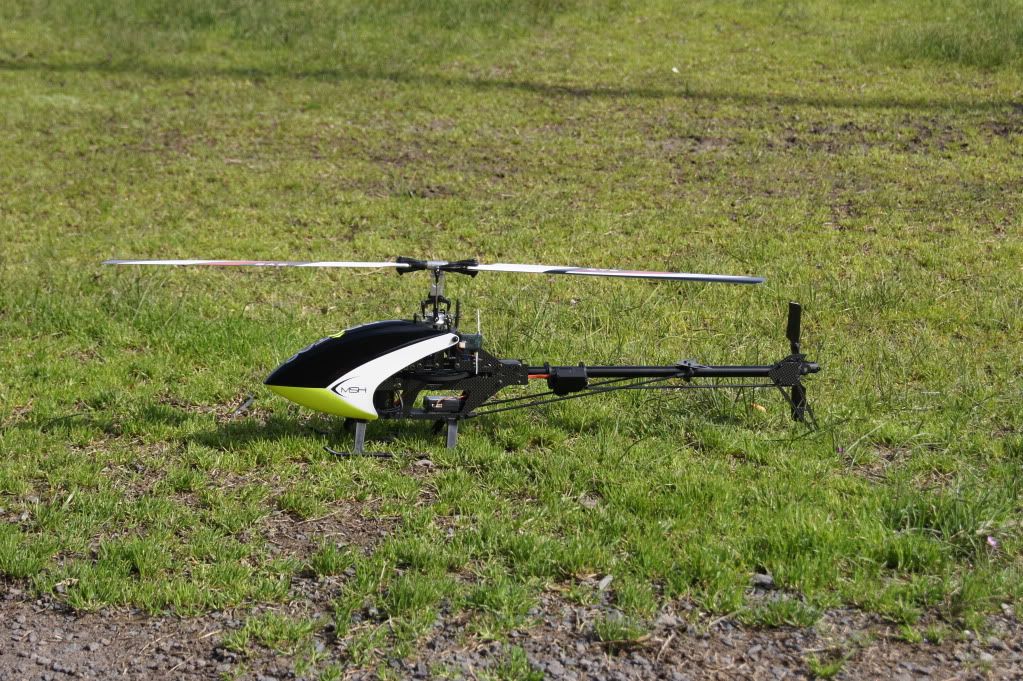 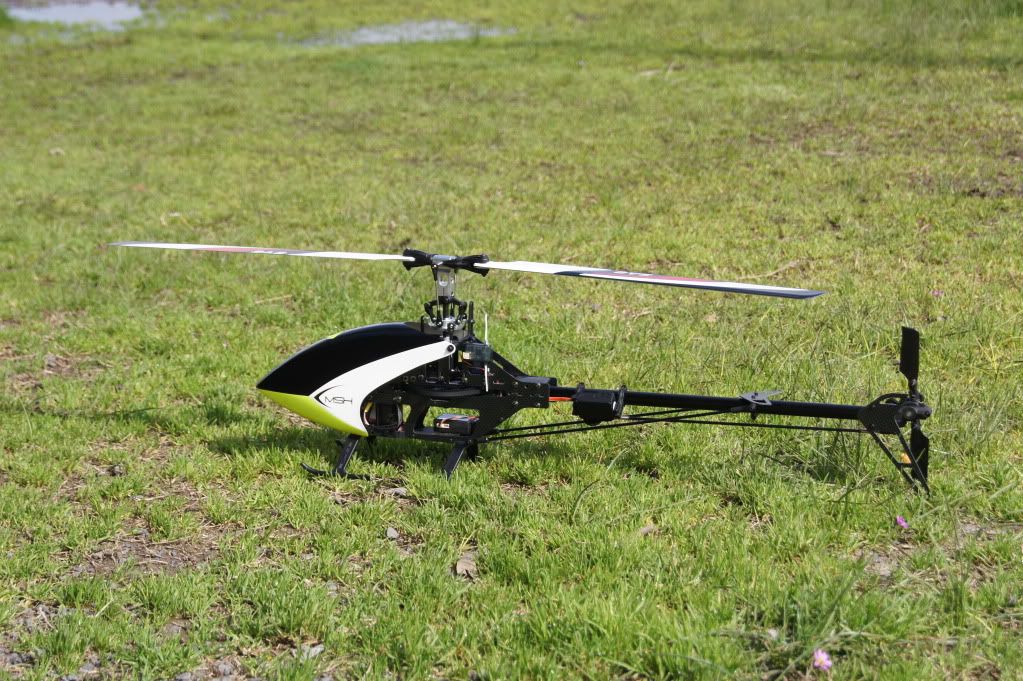 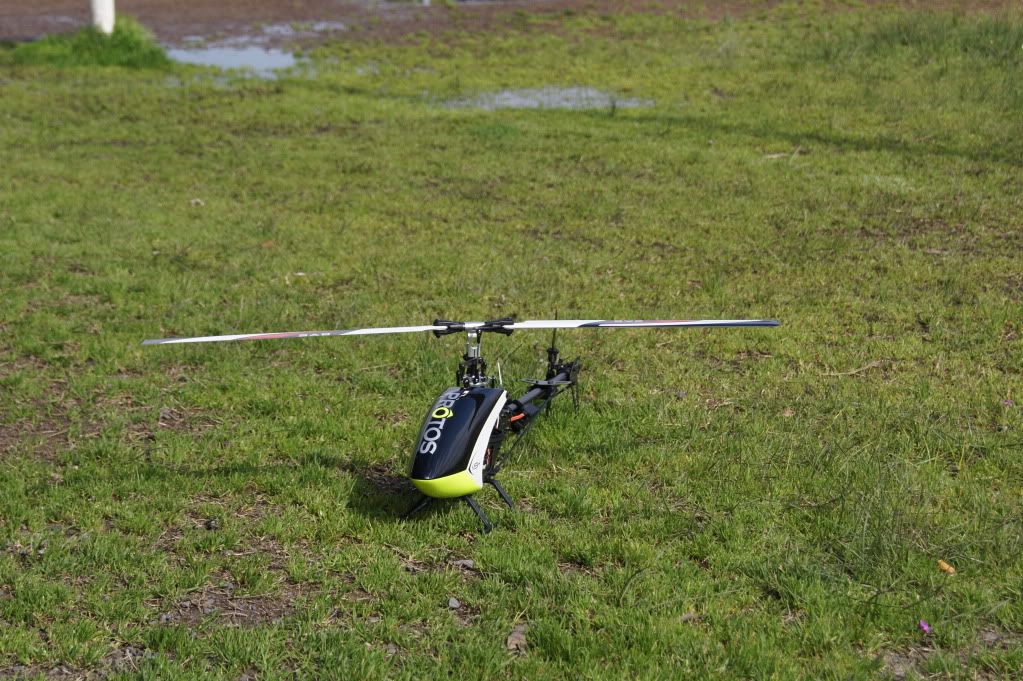 First flight was totally un-eventful, heli flew straight, no vibration good tail hold and no wag or cyclic bounce. Some circuits, a few flips, loops and rolls before landing. Heli felt light and powerful as expected, I am only running +-11 degrees of pitch and the Skookum is on the Sports setup so it is not very wild. As is normal for the Protos belt driven heli's it is whisper quiet with no gear whine. I am running the front belt quite loose as has been recommended and on the second pack I wanted to make sure it was not jumping so I did a few pitch pumps when up at 10-15 meters. On the second pump I heard that I had lost drive and managed to auto down with a little bit of a bump. Only damage was a crack on the canopy ear at the mounting post. When I checked out the heli it looked like there was a problem with the oneway so that brought the testing to a close. When I pulled the motor out I found the reason I had lost drive was that the pinion had split and so the oneway was just spinning in the pinion. It looks like this is a known issue with the original 14 tooth pinion, there is very little metal left after machining the pinion so there is a new version of the pinion that will be available soon. I fitted the stock 16 tooth pinion, reduced the throttle curves and went out again today. Put another couple of packs through it and am very happy, the light disk loading and extra stability of the bigger blades make this a very nice heli to fly, really doesn't feel like a 450 at all. I will put some 325 blades on and take it to the indoor for a flight and report back on its performance indoors. //Dennis.
__________________
soXos: Strike 8.1 - Strike 7.1 Light - Strike 6.1 : Goosky: RS7 - RS4 - S2 - S1 soXos DB7 nightflyer : Jeti DS-16 & DS-12 I am www.soxosaustralia.com.au | soXos helis | 1st-RC Products | EGODRIFT motors | Goosky helis | Spinblades |
|
|
|
|
08-25-2011, 05:06 PM
|
#6 (permalink) |
|
Registered Users
Join Date: Nov 2008
|
Hi Thunder,
Very nice topic ! Thanks for all the tips ! |
|
|
|
|
08-25-2011, 07:18 PM
|
#7 (permalink) |
|
Registered Users
Thread Starter
Join Date: Jul 2007
Location: Melb, Oz
|
No problems, it is a great little heli to build.
//Dennis.
__________________
soXos: Strike 8.1 - Strike 7.1 Light - Strike 6.1 : Goosky: RS7 - RS4 - S2 - S1 soXos DB7 nightflyer : Jeti DS-16 & DS-12 I am www.soxosaustralia.com.au | soXos helis | 1st-RC Products | EGODRIFT motors | Goosky helis | Spinblades |
|
|
|
|
08-25-2011, 08:27 PM
|
#8 (permalink) |
|
Registered Users
|
I am very interested in what you find with the 325 blades indoor flying.
I just ordered a Mini Protos and I'm really up in the air on keeping it stock to fly inside or to stretch it... Do you have any thoughts on this after flying yours?
__________________
GAUI NX7 - GAUI X7 - GAUI X5 - GAUI NX4 - GAUI GX4 - GAUI X4 II - GAUI X3 - GAUI X2 - All on VBar 5.3 Pro Team GAUI USA / Empire Hobby / Scorpion Power Systems / Optipower Batteries / Cyclone Blades / Savox / YS Engines / VP PowerMaster / JR |
|
|
|
|
08-26-2011, 12:59 AM
|
#9 (permalink) | |
|
Registered Users
Thread Starter
Join Date: Jul 2007
Location: Melb, Oz
|
Quote:
 I haven't had a chance to fly the mini indoors yet as I missed the last meeting and the next one is a bit over a week away. But I must say I am considering selling the X2 as I enjoy flying the mini P much more. It's not that the X2 flys bad, it flys much better than the Trex 250se I had before it, but I really love the mini P. It will come down to how well it works indoors with the smaller blades, so I will definitely let you know after I have flown it. Btw: we fly in a double basketball court and can have 5 heli's in the air at the same time unless someone is doing 3d, so having a smaller size can be an advantage. //Dennis.
__________________
soXos: Strike 8.1 - Strike 7.1 Light - Strike 6.1 : Goosky: RS7 - RS4 - S2 - S1 soXos DB7 nightflyer : Jeti DS-16 & DS-12 I am www.soxosaustralia.com.au | soXos helis | 1st-RC Products | EGODRIFT motors | Goosky helis | Spinblades |
|
|
|
|

|
08-26-2011, 01:06 AM
|
#10 (permalink) |
|
Registered Users
|
Great work
 I'm very interested in the performance of 325 blades on stretch too. I'm very interested in the performance of 325 blades on stretch too.Thunder, could you post a link to the servo arms you found? I'm looking for some too for exactly the same reason. SH-0253 stock arms won't allow movement I want without hiting the canopy pins...
__________________
Tom  RCHN#233 | Lynx Heli Innovations Team Goblin 700 Carbon | Protos Max | Goblin 570 |
|
|
|
|
08-26-2011, 01:13 AM
|
#11 (permalink) |
|
Registered Users
Thread Starter
Join Date: Jul 2007
Location: Melb, Oz
|
Here is the link to the part on the Aussie site I got them from but it has the part number so you should be able to find them ok.
D4BF Servo Horn HSP41003 //Dennis.
__________________
soXos: Strike 8.1 - Strike 7.1 Light - Strike 6.1 : Goosky: RS7 - RS4 - S2 - S1 soXos DB7 nightflyer : Jeti DS-16 & DS-12 I am www.soxosaustralia.com.au | soXos helis | 1st-RC Products | EGODRIFT motors | Goosky helis | Spinblades |
|
|
|
|
08-26-2011, 02:23 AM
|
#12 (permalink) |
|
Registered Users
|
Thanks. Just ordered a couple sets from Germany, they should come on monday
__________________
Tom RCHN#233 | Lynx Heli Innovations Team Goblin 700 Carbon | Protos Max | Goblin 570 |
|
|
|
|
08-26-2011, 03:17 AM
|
#13 (permalink) |
|
Registered Users
Thread Starter
Join Date: Jul 2007
Location: Melb, Oz
|
Great.
A quick battery report. I am using Turnigy 4s 2200 30C packs and with the timer at 5:30 (about 5 minutes in the air) at 2800rpm I only used 50% of the pack. The ESC and motor don't seem over stressed even running the larger than required 16 tooth pinion in governor store mode. ESC, motor and pack are all barely warm with sports aerobatic flights in our mild late winter 17 Degree C weather. //Dennis.
__________________
soXos: Strike 8.1 - Strike 7.1 Light - Strike 6.1 : Goosky: RS7 - RS4 - S2 - S1 soXos DB7 nightflyer : Jeti DS-16 & DS-12 I am www.soxosaustralia.com.au | soXos helis | 1st-RC Products | EGODRIFT motors | Goosky helis | Spinblades Last edited by Thunder Fighter; 08-26-2011 at 09:11 AM.. |
|
|
|
|
08-26-2011, 04:01 AM
|
#14 (permalink) | |
|
Registered Users
Join Date: May 2010
|
Quote:
|
|
|
|
|
|
08-26-2011, 04:40 AM
|
#15 (permalink) | |
|
Registered Users
|
Quote:
You might want to slightly up your headspeed, but that should be it. I'll try my old SAB 325's tonight if I manage to charge enough packs.
__________________
Tom RCHN#233 | Lynx Heli Innovations Team Goblin 700 Carbon | Protos Max | Goblin 570 |
|
|
|
|
|
08-26-2011, 05:14 AM
|
#16 (permalink) | |
|
Registered Users
Join Date: May 2010
|
Quote:
 Alright, cool, i guess I might give it a try later this afternoon. but let me know your outcomes too. I feel bad watching my 325 blades not been used. might just use those instead and keep the 350 for weekends flight only !! |
|
|
|
|
|
08-26-2011, 07:36 AM
|
#17 (permalink) | |
|
Registered Users
|
Quote:
I was considering stretching and going 4S and using the 350mm blades outside and the 325 blades indoors, if I can with the same motor and battery. Also, as long as it still has enough authority with the heavier weight and smaller blades.
__________________
GAUI NX7 - GAUI X7 - GAUI X5 - GAUI NX4 - GAUI GX4 - GAUI X4 II - GAUI X3 - GAUI X2 - All on VBar 5.3 Pro Team GAUI USA / Empire Hobby / Scorpion Power Systems / Optipower Batteries / Cyclone Blades / Savox / YS Engines / VP PowerMaster / JR |
|
|
|
|
|
08-26-2011, 07:41 AM
|
#18 (permalink) |
|
Registered Users
Join Date: May 2010
|
I'm using the msh 2010kv with the hyperion 4s 45c 2200mah lipo. flying around 2400/2500rpm. i don't know what will happen if i use the 325 blades with this setup. but will try to hover it first and see how it goes, it would be great if I can use the 325 blades also.
|
|
|
|
|
08-26-2011, 08:28 AM
|
#19 (permalink) |
|
Registered Users
|
I used to fly 325's on slower headspeeds (2650 RPM) and it worked fine. Nothing smackable, but great for precision training and sport flying. 2010kV motor should allow you to bump HS up a little on 325's and keep it there due to lower mass of the blades, so you'll be ok.
__________________
Tom RCHN#233 | Lynx Heli Innovations Team Goblin 700 Carbon | Protos Max | Goblin 570 |
|
|
|
|
08-26-2011, 09:04 AM
|
#20 (permalink) | |
|
Registered Users
|
Quote:
__________________
GAUI NX7 - GAUI X7 - GAUI X5 - GAUI NX4 - GAUI GX4 - GAUI X4 II - GAUI X3 - GAUI X2 - All on VBar 5.3 Pro Team GAUI USA / Empire Hobby / Scorpion Power Systems / Optipower Batteries / Cyclone Blades / Savox / YS Engines / VP PowerMaster / JR |
|
|
|
|
|
|
|
«
Previous Thread
|
Next Thread
»
| Thread Tools | |
| Display Modes | |


 Linear Mode

|
|


